
Companion Plants
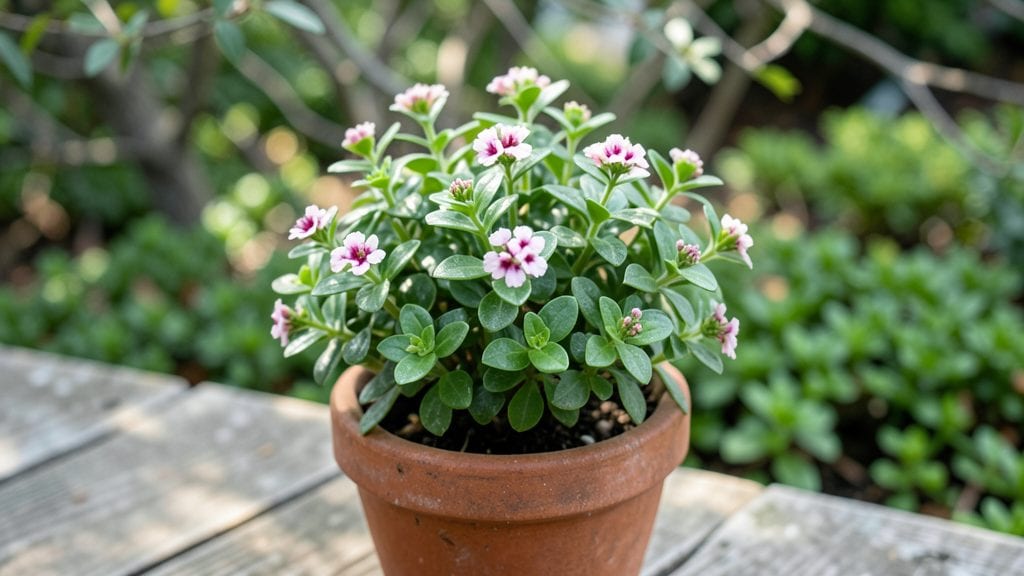
Growing mini flower plants in tiny pots changed how I see gardening—now I have vibrant blooms on my balcony all year. 🌿 These pint-sized powerhouses prove you don’t need a yard to enjoy flowers, just the right varieties and a little care.
My fairy primroses and dwarf petunias now brighten up my space without taking over.
The secret starts with choosing plants bred for small spaces like fairy primroses (3-6 inches tall) or mini roses (12-18 inches). They thrive in 4-6 inch pots with well-draining soil and 4-6 hours of sunlight daily.
Overwatering is the biggest mistake—let the top inch dry between waterings, and you’ll avoid root rot.
With the right mix of nutrients and occasional pruning, these plants stay compact and keep blooming. My dwarf petunias produce nonstop flowers from spring to frost, and the fragrant fairy primroses add a delicate touch.
The best part? You can move them indoors during winter if you have a sunny window.
Whether you’re working with a windowsill or a balcony, these tiny bloomers adapt easily. Start with just one pot to test what works best in your space—you’ll be hooked after the first flush of color. Let’s get those pots prepped!
📚 In This Guide
- What you need
- Instructions
- Tips and common mistakes
- Wrapping up and next steps
What you need
- ● Mini flower plant varieties: Choose compact, slow-growing options like African violets, mini petunias, baby’s tears (Soleirolia), or dwarf impatiens. Quantity: 3–6 plants (depending on your desired display size).
- ● Small pots or containers: 3–4" diameter pots (or hanging baskets for trailing varieties). Material: Terracotta (breathable) or plastic (lightweight). Quantity: 1 per plant + 1–2 extras for propagation.
- ● Well-draining potting mix: A blend of 50% peat-free potting soil + 30% perlite or vermiculite + 20% coco coir or sand for aeration. Quantity: 1–2 gallons total.
- ● Drainage trays or saucers: To catch excess water and prevent root rot. Quantity: 1 per pot or a shared tray for grouped plants.
- ● Watering can or spray bottle: A gentle-mist spray bottle (for delicate foliage) or a small watering can with a narrow spout for precision.
- ● Balanced liquid fertilizer: A 10-10-10 or 20-20-20 NPK ratio diluted to half-strength. Quantity: 1 small bottle (16 oz).
- ● Pruning shears or small scissors: For trimming leggy stems or deadheading spent blooms.
- ● Decorative pebbles or moss: For a polished look in trays or to retain moisture.
- ● Grow lights (LED or fluorescent): If natural light is Spec: Full-spectrum, 6000K–6500K.
- ● Slow-release fertilizer pellets: Mix into soil for 3–6 months of nourishment.
- ● Mini trellis or stakes: For climbing varieties like mini clematis or thunbergia.
- ● Humidity dome or plastic wrap: To create a greenhouse effect for seedlings or tropical varieties.
Step-by-Step guide to growing mini flower plants in small pots
Here’s how to create a vibrant mini flower garden that thrives year-round, even in limited space.
🌱 Step 1: Select the Right Containers and Soil Mix
Choose 4-inch diameter pots with drainage holes to prevent root rot—terracotta works best because it breathes. Fill each pot with 1/3 of the 4 gallons of lightweight potting mix, leaving room for roots to grow. Press the soil down gently but don’t compact it too tightly; you want it fluffy so water drains evenly.
I like to add a handful of perlite to the mix for extra drainage, especially if you’re growing moisture-sensitive varieties like petunias or snapdragons. The key here is balance: the soil should hold moisture but not stay soggy. Tap the pot lightly after filling to settle the mix without crushing it.
🌿 Step 2: Plant Your Mini Flower Starts
Dig a small hole in the center of each pot—just deep enough to cover the roots of your 4 mini flower plants without burying the stems. Place each plant gently into its pot, then fill the hole with more potting mix, pressing lightly around the base to secure it. This ensures the roots make contact with the soil immediately.
Don’t pack the soil too firmly, or you’ll restrict root growth. Instead, give it a light pat to remove air pockets. If you’re planting seeds instead of starts, sprinkle them on top of the soil (no need to bury them) and press them in lightly. Water gently right after planting to help settle the soil around the roots.
💧 Step 3: Water and Place in the Right Light
Water each pot until water runs out of the drainage holes—this ensures the roots get a good soak. Let the excess drain completely before placing the pots in their final spot. Overwatering is the biggest mistake with small pots, so I always check the soil’s moisture level by sticking my finger 1 inch deep; if it feels dry, it’s time to water.
Place your mini flowers in a spot with 4-6 hours of sunlight daily—a bright windowsill or under a grow light works perfectly. If you’re using a grow light, keep it 6 inches above the plants and adjust as they grow. Too little light, and your flowers will stretch and look leggy; too much direct sun can scorch delicate petals.
☀️ Step 4: Feed and Maintain for Continuous Blooms
Once your mini flowers start showing new growth, feed them with 1/4 of the 8-ounce bottle of liquid fertilizer diluted in water every 2 weeks. This gives them the nutrients they need without overwhelming their tiny root systems. Always water the soil first to prevent burning the roots with concentrated fertilizer.
Deadhead spent blooms by pinching off the faded flowers with your fingers—this encourages more blooms and keeps your plants looking neat. I also rotate the pots a quarter turn weekly so all sides get even light exposure. This prevents the plants from leaning toward one direction and growing unevenly.
⏰ Step 5: Adjust Care for Seasonal Changes
In cooler months, move your mini flowers to a sunny indoor spot where temperatures stay above 50°F. If you notice leaves wilting or yellowing, it’s a sign they need more light or water. In warmer months, keep them outdoors but bring them inside if temperatures rise above 85°F—heat stress can cause flowers to drop.
Watch for pests like aphids or spider mites, especially on the undersides of leaves. If you spot any, wipe them off with a damp cloth or spray with a mild insecticidal soap (just 1 teaspoon per quart of water). A little prevention goes a long way with tiny plants—they’re more vulnerable to pests than larger ones.
Tips & tricks for perfect mini flower plants
Here's how to ensure your tiny pots burst with vibrant blooms all year long—without the common pitfalls that kill most mini gardens.
The Container Factor: Terracotta pots might be classic, but plastic pots actually retain moisture better for moisture-loving varieties like impatiens. If you choose plastic, add an extra handful of perlite to the 1/3 of the 4 gallons of lightweight potting mix to prevent soggy roots. I've seen roots rot in just 4 days when using regular garden soil without proper drainage in plastic containers.
Planting Technique: When placing your 4 mini flower plants in Step 2, make sure the soil line matches the pot's rim—this prevents water from pooling around stems. For seeds, press them gently but firmly into the top layer of soil (no need to bury them), then mist with water to encourage germination. I've found that using a toothpick to create tiny holes for seeds works better than just sprinkling them on top.
Lighting Secrets: The 4-6 hours of sunlight recommendation is ideal, but if you're using a grow light, position it 6 inches above and adjust as plants grow. I've noticed that LED grow lights actually work better than fluorescent ones for mini plants—they emit less heat that can stress delicate petals. Rotate your pots a quarter turn weekly to prevent leaning, which happens when plants stretch toward one light source.
Seasonal Survival: In winter, if your indoor space drops below 50°F, move your plants to a sunny windowsill or under a grow light immediately. I've seen flowers drop completely when left in drafty areas near doors or windows. In summer, watch for wilting when temperatures exceed 85°F—move them to shaded spots and water more frequently, but never let them sit in standing water.
Pro Tips for Mini Flower Plants
- Here's how to ensure your tiny pots burst with vibrant blooms all year long—without the common pitfalls that kill most mini gardens.
- The Container Factor: Terracotta pots might be classic, but plastic pots actually retain moisture better for moisture-loving varieties like impatiens.
- Planting Technique: When placing your 4 mini flower plants in Step 2, make sure the soil line matches the pot's rim—this prevents water from pooling around stems.
Frequently asked questions
How often should I water my mini flower plants?
Watering depends on the plant type, but most mini flowers thrive with soil kept lightly moist (not soggy). Check the top inch of soil—if it’s dry, give a gentle watering. Overwatering is the #1 killer, so drainage holes in pots are a must!
When is the best time to plant mini flowers?
For year-round blooms, plant in spring or early fall when temperatures are mild (50–75°F). If starting indoors, use grow lights 12–16 hours/day. Hardy annuals (like pansies) can handle light frosts, but tender varieties need warmer soil.
Can I grow mini flowers indoors without sunlight?
Yes! Use a south-facing window or grow lights (12+ inches above plants). LED bulbs with full-spectrum light work best. Rotate pots weekly for even growth. Low-light plants like peace lilies or African violets are great alternatives if sunlight is limited.
What should I do if my mini flowers get pests?
Start with a neem oil spray (mix 1 tsp oil + 1 tsp mild soap in 1 quart water). For aphids, blast them off with water. Prevent pests by keeping plants spaced, removing dead leaves, and avoiding overwatering. Ladybugs are natural allies!
Are mini flower plants good for small spaces?
They’re perfect for balconies, windowsills, or fairy gardens. Choose compact varieties like fairy primroses (3–6 inches tall) or dwarf petunias. Stack pots vertically or use wall planters to maximize space. Bonus: They’re great for pollinators too!
Wrapping up and next steps
Mini flower plants are the perfect way to bring color, joy, and greenery to any space—no matter how small! Whether you're a seasoned gardener or a beginner, these tiny bloomers prove that big beauty comes in small packages.
With the right care and a little creativity, you can enjoy year-round flowers on your balcony, windowsill, or patio.
Ready to dive in? Start by picking your favorite mini blooms, gather your supplies, and let your green thumb shine! Plant, nurture, and watch your tiny garden flourish—one petal at a time. 🌸✨