Tools
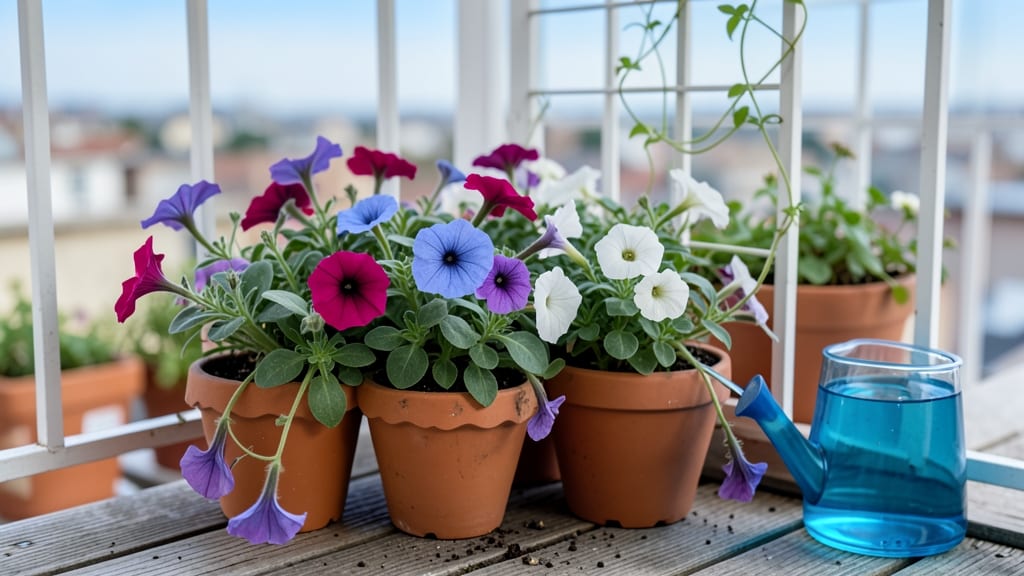
A balcony flower garden transforms tiny spaces into vibrant havens for bees, butterflies, and your own joy. 🌿 I spent years watching concrete patios go unused until I realized even a 4-foot ledge could become a pollinator paradise with the right plants and setup.
The key is matching containers to sunlight—hanging baskets for morning sun, deep pots for thirsty perennials, and self-watering systems for forgetful gardeners. My go-to mix is pollinator magnets like lavender, coneflowers, and cosmos that thrive in small spaces and keep blooming all season.
By summer’s end, you’ll have a vertical garden bursting with color, humming with life, and smelling like a meadow. The best part? These plants attract bees and butterflies while requiring less water and fuss than most lawns.
Works for any balcony size, from city apartments to suburban patios. Here’s how to make it happen without breaking the bank or your back.
📚 In This Guide
- What you need
- Instructions
- Tips and common mistakes
- Wrapping up and next steps
What you need
- ● Containers: 3–6 flower pots or planters (5–10 inches deep, with drainage holes). Choose lightweight materials like: Terracotta (breathable, classic)
- ● Fiberglass (durable, weather-resistant)
- ● Plastic (budget-friendly, lightweight)
- ● Potting Mix: 1–2 bags (1–2 cubic feet) of well-draining, organic potting soil (avoid garden soil—it compacts!). Look for mixes labeled "for flowers" or "pollinator-friendly."
- ● Pollinator-Friendly Seeds/Plants: 12–24 plants or seed packets (mix of annuals/perennials). Top picks: Milkweed (for monarchs) 🦋
- ● Coneflower (echinacea)
- ● Bee balm (monarda)
- ● Sunflowers (helianthus)
- ● Lavender (calming + pollinator magnet)
- ● Drainage: Pebbles or gravel (1–2 inches per pot)
- ○ Or a self-watering liner (optional but handy)
- ● Watering Supplies: Watering can (1–2 gallon capacity) or a hose with a gentle spray nozzle
- ● Saucer trays (to catch runoff, if needed)
- ● Basic Tools: Trowel or small hand shovel (for planting)
- ● Pruning shears (for trimming)
- ● Gloves (to keep hands clean!)
- ○ Optional Upgrades: Vertical planters or trellises (for climbing flowers like morning glories)
- ● Self-watering system (e.g., drip irrigation or wicking pots)
- ● Mulch (to retain moisture—shredded bark or coconut coir)
- ● Plant labels (to track varieties)
- ● Solar-powered LED lights (for evening ambiance)
- ● A balcony with at least 4–6 hours of sunlight daily (check your space: full sun = south/west-facing; partial shade = east/north).
- ● Access to water (a nearby sink or hose connection).
- ● Basic knowledge of your climate zone (choose plants suited to your region’s last frost date!).
- ● Patience! Some seeds take 2–4 weeks to sprout, while transplants bloom faster.
Step-by-step instructions for creating a balcony flower garden
Here's how to transform limited space into a thriving, pollinator-friendly oasis.
🪴 Step 1: Choose the Right Containers and Locations
Select containers with drainage holes to prevent root rot—terracotta pots are ideal for their breathability. I like to mix sizes: 6-inch pots for small annuals like petunias, 8-10 inch pots for perennials like lavender, and hanging baskets for trailing plants like nasturtiums. Place containers where they'll receive at least 6 hours of sunlight daily—south or west-facing spots work best.
If your balcony only gets partial sun, opt for shade-tolerant flowers like impatiens or fuchsias. I always test light exposure for a week before planting to avoid disappointing results. Group containers by sunlight needs to simplify care later.
🌱 Step 2: Fill Containers With Quality Potting Mix
Use a lightweight potting mix (never garden soil) to ensure proper drainage. I fill each container 2/3 full, then add a slow-release fertilizer like 10-10-10 at the rate of 1 teaspoon per gallon of mix. This gives flowers a nutrient boost without burning roots.
Leave 1-2 inches of space at the top for watering—this prevents soil from spilling when you water. Tap the container gently to settle the mix before planting. For hanging baskets, line the bottom with 1 inch of coconut coir to retain moisture while allowing drainage.
🌿 Step 3: Plant Pollinator-Friendly Flowers
For your 4 containers, I recommend a mix of bee balm, coneflowers, black-eyed Susans, and marigolds—these attract butterflies, bees, and hummingbirds. Plant 3-5 flowers per 6-inch pot and 5-7 per 8-10 inch pot, spacing them 2-3 inches apart for airflow.
Dig holes twice as deep as the root ball and gently press soil around the roots to eliminate air pockets. Water lightly after planting to help roots settle. If using hanging baskets, place trailing plants like lobelia or sweet potato vine at the edges so they spill over beautifully.
💧 Step 4: Water and Maintain Consistent Moisture
Water deeply every 2-3 days until water runs out the drainage holes—this encourages strong root growth. I check moisture by sticking my finger 1 inch into the soil; if it feels dry, it's time to water. Avoid wetting the leaves to prevent fungal diseases like powdery mildew.
Mulch the soil surface with ½ inch of shredded bark to retain moisture and suppress weeds. Fertilize every 4-6 weeks with a balanced liquid fertilizer (like 20-20-20) diluted to half strength. Deadhead spent blooms regularly to encourage continuous flowering.
☀️ Step 5: Rotate and Adjust for Optimal Growth
Every 2-3 weeks, rotate containers ¼ turn to ensure even sunlight exposure—this prevents lopsided growth. If you notice leaves yellowing, your plants may need more iron or less water. I always check for pests like aphids or spider mites weekly; a strong spray of water usually removes them.
By mid-summer, you’ll see your balcony transform into a buzzing, colorful garden. The key is consistency—watering, fertilizing, and deadheading keep flowers thriving. Enjoy your pollinator paradise!
Tips & tricks for perfect balcony flower garden
Your balcony garden can become a thriving haven with these simple yet game-changing strategies.
Container Selection: Terracotta pots are my go-to because they breathe well and help regulate soil moisture, but plastic containers work too if you're on a budget. For hanging baskets, make sure they have sturdy hooks—nothing ruins a pretty display faster than a collapsed basket. I always double-check that each container has drainage holes before adding soil, even if the package says it does.
Sunlight Strategy: The 6 hours of sunlight mentioned is non-negotiable for most pollinator-friendly flowers. If your balcony gets less, choose shade-tolerant varieties like impatiens or fuchsias, but don't expect the same vibrant blooms as sun-lovers. I test light exposure for a week before planting by placing a small plant in each spot—this helps me avoid disappointment later.
Soil Preparation: Don't skimp on the potting mix! A lightweight blend with perlite or vermiculite ensures proper drainage, which prevents root rot in containers. I always add my slow-release fertilizer (10-10-10) at planting time because it gives flowers a steady nutrient supply without the risk of over-fertilizing. For hanging baskets, that extra inch of coconut coir makes all the difference in moisture retention.
Watering Wisdom: The 2-3 day watering schedule works best when you water deeply—until it runs out the drainage holes. This encourages roots to grow downward rather than staying shallow. I use a spray nozzle on my watering can to avoid disturbing the soil while keeping leaves dry, which prevents those pesky fungal diseases. Mulching with that ½ inch of shredded bark helps maintain even moisture between waterings.
Pro Tips for Balcony Flower Garden
- Your balcony garden can become a thriving haven with these simple yet game-changing strategies.
- Container Selection: Terracotta pots are my go-to because they breathe well and help regulate soil moisture, but plas...
- Sunlight Strategy: The 6 hours of sunlight mentioned is non-negotiable for most pollinator-friendly flowers. If your ...
Frequently asked questions
Got questions about creating your own balcony flower garden?
You’re not alone! Here are answers to the most common queries to help you grow with confidence—whether you’re a beginner or a seasoned green thumb.
What are the best low-maintenance flowers for a balcony garden?
Opt for hardy, drought-tolerant varieties like petunias, geraniums, or succulents. Pollinator favorites such as lavender, coneflowers, and bee balm thrive in small spaces with minimal fuss. Choose self-watering pots or self-cleaning flowers (like bromeliads) to cut down on upkeep.
When is the best time to start a balcony flower garden?
Start in early spring (after the last frost) for annuals or late winter for perennials. If you’re in a warm climate, you can plant year-round! For containers, seedlings or young plants (3–6 inches tall) give you a head start. Pro tip: Use slow-release fertilizer at planting time to avoid early-season stress.
How do I keep my balcony flowers watered without overwatering?
Use self-watering planters or place a tray under pots to catch excess water. Water in the morning to reduce evaporation, and check soil moisture with your finger—top 1–2 inches should be dry before watering. Group plants with similar needs together to simplify care. Troubleshooting: Yellowing leaves? You’re likely overwatering!
Can I grow flowers on a balcony with no direct sunlight?
Try shade-tolerant plants like fuchsias, impatiens, or heucheras. Place pots near windows or use reflective surfaces (like white walls) to maximize indirect light. For deeper shade, opt for ferns or calatheas, though they won’t bloom as prolifically. Grow lights can help extend the season for sun-lovers.
How do I attract pollinators to my balcony garden?
Plant native flowers with flat or tubular blooms (like milkweed for butterflies or sage for bees). Avoid pesticides, and add a shallow water source (a saucer with pebbles and water works!). Cluster plants in groups of 3+ to create visible "landing zones" for pollinators. Bonus: Let some flowers go to seed to support long-term ecosystems!
What should I do if my balcony plants look leggy or stretched?
Leggy growth usually means your plants aren’t getting enough light. Move pots to a sunnier spot (even a south-facing wall helps) or rotate them weekly for even exposure. Prune the leggy stems just above a leaf node to encourage bushier growth. For indoor balconies, supplement with a grow light 12–16 hours daily. Quick fix: Pinch back new growth to prompt denser foliage.
Wrapping up and next steps
Creating a balcony flower garden is more than just a way to beautify your space—it’s a chance to support local pollinators while enjoying nature up close. 🌸 With the right pollinator-friendly plants, vertical gardening techniques, and a little creativity, even small spaces can thrive.
Whether you’re a beginner or a seasoned green thumb, every bloom makes a difference!
Ready to take the next step? Start small—pick one or two plants that excite you, gather your supplies, and let your balcony bloom! 🌿 Share your progress or explore more tips to keep your garden growing.