
Pruning
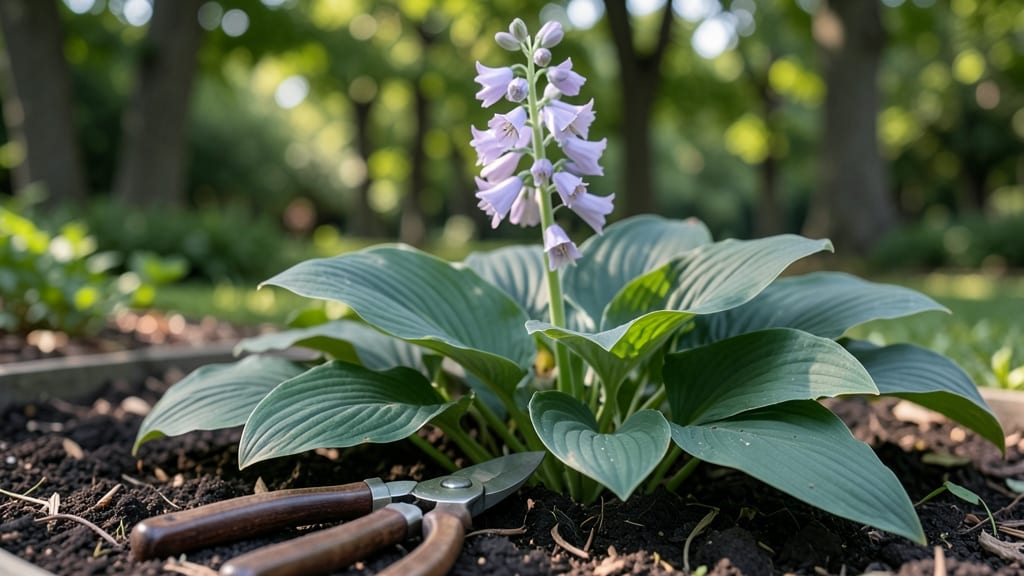
Trimming hosta flowers after they bloom isn’t just about tidying up—it’s the secret to keeping those broad, velvety leaves looking shockingly lush all season long. 🌿 I learned the hard way that skipping this step means energy wasted on seeds instead of foliage, and my hostas paid for it with smaller, thinner leaves by summer’s end.
The right timing and technique make all the difference, and I’ll show you exactly how to do it without harming the plant.
You’ll need a pair of clean, sharp pruners or even just your fingers for the job—no fancy tools required. The best time to trim is right after the flowers fade but before they form seed heads, usually in late spring or early summer.
This one simple cut redirects the plant’s energy back into the roots and leaves, which is why your hostas will reward you with thicker, more vibrant foliage by midsummer.
What you’ll end up with is a hosta that looks like it’s been pampered all season, with leaves so bold they’ll make your neighbors take notice. The key is to be gentle—never cut more than the flower stalk itself, and avoid damaging the surrounding foliage.
This small effort now means fewer pests, stronger growth, and a plant that stays healthy well into fall.
Works for all hosta varieties, whether you’re growing them in shade gardens, woodland borders, or even container pots. Once you master this, you’ll never look at those spent blooms the same way again—just think of them as free tickets to better foliage. Ready to give it a try?
📚 In This Guide
- What you need
- Instructions
- Tips and common mistakes
- Wrapping up and next steps
What you need
- ● Pruning shears or sharp scissors: Choose bypass pruners (for clean cuts) or small garden scissors. Size: 5–7 inches for precision.
- ● Gloves: Heavy-duty gardening gloves (to protect from thorns or rough foliage). Material: Nitrile-coated or leather.
- ○ Disinfectant (optional but recommended): 70% isopropyl alcohol or a gardening disinfectant spray (to prevent disease spread).
- ● Trash bag or bucket: For collecting spent flowers and debris.
- ○ Water (optional): A spray bottle with water to rinse tools mid-task (if working in dusty conditions).
- ● Knee pads: For comfort if you’re kneeling frequently.
- ● Hand lens or magnifying glass: To spot pests or diseases on stems.
- ● Compost bin: If you want to repurpose trimmed flowers as mulch.
- ● Sunscreen and hat: For sunny workdays (hosta gardens can get hot!).
Step-by-step instructions for trimming hosta flowers
Here's how to keep your hostas looking their best all season long.
✂️ Step 1: Identify the Right Time to Trim
Wait until the hosta flowers have fully bloomed and are starting to fade. You'll know it's time when the flower stalks turn brown and the blooms look wilted. Trimming too early can reduce the plant's energy reserves, while waiting too long means you're missing the best window for encouraging new foliage growth.
I usually trim mine in early summer, right after the flowers have finished blooming. This timing ensures the plant has enough energy to put into growing fresh leaves rather than producing seeds. If you see bees or butterflies visiting the flowers, wait a few extra days—they rely on these blooms for nectar.
✂️ Step 2: Gather Your Tools
You don't need much for this task—just a pair of clean, sharp pruners or scissors. I like to use pruners because they give me a cleaner cut, but scissors work just fine. Disinfect your tools with rubbing alcohol before you start to prevent spreading any diseases between plants.
Wear gloves if you're sensitive to sap or rough foliage. Hostas can sometimes have sharp edges, especially on larger leaves, so gloves protect your hands while you work. Keep a small bucket nearby to collect the trimmed flower stalks—you can compost them later or toss them in the trash.
✂️ Step 3: Cut Back the Flower Stalks
Hold the pruners at a 45-degree angle about ½ inch above the first set of leaves on the flower stalk. This angle helps water run off the cut and prevents rot. If you cut too close to the leaves, you might damage the plant's growing point. If you cut too high, the stalk might regrow.
Make one clean cut per stalk—don't tear or rip it. You'll feel the resistance give way as you cut through the stem. After trimming, step back and admire your hostas. The plant will now redirect its energy into growing thicker, more vibrant foliage instead of producing seeds.
🌿 Step 4: Encourage New Growth
After trimming, give your hostas a light feeding with a balanced, water-soluble fertilizer. I use a 10-10-10 mix diluted to half strength. This helps the plant recover quickly and promotes lush new growth. Water the soil thoroughly after fertilizing to help the nutrients soak in.
Keep an eye on the foliage over the next few weeks. You should see new leaves emerging from the center of the plant. If the soil feels dry to the touch, water deeply but avoid soggy conditions—hostas hate wet feet. Mulch around the base with 2-3 inches of organic mulch to retain moisture and keep weeds at bay.
⏰ Step 5: Monitor and Maintain
Check your hostas every few weeks for any new flower stalks that might pop up. If you see them, trim them back immediately to keep the plant focused on foliage growth. This is especially important if you're growing hostas for their leaves rather than their flowers.
In late fall, after the foliage has turned brown and died back, you can cut the entire plant down to the ground. This cleans up the garden and makes it easier to spot pests or diseases in the spring. I always leave a little stub of the stalk—about 1-2 inches tall—to protect the crown from cold temperatures.
Tips & tricks for perfect hosta flower trimming
Here's what I've learned after years of keeping my hostas looking their absolute best.
The Timing Secret: Early summer is prime time for trimming, but don't rush it! Wait until flowers are completely spent and stalks turn brown—this usually happens about 2-3 weeks after blooming. I've learned that waiting for that final wilt prevents shocking the plant when it's still putting energy into seed production. If you're unsure, do the "finger test": gently press a bloom. If it feels papery and crumbles easily, it's ready.
Cutting Angle Matters: That 45-degree angle in Step 3 isn't just for looks—it's crucial for plant health. The angled cut helps water drain away from the stem, preventing rot that can creep up from the soil. I've seen too many hostas develop unsightly brown spots where water pooled after straight cuts. For stubborn stalks, make a small nick first to guide your cut—this prevents crushing the stem.
Fertilizer Timing: The 10-10-10 fertilizer recommendation works wonders, but there's a trick to application. After trimming, wait 3-4 days before feeding. This gives the plant time to recover from the "surgery" and prevents fertilizer burn. I also like to water the soil first, then apply fertilizer to the dry soil—this helps the nutrients soak in evenly rather than running off.
Seasonal Maintenance: Don't forget about fall! When you cut back the entire plant, leave those 1-2 inch stubs as natural mulch. They'll protect the crown from freeze-thaw cycles that can damage tender growth. I've seen hostas with perfect crown protection from this simple trick—no extra work, just smart timing. In spring, you'll notice new shoots emerging from the protected base.
Pro Tips for Trim Hosta Flowers
- Here's what I've learned after years of keeping my hostas looking their absolute best.
- The Timing Secret: Early summer is prime time for trimming, but don't rush it! Wait until flowers are completely spen...
- Cutting Angle Matters: That 45-degree angle in Step 3 isn't just for looks—it's crucial for plant health. The angled ...
Frequently asked questions
Got questions about trimming hosta flowers? You’re not alone!
Here are answers to the most common concerns gardeners have when deadheading these beauties for healthier foliage.
When is the best time to trim hosta flowers?
Trim hosta flowers as soon as they start wilting—usually mid-to-late summer (July–August). Early deadheading prevents seed production, redirecting energy to leaf growth. Avoid cutting too late in the season, though, as late blooms may still attract pollinators.
Do I need special tools to trim hosta flowers?
Nope! A pair of clean, sharp pruners or scissors works perfectly. Just ensure they’re sanitized (wipe with rubbing alcohol) to avoid spreading disease. For large clumps, shears or even your fingers can pinch spent blooms—no fancy tools required!
Will trimming flowers hurt my hosta plants?
Not at all! In fact, it’s beneficial. Removing spent blooms prevents seed formation, which can weaken the plant. It also keeps your hostas looking tidy and encourages bigger, healthier leaves—the real star of the show!
What if my hosta flowers turn brown before blooming?
Brown or mushy buds often signal fungal issues (like botrytis) or stress from heat/drought. Trim the affected blooms immediately, improve airflow around the plant, and water at the base (not overhead). Consider fungicide if problems persist.
Should I remove hosta flowers entirely, or just deadhead?
You’ve got options! Deadheading (snipping spent blooms) is ideal for most gardeners. If you love the look of hosta flowers, leave a few blooms for aesthetics—but remove the rest to boost foliage. Pro tip: Save seeds from healthy plants if you’re into propagation!
Wrapping up and next steps
Trimming hosta flowers is a simple yet powerful way to keep your garden thriving! By deadheading spent blooms, you encourage bigger, healthier foliage and extend the beauty of your hostas well into fall.
Whether you’re a gardening pro or just starting, this easy task makes a huge difference—so grab those pruners and get to work!
Ready to see the results? Pick a sunny day and spend just 10 minutes trimming—your hostas (and your garden’s curb appeal!) will thank you. 🌿✨