
Tools
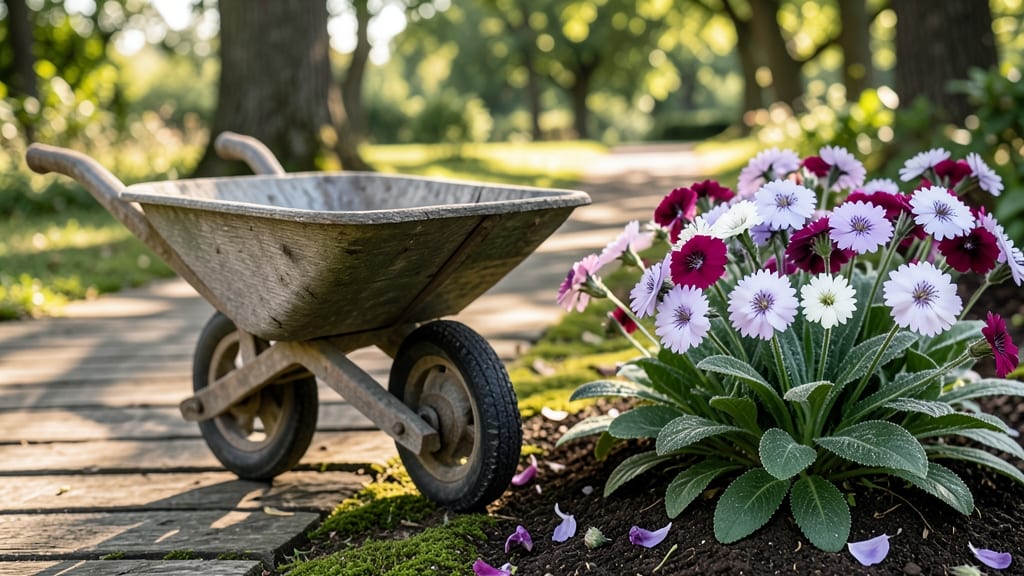
My wheelbarrow spilling flowers became the star of my backyard after I filled it with trailing petunias and geraniums—it’s the kind of overflowing display that makes neighbors pause and ask questions. 🌿 The key is choosing plants that spill gracefully, like fuchsias, lobelias, or sweet alyssum, which cascade over the sides while staying lightweight enough not to topple.
I picked a vintage-style wheelbarrow in deep green to contrast with the bright blooms, and the whole thing now sits near my patio as a living centerpiece.
You’ll need a sturdy wheelbarrow (empty ones work best), potting soil mixed with perlite for drainage, and a watering can with a long spout. Line the bottom with landscape fabric to prevent soil loss, then fill it halfway with your mix.
The plants should go in after the soil settles—think of it like a hanging basket, but with more drama. For extra stability, add a few bricks or pavers to the base if your wheelbarrow feels wobbly.
By midsummer, you’ll have a vibrant spilling display that changes with the seasons—swap out spring bulbs for heat-loving annuals by June, then add mums or pansies in fall. The wheelbarrow’s height makes it perfect for seating areas, while its mobility lets you move it for sunlight or shade.
Just keep an eye on watering; trailing plants dry out faster, so check the soil daily during heatwaves. The payoff? A season-long show that’s cheaper than store-bought arrangements and way more satisfying.
Pro tip: Add solar-powered string lights for evening magic, or paint the wheelbarrow’s sides with stenciled designs to tie it into your garden’s theme. Even a small patio can handle this—just pick a compact wheelbarrow and go for dwarf varieties.
Once you see how easy it is to refresh the flowers, you’ll never look at an old wheelbarrow the same way again.
📚 In This Guide
- What you need
- Instructions
- Tips and common mistakes
- Wrapping up and next steps
What you need
- ● Wheelbarrow: A sturdy, weather-resistant metal or plastic wheelbarrow (18–24" wide, 20–30" deep). Pro tip: 💡 Choose one with a flat base for stability and drainage.
- ● Potting soil: 2–3 cubic feet of high-quality, well-draining potting mix (e.g., Miracle-Gro Moisture Control or Black Gold Natural & Organic).
- ● Flowers: A mix of trailing and upright plants (3–5 varieties) for texture and spillover: Trailing: 1–2 plants of Sweet Alyssum, Lobelia, or Petunias (10–12" pots).
- ● Upright: 2–3 plants of Geraniums, Coleus, or Impatiens (6–8" pots).
- ● Seasonal filler: 1–2 bunches of Dianthus or Calibrachoa for pops of color.
- ● Drainage: 1–2 inches of gravel or perlite at the bottom.
- ○ Garden gloves (1 pair) – Optional but recommended!
- ● Trowel or hand shovel – For planting and soil adjustments.
- ● Watering can or hose with a gentle spray nozzle.
- ● Scissors or pruners – To trim overgrown stems.
- ○ Mulch or decorative stones (optional) – For a polished look.
- ● Fertilizer (balanced liquid or slow-release granules) – Feed every 2–3 weeks.
- ● Fairy lights or solar-powered stakes – For evening ambiance.
- ● Paint or chalk – To customize the wheelbarrow’s handles or sides.
- ● Mini trellis or lattice – For climbing flowers like Nasturtiums.
- ● Herbs or edible flowers (e.g., Basil, Pansies) – For a functional twist!
Step-by-step instructions for creating a wheelbarrow spilling flower display
Turn that old wheelbarrow into a vibrant, overflowing garden centerpiece that keeps blooming all season.
🪴 Step 1: Choose and Prep Your Wheelbarrow
Start with a sturdy wheelbarrow that's at least 18 inches wide—narrower ones won't hold enough plants to create that dramatic spill. Remove any loose rust or sharp edges with sandpaper, then give it a fresh coat of weather-resistant paint in a bright color. I like to add a 1-inch lip of paint around the edges so soil won't escape when plants spill over.
Line the bottom with landscape fabric to prevent soil from falling through any gaps in the wheelbarrow's base. Cut the fabric to fit snugly, then secure it with staples or heavy-duty staples. This keeps your soil contained while allowing excess water to drain properly.
🌱 Step 2: Layer Soil and Drainage
Fill the wheelbarrow with 2 inches of gravel or coarse sand at the bottom for drainage. This prevents water from pooling at the roots and causing rot. Next, add 12 inches of high-quality potting mix mixed with compost—this gives your plants the nutrients they need to thrive and bloom continuously.
Don't pack the soil down too tightly. You want it loose enough for roots to spread easily but firm enough to hold plants upright. Press down gently with your hands until the soil feels stable. The top inch should look slightly crumbly so water can penetrate quickly.
🌿 Step 3: Plant for Season-Long Color
Choose plants that thrive in similar conditions and bloom at different times. I like to mix petunias (for summer color), impatiens (for shade tolerance), and calibrachoa (for trailing beauty). Start by planting 3-4 petunias along the back edge, then fill in with 5-6 impatiens and 4-5 calibrachoa trailing over the sides.
Space plants about 6 inches apart so they have room to grow but still create that lush, overflowing look. Water thoroughly after planting to help roots settle into the soil. You'll see new growth within a week—that's your signal everything is working.
✂️ Step 4: Maintain and Encourage Continuous Blooms
Water your wheelbarrow display every morning, giving it enough to soak 2-3 inches deep. You'll know it's right when water runs out the bottom but doesn't pool on top. Deadhead spent blooms regularly to encourage more flowers. I like to do this in the early morning when the blooms are still damp and easy to remove.
Add a slow-release fertilizer every 4-6 weeks to keep plants blooming all season. Watch for pests like aphids or spider mites—if you see them, spray with neem oil in the evening when bees aren't active. Rotate the wheelbarrow every 2 weeks so all sides get equal sun exposure.
🌸 Step 5: Refresh for Seasonal Changes
As summer winds down, replace any plants that have finished blooming with fall-blooming mums or pansies. These cold-hardy plants will keep your wheelbarrow colorful well into autumn. In late fall, empty the wheelbarrow, compost the spent plants, and store it for next season.
Here's the thing—this display works best when you let it go wild. Don't be afraid to let vines trail freely or let flowers spill over the sides. That's what makes it look so magical. With a little care, your wheelbarrow will be the talk of the neighborhood all growing season long.
Tips & tricks for perfect wheelbarrow spilling flowers
A few key strategies will help you create a thriving, overflowing display that stays vibrant all season long.
Wheelbarrow Selection: Don't settle for just any wheelbarrow—look for one with sturdy handles and a wide base. The 18-inch minimum width is crucial for holding enough plants to create that dramatic spill. I've found that plastic wheelbarrows with built-in trays work particularly well since they have fewer drainage gaps to worry about. If using metal, choose galvanized steel to prevent rust that could leach into your soil.
Soil Layering Secret: The 2-inch gravel base is non-negotiable for drainage, but don't skip the 12-inch potting mix layer—this is where your plants will thrive. I like to mix in one part perlite to the potting mix for even better aeration. After adding the soil, gently press it down with your hands until it feels stable, but resist the urge to compact it too tightly. The top inch should remain slightly crumbly to allow quick water penetration.
Plant Placement Strategy: When arranging your 3-4 petunias, 5-6 impatiens and 4-5 calibrachoa, place the tallest plants like petunias along the back edge first. This creates a natural tiered effect that makes the display look fuller. For the trailing calibrachoa, tuck them near the edges so their vines can cascade dramatically. The 6-inch spacing gives roots room to establish while creating that lush, overflowing look.
Maintenance Shortcut: Instead of deadheading every single spent bloom—which can be tedious—I recommend doing a "selective deadheading" approach. Focus on removing the largest, most noticeable blooms first, then work your way to the smaller ones. This keeps the display looking full while saving you time. For the 2-week rotation, I set a reminder on my phone so I don't forget to turn the wheelbarrow and give all sides equal sun exposure.
Pro Tips for Wheelbarrow Spilling Flowers
- A few key strategies will help you create a thriving, overflowing display that stays vibrant all season long.
- Wheelbarrow Selection: Don't settle for just any wheelbarrow—look for one with sturdy handles and a wide base.
- Soil Layering Secret: The 2-inch gravel base is non-negotiable for drainage, but don't skip the 12-inch potting mix layer—this is where your plants will thrive.
Frequently asked questions
Got questions about creating your own wheelbarrow spilling flower display?
Here are answers to the most common ones—so you can dive right in with confidence!
What’s the best time of year to plant a wheelbarrow spilling flowers?
The ideal time depends on your climate! In mild winters, plant in early spring (after the last frost) for summer blooms. In colder zones, opt for late spring to avoid frost damage. For season-long color, mix spring bloomers (like pansies) with summer/fall varieties (like petunias or mums).
How do I keep the flowers from wilting too quickly?
Use well-draining soil (add perlite or sand) and water deeply but infrequently—aim for the base, not the leaves. Morning watering prevents evaporation, and a light mulch layer retains moisture. For extra longevity, trim spent blooms and fertilize every 2–3 weeks with a balanced, water-soluble formula.
Can I reuse a wheelbarrow for this project, or do I need a new one?
Absolutely reuse one! Clean it thoroughly with soapy water to remove debris, then sanitize with a 10% bleach solution (rinse well). Drill drainage holes if missing—4–6 small holes in the bottom prevents root rot. Line with landscape fabric to block soil loss, but avoid plastic liners (they trap moisture).
What are some low-maintenance flower options for beginners?
Start with hardy, self-cleaning varieties like:
- Petunias – Vibrant, drought-tolerant, and bloom nonstop.
- Marigolds – Pest-repelling and thrive in heat.
- Sweet Alyssum – Fragrant, spill-over friendly, and drought-resistant.
- Begonias – Shade-tolerant with lush, trailing foliage.
For year-round interest, pair with evergreen fillers like heuchera or sedum.
Why are my flowers turning yellow or dying off?
Yellowing leaves often signal overwatering or poor drainage. Check for:
- Soggy soil – Let the top inch dry between waterings.
- Root rot – Ensure drainage holes are clear and soil isn’t compacted.
- Too much sun – Some flowers (like impatiens) scorch in direct heat.
- Pests – Inspect for aphids or spider mites; treat with neem oil if needed.
Adjust care based on your plants’ needs—most issues fix with proper spacing, light, and airflow.
Wrapping up and next steps
A wheelbarrow spilling flowers isn’t just a charming garden centerpiece—it’s a year-round celebration of color, creativity, and effortless beauty. Whether you’re a seasoned gardener or a beginner with a green thumb, this project proves that overflowing blooms can transform any space into a vibrant haven. 🌸
Now that you’re inspired, take the next step! Start small with a single container or go bold with a full garden display. Grab your tools, pick your favorite flowers, and let your garden tell its own story—one petal at a time. Happy planting! 🌱