
Tools
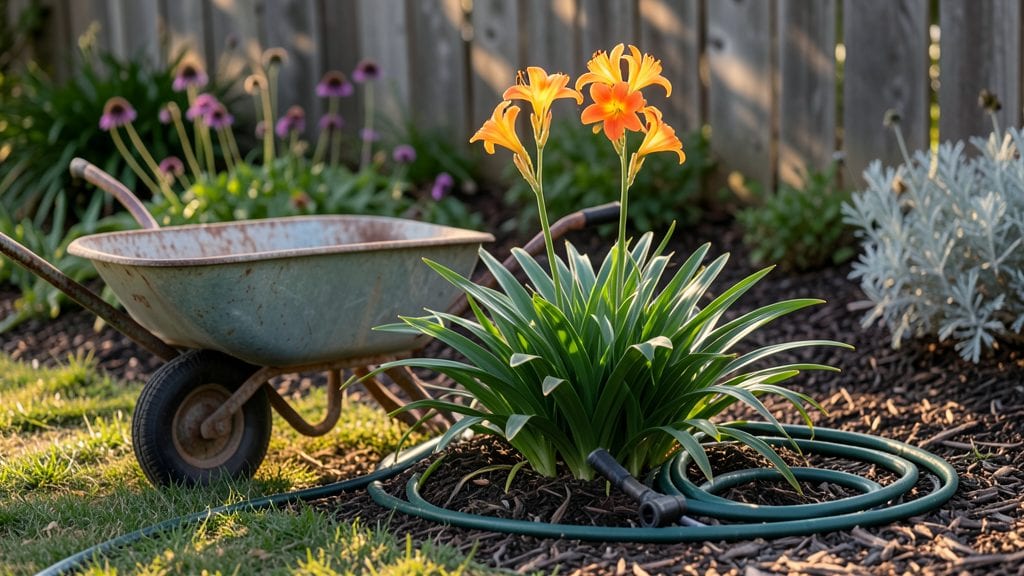
A rusty wheelbarrow flower bed can turn dead space into a thriving vertical garden. 🌿 I stumbled upon this idea after filling my patio with potted plants that took up every inch—until I realized my old wheelbarrow could do double duty as both a planter and a statement piece.
The best part? It’s perfect for small yards where every square foot counts.
You’ll need a sturdy wheelbarrow (or two), lightweight potting mix, and plants that love to trail or stay compact. Succulents, trailing petunias, and herbs like thyme or oregano thrive here, plus you can add drainage holes if your wheelbarrow isn’t pre-drilled.
The setup takes under an hour, and the results? A lush, movable garden that doubles as decor.
Imagine a cascading mix of purple and pink blooms spilling over the sides, or a fragrant herb garden within arm’s reach. Maintenance is simple—just water when the top inch of soil feels dry and trim back leggy growth.
The wheelbarrow can be moved to follow the sun or tucked away when needed, making it the ultimate flexible garden solution.
Works for balconies, sidewalks, or even as a centerpiece on a deck. Whether you’re filling a corner or adding greenery to a dull space, this project proves you don’t need a yard to have a garden. Let’s get planting!
📚 In This Guide
- What you need
- Instructions
- Tips and common mistakes
- Wrapping up and next steps
What you need
- ● Wheelbarrow: 1 sturdy, rust-resistant metal wheelbarrow (2–3 cubic feet capacity, with a flat base for stability).
- ● Drill & bits: 1 cordless drill (with ¼" and ½" drill bits) for drainage holes.
- ● Drill bit set: 1 set of masonry bits (if working with concrete wheelbarrows).
- ● Screws or bolts: 4–6 heavy-duty screws/bolts (for securing drainage mesh or a false bottom).
- ● Drainage mesh: 1 roll of hardware cloth (¼" mesh, cut to fit wheelbarrow base).
- ● Potting soil: 1–2 bags of lightweight potting mix (avoid garden soil—it compacts!).
- ● Slow-release fertilizer: 1 packet of organic granular fertilizer (e.g., 10-10-10 or compost).
- ● Plants: 3–5 compact, trailing, or dwarf varieties (e.g., petunias, ferns, succulents, or herbs like thyme).
- ● Watering can: 1 with a long spout (or a hose with a gentle nozzle).
- ● Measuring tape: 1 (to ensure even soil distribution).
- ● False bottom: 1 piece of corrugated plastic or landscape fabric (to prevent soil from falling through drainage holes).
- ● Liner: 1 heavy-duty pond liner or plastic sheeting (to protect the wheelbarrow from soil acids).
- ● Hanging planters: 2–3 small fabric or plastic pockets (for trailing plants like nasturtiums).
- ● Mulch: 1 bag of cocoa hulls or pine bark (to retain moisture and suppress weeds).
- ● Decorative accents: Paint, weatherproof decals, or LED string lights (for a pop of personality!).
- ● Wheel locks: 2 (to keep the wheelbarrow stationary while planted).
Step-by-Step instructions for building a wheelbarrow flower bed
Transform that empty corner into a lush vertical garden with this creative, space-saving hack!
🪴 Step 1: Prepare the Wheelbarrow Base
Start by thoroughly cleaning your wheelbarrow with warm, soapy water to remove any dirt or debris. Rinse well and let it dry completely—moisture trapped in crevices can rot wood over time. If your wheelbarrow has a removable bottom tray, take it out and set it aside for now.
Next, line the wheelbarrow with landscape fabric to prevent soil from falling through the gaps. Secure it tightly with staples or small nails along the edges, leaving a few inches of extra fabric to fold over the sides. This keeps your soil contained and makes cleanup a breeze.
🌱 Step 2: Layer Soil for Optimal Drainage
Fill the wheelbarrow with a mix of 2 parts potting soil and 1 part perlite or coarse sand to improve drainage. I like to start with a 2-inch layer of small gravel or broken pottery pieces at the bottom—this creates a drainage layer that prevents waterlogging, which is especially critical in containers.
Add the soil mix in layers, tamping it down lightly with your hands after each 2-inch addition. Stop about 1 inch below the wheelbarrow’s rim to leave room for plants and watering. The soil should feel like a damp sponge—not soggy, but not bone-dry either.
☀️ Step 3: Select and Plant Your Flowers
Choose plants that thrive in containers and have similar watering needs—this ensures everything stays happy. I recommend trailing plants like petunias or nasturtiums for the edges, along with upright varieties like geraniums or marigolds for height and structure. Dig small holes with your finger, just deep enough to cover the plant’s roots.
Gently place each plant in its hole, spreading the roots outward before covering them with soil. Press lightly around the base to remove air pockets. Water each plant thoroughly after planting to help the soil settle and eliminate any gaps. You’ll know it’s done right when the soil surface looks slightly compacted but still loose enough for water to penetrate.
💧 Step 4: Water and Position for Success
Water the wheelbarrow deeply right after planting to moisten the entire soil layer. Let the water drain completely through the bottom—this helps flush out any excess salts or debris. From now on, water whenever the top 1 inch of soil feels dry to the touch, which usually means every 2-3 days depending on your climate.
Place your wheelbarrow flower bed in a spot that gets at least 6 hours of sunlight daily. A south-facing wall or patio is ideal, but even partial shade works for shade-tolerant plants. Rotate the wheelbarrow a quarter turn every few days so plants grow evenly toward the light instead of leaning in one direction.
✂️ Step 5: Maintain and Enjoy Your Vertical Garden
Check your plants weekly for signs of pests or wilting—trailing plants in containers can dry out faster than those in the ground. Deadhead spent blooms regularly to encourage more flowers, and trim any leggy growth to keep the plants compact and full. Fertilize every 4-6 weeks with a balanced liquid fertilizer to keep your flowers thriving all season.
Here’s the thing—this wheelbarrow bed is a game-changer for small spaces. Not only does it save room, but it also adds height and drama to any yard. Plus, you can move it around as needed, so if you’re renting or just love to switch up your decor, this setup is perfect for you!
Tips & tricks for perfect wheelbarrow flower beds
Turn your wheelbarrow into a stunning vertical garden with these pro tips that’ll make all the difference!
Drainage is Everything: In Step 2, that 2-inch gravel layer isn't just for looks—it's the secret to preventing root rot. I like to use broken terracotta pieces because they're free (just save your old pots!) and they create even better drainage than smooth gravel. Pro tip: Rinse them first to remove dust that could clog your drainage layer.
Soil Layering Hack: When adding your 2-inch soil layers, use a wooden spoon or your hand to create small holes in the soil before planting. This helps roots establish faster by breaking up compacted soil. Also, mix in a handful of compost with each layer—it's like giving your plants a vitamin boost right from the start!
Plant Placement Strategy: For Step 3, think vertically! Place your tallest plants (like geraniums) in the center where they won't get shaded by trailing plants. The trailing varieties (petunias, nasturtiums) should go around the edges—this creates that beautiful waterfall effect we all love. Don't forget to leave about 6 inches between plants for proper air circulation.
Sunlight Rotation Reminder: That quarter-turn rotation in Step 4 isn't just decorative—it's essential for even growth. Set a calendar reminder every 3 days to rotate your wheelbarrow. I mark it on my phone with an emoji so I don't forget! This prevents your plants from growing lopsided toward the sun, keeping them bushy and full.
Pro Tips for Wheelbarrow Flower Bed
- Turn your wheelbarrow into a stunning vertical garden with these pro tips that’ll make all the difference!
- Drainage is Everything: In Step 2, that 2-inch gravel layer isn't just for looks—it's the secret to preventing root rot.
- Soil Layering Hack: When adding your 2-inch soil layers, use a wooden spoon or your hand to create small holes in the soil before planting.
Frequently asked questions
Got questions about creating a wheelbarrow flower bed? You’re not alone! Here are some of the most common inquiries—and their practical solutions—to help you get started with confidence.
What’s the best soil mix for a wheelbarrow flower bed?
A lightweight, well-draining mix is key! Use a blend of 50% potting soil, 30% perlite or vermiculite, and 20% compost. Avoid garden soil—it compacts easily and drains poorly. For heavy feeders like petunias, add a slow-release fertilizer to the mix at planting time.
How often should I water a wheelbarrow flower bed?
Watering depends on your climate, but aim for daily checks in hot weather. The soil should stay consistently moist (not soggy). A wheelbarrow’s small size means it dries out faster than in-ground beds. Early morning watering prevents evaporation and fungal issues.
Can I reuse a wheelbarrow for a flower bed after growing veggies?
Yes, but sanitize it first! Scrub with a 10% bleach solution (1 part bleach to 9 parts water) to kill pathogens. Rinse thoroughly, then let it dry in the sun. Avoid using the same wheelbarrow for veggies and flowers if possible—some soil-borne diseases (like blight) can linger.
What are some low-maintenance flowers for a wheelbarrow bed?
Opt for drought-tolerant, compact varieties like sweet alyssum, marigolds, or trailing lobelia. Succulents (e.g., sedum) or herbs like thyme or oregano thrive with minimal water. Avoid heavy bloomers like hydrangeas—they’ll weigh down the wheelbarrow over time.
Will a wheelbarrow flower bed attract pests like aphids or slugs?
Yes, but proactive care helps! Use neem oil for aphids or set up beer traps for slugs. Plant pest-repelling companions like basil, lavender, or nasturtiums. Elevate the wheelbarrow slightly off the ground (with bricks or feet) to deter ground-dwelling pests.
How do I overwinter a wheelbarrow flower bed?
Empty and store it in a dry place if possible, but if keeping plants, drain excess water and cover with frost cloth. Move it to a sheltered spot (like a garage or under an eave) to protect from harsh winds. Empty soil and compost it—don’t let it freeze solid in the wheelbarrow.
Still stumped? Drop your question in the comments—we’ve got you covered!
Wrapping up and next steps
Transforming your small yard into a vibrant garden has never been easier—or more creative! With a wheelbarrow flower bed, you’ve unlocked a space-saving, stylish, and functional solution that brings nature right to your doorstep.
Whether you’re a seasoned gardener or just starting out, this project is your ticket to lush greenery without the footprint.
Ready to bloom? Grab your wheelbarrow, gather your supplies, and start planting—your future garden (and neighbors) will thank you! 🌸 For extra inspiration, browse vertical garden ideas or check out DIY tutorials to keep your project thriving all season long.