
Pruning
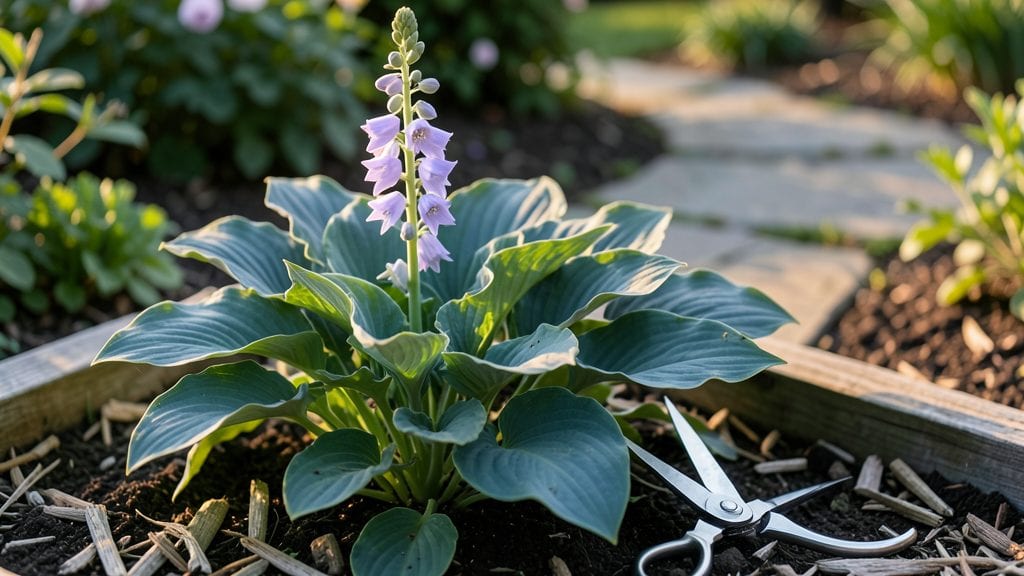
Trimming hosta flowers after they bloom isn’t just about tidying up—it’s the secret to keeping your plants thriving for years. ✨ I’ve learned the hard way that skipping this step leads to weak foliage and fewer blooms next season, but the right timing and technique make all the difference.
The key is acting at the perfect moment when the flowers fade but before seed heads form, giving your hostas energy to focus on their signature leaves.
You’ll need just a few simple tools: sharp pruners for clean cuts, gloves to protect your hands from rough edges, and a small bucket for clippings.
The process takes about 10 minutes per plant, and the payoff is hostas that stay lush, vibrant, and ready to put on a show year after year. Even if you’ve never pruned before, this method is straightforward—no guesswork, just clear steps that work every time.
After trimming, your hostas will redirect energy into stronger roots and bigger leaves, setting the stage for next year’s blooms. The foliage stays bold and healthy, and you’ll notice fewer pests hiding in spent flower stalks.
This is also the ideal time to check for any damaged or yellowing leaves, which you can remove while you’re at it—it’s like giving your plants a fresh start.
Whether you’re dealing with a single hosta or a whole garden bed, the principles stay the same. The only real mistake is waiting too long, so grab those pruners and get ready to see your hostas shine brighter than ever. Here’s exactly how to do it right—no second-guessing needed.
📚 In This Guide
- What you need
- Instructions
- Tips and common mistakes
- Wrapping up and next steps
What you need
- ● Pruning shears or sharp garden scissors – Choose bypass pruners (for clean cuts) or anvil pruners (for thicker stems). A 5-inch blade is ideal for most hosta flowers.
- ● Gloves – Opt for gardening gloves with nitrile-coated palms (for grip and protection against sap or thorns).
- ○ Disinfectant (optional but recommended) – A 70% isopropyl alcohol or rubbing alcohol (in a spray bottle) to sterilize tools and prevent disease spread.
- ● Small bucket or bag – A 5-gallon bucket or heavy-duty trash bag to collect trimmed flowers and debris.
- ● Water and a cloth – For wiping down tools before and after trimming.
- ● Hand pruners with ergonomic grips – Reduces hand fatigue for longer trimming sessions.
- ● Knee pads or a small stool – Makes reaching low-growing hostas more comfortable.
- ● Compost bin access – If you plan to compost trimmed flowers (check local guidelines first!).
- ● Safety glasses – Useful if you’re trimming near your eyes or in windy conditions.
Step-by-step guide to trimming hosta flowers
Here’s how to keep your hostas lush and vibrant by removing spent blooms at the perfect time.
✂️ Step 1: Identify When to Trim
Wait until the flower stalks have completely faded and turned brown—this usually happens in late summer or early fall. You’ll notice the blooms wilting and the stalks drying out. Trimming too early can weaken the plant, while waiting too long lets the energy drain from the foliage.
If you see any remaining buds still green or flowers just starting to open, hold off for a few days. The goal is to remove only fully spent blooms, not fresh ones. This ensures your hosta stores energy for next year’s growth instead of wasting it on dead flowers.
✂️ Step 2: Gather the Right Tools
Use clean, sharp pruning shears or scissors to make a precise cut. Dull tools can crush stems and invite disease. I like to wipe the blades with rubbing alcohol before and after trimming to keep everything sterile.
Wear gloves if your hostas have jagged edges or thorns—some varieties can be prickly. Avoid using your hands to pinch off stalks, as this can damage the plant and leave uneven cuts that heal poorly.
✂️ Step 3: Cut at the Right Spot
Locate the base of the flower stalk where it meets the main foliage. Make a clean cut about ½ inch above the first set of leaves or where the stalk starts to thicken. This prevents unsightly stubs and encourages new growth from the right spot.
Don’t cut too close to the foliage—this can harm the leaves and leave the plant vulnerable to rot. If the stalk is thick, use a slight angle to reduce water pooling. A sharp cut heals faster and looks tidier.
🌿 Step 4: Dispose of the Trimmings
Remove the spent flower stalks from your garden immediately to prevent pests or disease from lingering. Toss them in the compost bin if they’re healthy, or throw them away if they show signs of rot or pests.
I always rinse my tools with water afterward to remove any plant debris. This keeps your garden tools ready for the next task and prevents cross-contamination between plants.
💧 Step 5: Care for Your Hosta After Trimming
Water your hosta lightly after trimming to help it recover. The plant will redirect energy from the flower stalks to the leaves, so keep the soil evenly moist but not soggy. Mulch around the base with 1-2 inches of shredded bark to retain moisture and protect the roots.
Watch for new growth in the coming weeks—this is a sign your hosta is thriving. If you notice yellowing leaves, it might need more sunlight or better drainage. A little extra care now means bigger, healthier foliage next season.
Tips & tricks for perfect hosta flower trimming
Here's what nobody tells you about keeping your hostas looking their best after trimming.
The Timing Secret: I've learned this the hard way—trimming too early can actually weaken your hosta. Wait until those flower stalks are completely brown and crispy, not just slightly wilted. The plant needs to fully exhaust its energy in the blooms before redirecting it to the leaves. Think of it like giving your hosta a final push to store up for next year's growth.
Tool Prep Matters: Before you even touch your hostas, take 30 seconds to clean your pruning shears with rubbing alcohol. I keep a small bottle in my gardening toolkit just for this. Sterile tools prevent introducing diseases to your plants, and sharp blades make cleaner cuts that heal faster. Between us, I've seen more garden problems start from dirty tools than any other single factor.
Cutting Technique Breakthrough: That ½-inch rule above the first set of leaves isn't just arbitrary—it's about growth signals. Cutting here sends a clear message to the plant where new growth should emerge. For thicker stalks, use a slight downward angle to prevent water from pooling at the cut site, which could lead to rot. I've seen some gardeners make horizontal cuts, and those always seem to heal slower.
Post-Trimming Care: After trimming, give your hosta a light drink of water—about ½ gallon per plant—to help it recover. The mulch you add (1-2 inches of shredded bark) isn't just decorative; it's a moisture barrier that protects roots from temperature swings. I've noticed my hostas bounce back fastest when I mulch right after trimming, especially in late summer when temperatures can fluctuate dramatically.
Pro Tips for Trimming Hosta Flowers
- Here's what nobody tells you about keeping your hostas looking their best after trimming.
- The Timing Secret: I've learned this the hard way—trimming too early can actually weaken your hosta.
- Tool Prep Matters: Before you even touch your hostas, take 30 seconds to clean your pruning shears with rubbing alcohol.
Frequently asked questions
Got questions about trimming hosta flowers? You’re not alone! Here are some of the most common queries gardeners have—plus clear, actionable answers to keep your hostas thriving.
When is the best time to trim hosta flowers?
The ideal time to trim hosta flowers is right after they fade—usually late summer to early fall (August–September). This prevents seed production, which can drain energy from the plant. Avoid cutting too early, as it may reduce foliage quality for the next season.
Do I need special tools to trim hosta flowers?
Nope! Basic tools like clean, sharp pruners or even disinfected scissors work perfectly. Just ensure they’re sanitized with rubbing alcohol to avoid spreading diseases. A small hand pruner is ideal for precision—no heavy-duty equipment required!
What if I wait too long to trim the flowers?
If you miss the window, don’t panic! Trim dead or browned flower stalks anytime, but wait until spring to prune any remaining foliage. Waiting too long may leave the plant vulnerable to pests or fungal issues, so act sooner rather than later for best results.
Should I remove hosta flowers entirely, or just deadhead?
Both options work! Deadheading (snipping only faded blooms) is great for keeping the plant tidy, while full removal (cutting the entire stalk at the base) redirects energy to foliage growth. Choose based on your goals—foliage lovers may prefer full removal for lush leaves!
Will trimming hosta flowers attract pests?
Not if done correctly! Use sterilized tools and avoid over-pruning. Pests like slugs or aphids are more drawn to stressed plants, so trim strategically and keep the area clean. A light layer of mulch can also deter unwanted critters while supporting plant health.
Wrapping up and next steps
Trimming your hosta flowers isn’t just about aesthetics—it’s a game-changer for your garden’s health and vibrancy! 🌿 By following the right techniques and timing, you’ll encourage lush foliage, deter pests, and keep your hostas thriving for years.
Whether you’re a seasoned gardener or just starting out, this simple task makes a huge difference.
Now that you’re armed with knowledge, grab those shears and get pruning! 🌱 Start with just one hosta plant to build your confidence, and soon, your garden will be the envy of the neighborhood. Happy gardening—your hostas will thank you!