
Pruning
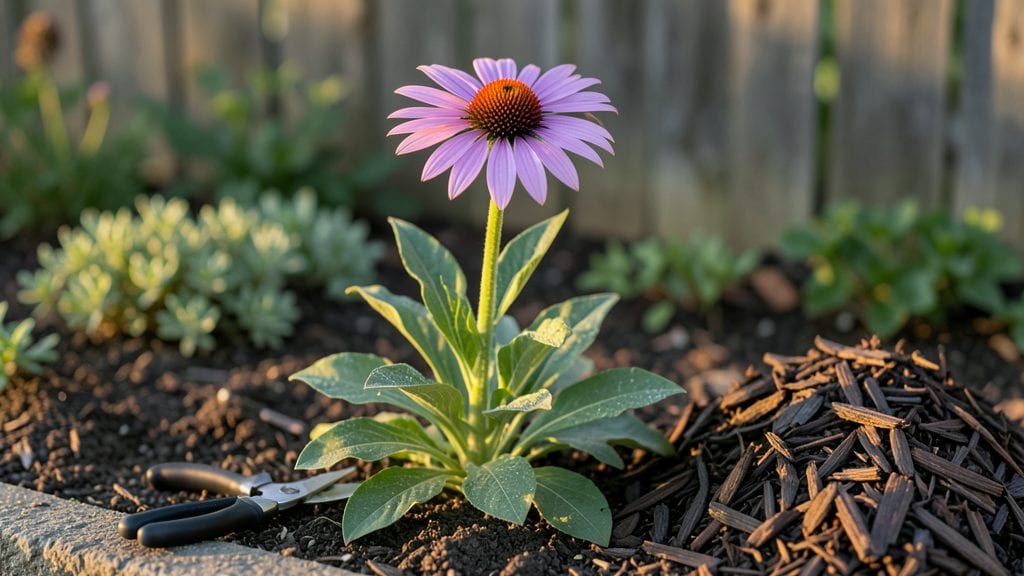
Pruning perennial flowers isn't just about cutting back—it's the secret to keeping them blooming like crazy for years. ✨ I've learned the hard way that timing matters more than most gardeners realize, and a few simple cuts can mean the difference between a showstopper border and a sad, leggy mess.
The right approach turns perennials into the workhorses of your garden, giving you color from early spring through frost.
You don't need fancy tools to get started—just sharp pruners, gloves, and a clear head on a calm day. The real magic happens in three key moments: right after blooming, mid-season cleanup, and late winter shaping.
I'll walk you through exactly when to do each, plus how to tell which stems to keep and which to snip without guessing. Most gardeners over-prune in spring, which actually reduces next year's blooms—don't make that mistake.
When you're done, your perennials will look like they've been professionally landscaped, with fresh new growth and room to spread. The blooms come thicker, last longer, and the plants stay healthier through droughts and pests.
You'll notice the difference within weeks—more flowers, fewer problems, and a garden that actually performs year after year. Let's get those shears ready.
This works for everything from peonies to coneflowers, whether you're working with a small city garden or a half-acre landscape. The same principles apply no matter your space—just adjust the scale. Once you master the timing, you'll wonder why you ever struggled with perennials before.
📚 In This Guide
- What you need
- Instructions
- Tips and common mistakes
- Wrapping up and next steps
What you need
- ● Bypass pruners – Sharp, clean, and must be disinfected (1 pair). Choose ergonomic handles for comfort during long sessions.
- ● Loppers – For thicker stems (¼"–1" diameter). Opt for bypass blades to avoid crushing (1 pair).
- ● Hand pruners (felco or anvil) – For delicate trimming (1 pair). Anvil-style works for deadheading but may crush stems.
- ● Garden shears – For shaping shrub-like perennials (e.g., Shasta daisies). Look for serrated edges for clean cuts (1 pair).
- ● Pruning saw – For stubborn, woody stems (1, with a fine-tooth blade).
- ● Disinfectant – 70% rubbing alcohol or 10% bleach solution (1 bottle or spray bottle). Critical for preventing disease!
- ● Garden gloves – Nitrile-coated for grip and protection (1 pair). Avoid latex if allergic.
- ○ Bucket or bag – For clippings (1, 10+ gallons for large prunings). Optional: Add a compost bin liner for easy cleanup.
- ○ Rake or leaf blower – To clear debris (1, optional for post-pruning tidying).
- ● Know your perennials – Research when and how to prune each type (e.g., deadheading vs. cutting back to ground level).
- ● Weather check – Prune on a dry, overcast day to reduce stress on plants.
- ● Sharp tools only – Dull blades tear stems, inviting disease. Hone blades with a file or whetstone before starting.
Step-by-Step guide to pruning perennial flowers for year-round blooms
Here’s how I keep my perennials thriving and blooming like clockwork—no guesswork, just precision.
✂️ Step 1: Identify the Right Time for Each Type
Not all perennials bloom at the same time, and pruning at the wrong season can kill next year’s flowers. Early bloomers like bleeding heart and lungwort need pruning right after they finish flowering in early summer—never in fall. Late bloomers like coneflower and black-eyed Susan can wait until late winter or early spring. I always check my notes from last year to remember which plants need when.
If you’re unsure, look for dead or brown stems—those can go first. Live stems with green buds or leaves are still active and should stay until their natural time. This ensures you’re never cutting off next season’s growth by accident.
✂️ Step 2: Clean Up Dead and Diseased Stems First
Grab your sterilized pruners and start by removing any stems that are black, mushy, or covered in spots. These are either dead or infected, and leaving them behind spreads disease or invites pests. Cut back to healthy green tissue—you’ll see a clear transition where the stem turns from brown to green. This step keeps your plants strong and prevents problems before they start.
Don’t toss those cuttings in the compost unless you’ve confirmed they’re just dead (not diseased). If they’re moldy or slimy, bag them up and throw them in the trash. I always clean my pruners with rubbing alcohol between cuts to keep everything sanitized.
✂️ Step 3: Shape the Plant for Airflow and Light
Now’s the time to give your perennials a little haircut—literally. Step back and look at the plant as a whole. You want to remove up to one-third of the oldest stems to encourage new growth from the base. Cut just above a leaf node or bud (that little bump where leaves or branches grow out). This ensures the plant knows where to send energy for fresh shoots.
Thin out crowded stems so air can circulate freely. You’ll notice the center of the plant opening up, which prevents fungal issues like powdery mildew. If a stem is growing at a weird angle or looks weak, snip it off at the base. This keeps the plant’s energy focused on strong, upright growth.
⏰ Step 4: Time Late-Winter Pruning for Early Spring Growth
For late-winter pruning (usually February or March in most climates), cut back dead or weak stems to about 6 inches above the ground. This gives the plant a fresh start and encourages vigorous new growth. Look for green buds at the base—these are your promise of next season’s blooms. If you see none, don’t panic; some perennials like peony and iris need to be left alone until after flowering.
After pruning, give your plants a light layer of mulch (about 2-3 inches) to protect roots and retain moisture. This is also a great time to add a balanced fertilizer to give them a nutrient boost for the growing season ahead. I like to water deeply after pruning to help the plant recover faster.
🌿 Step 5: Monitor and Adjust Throughout the Season
Perennials don’t just bloom once and call it a day. After the first flush of flowers, many need a light trim to encourage a second round. For example, shasta daisy and bee balm often rebloom if you deadhead spent flowers (cut just above the next set of leaves). Watch for wilted or fading blooms—these are your cues to snip them off.
If your plant starts looking leggy or sparse, it might need a mid-season trim to redirect energy. Just like with haircuts, perennials respond well to regular maintenance. I check my garden every 2-3 weeks during the growing season to stay on top of it—it only takes a few minutes per plant.
Tips & tricks for perfect perennial pruning
Precision timing and technique make all the difference when pruning perennials—here's how to avoid common mistakes and get the best results.
Seasonal Timing: The timing in Step 1 is crucial because early bloomers like bleeding heart need that early summer pruning right after flowering to avoid cutting off next year's buds. I keep a simple garden journal noting when each plant blooms and when I prune—it's saved me from making costly mistakes. For late bloomers like coneflower, that February/March pruning gives them time to develop new growth before spring warmth arrives.
Pruner Care: Sterilizing your pruners between cuts (as mentioned in Step 2) isn't just about sanitation—it prevents spreading diseases between plants. I keep rubbing alcohol in a small spray bottle near my gardening tools and wipe them down after every 3-4 cuts. For larger gardens, consider using separate pruners for healthy plants versus diseased ones. This simple habit keeps your entire garden thriving.
Visual Cues: When shaping plants in Step 3, look for those leaf nodes or buds—they're your plant's growth points. I learned this the hard way by cutting too close to the base and nearly losing a prized hosta! Cut just above that bump, and you'll encourage strong new growth. For crowded centers, thin stems gradually over 2-3 weeks to avoid shocking the plant all at once.
Post-Pruning Care: That 2-3 inch layer of mulch in Step 4 does more than protect roots—it helps regulate soil temperature and reduces water evaporation. I always add a slow-release fertilizer at this time too, giving my perennials a nutrient boost right when they need it most. The deep watering after pruning helps the plant recover faster by replenishing moisture lost during cutting.
Pro Tips for Pruning Perennial Flowers
- Precision timing and technique make all the difference when pruning perennials—here's how to avoid common mistakes and get the best results.
- Seasonal Timing: The timing in Step 1 is crucial because early bloomers like bleeding heart need that early summer pruning right after flowering to avoid cutting off next year's buds.
- Pruner Care: Sterilizing your pruners between cuts (as mentioned in Step 2) isn't just about sanitation—it prevents spreading diseases between plants.
Frequently asked questions
Got questions about keeping your perennials blooming beautifully? Here are some of the most common ones—and the answers you need to prune with confidence!
When is the best time to prune perennial flowers?
The ideal timing depends on the plant! For spring-bloomers (like peonies or lilacs), prune right after flowering to avoid cutting off next year’s buds. Summer-bloomers (such as coneflowers or black-eyed Susans) can be trimmed in early spring or after the first flush of blooms to encourage continuous reblooming. Deadhead faded flowers year-round to prompt more blossoms.
How much should I cut back my perennials?
Most perennials benefit from 1/3 to 1/2 of their height removed, but avoid over-pruning. For example, hardy perennials like sedum can be cut back by 50% in spring, while delicate stems (e.g., hostas) only need light trimming. Always leave some foliage to protect the crown from frost and pests.
Can I prune perennials in winter?
Winter pruning is not recommended for most perennials, as it exposes tender stems to cold damage. However, grasses and ornamental plants like Russian sage can be trimmed in late winter for shape. Wait until early spring (when new growth appears) for most varieties to avoid cutting back next year’s blooms.
What if I prune at the wrong time?
Mistakes happen! If you prune too early (e.g., cutting back spring bloomers before they flower), you may lose that season’s blooms—but the plant should recover. For severe over-pruning, water deeply and fertilize lightly to help regrowth. Pro tip: Take a photo before pruning to reference later!
Are there perennials that don’t need pruning?
Some perennials, like lavender or Russian sage, thrive with minimal pruning—just trim dead or woody stems in early spring. Others, such as heuchera or hostas, rarely need pruning unless they look messy. Focus on deadheading and removing spent foliage to keep the garden tidy without overworking it.
Wrapping up and next steps
Pruning perennial flowers isn’t just about tidying up—it’s your secret weapon for longer blooms, healthier plants, and a garden that bursts with color year after year. 🌸 By mastering the right timing and techniques, you’ll transform even the most stubborn perennials into showstoppers.
Now that you’re armed with the know-how, grab those shears and get pruning! Start small with one bed or plant, observe how it responds, and let your confidence—and your garden—grow.
🌱 Next Step: Plan Your Pruning Schedule
Create a simple calendar with key deadlines (like early spring for early bloomers or late winter for late bloomers). Pro tip: Mark it on your phone or fridge—out of sight, out of mind means missed opportunities! Happy pruning, and here’s to a garden that steals the show. 🌺