
Flowers
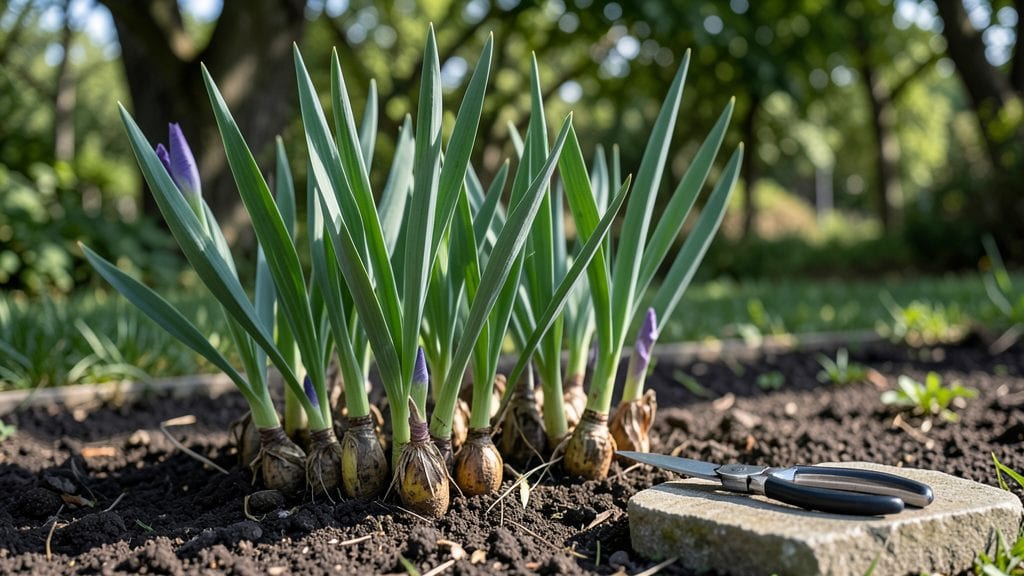
Growing this iris flower rhizome is where the magic of bold, repeat blooms begins—just don’t plant them too deep. 🌿 I’ve divided and replanted dozens of iris clumps, and the difference between a thriving patch and a sad, yellowing mess often comes down to that one mistake: burying the rhizomes too far underground.
The key is exposing the top third of each rhizome to sunlight, which helps prevent rot and encourages those signature sword-shaped leaves. You’ll need a sunny spot with well-draining soil, a sharp knife for dividing, and a 3-inch spacing between each rhizome.
The process takes about 30 minutes and transforms a clump into a showstopper by next spring.
What you’ll end up with are clusters of vibrant purple, yellow, or white blooms that return year after year with minimal effort. The secret lies in the dormancy period—iris rhizomes need that dry, cool rest to recharge for their next burst of color. No fertilizing during dormancy, just patience.
Works in zones 3-9, whether you’re refreshing an old border or starting a new one. Here’s how to get those rhizomes in the ground the right way—no guesswork, just blooms.
📚 In This Guide
- What you need
- Instructions
- Tips and common mistakes
- Wrapping up and next steps
What you need
- ● Mature iris rhizomes: Healthy, established rhizomes (3+ years old) with visible fan-like leaves and dormant buds (look for plump, firm sections). Quantity: 3–5 per division project.
- ● Sharp garden knife or pruning shears: Sterilized (rubbing alcohol wipe) to prevent disease. Spec: Stainless steel, 4–6" blade.
- ● Garden gloves: Heavy-duty (nitrile-coated) to protect against thorns and soil-borne pathogens.
- ● Well-draining potting mix or garden soil: Amend with compost (20%) and sand/perlite (10%) for aeration. pH: 6.0–7.0 (test kit recommended).
- ● Raised beds or containers: Size: At least 12" deep (iris rhizomes need room to spread). Drainage: Bottom holes + gravel layer.
- ● Hose with gentle spray nozzle: For rinsing rhizomes post-division.
- ○ Fungicide (optional but helpful): Copper-based or neem oil spray to treat cuts and prevent rot.
- ● Mulch (straw or pine needles): 2–3" layer to retain moisture and suppress weeds.
- ● Stakes or labels: Biodegradable markers to track divisions (if planting multiple varieties).
- ● Timing: Divide iris rhizomes in early spring (March–April) or late summer (August–September)—avoid peak bloom season!
- ● Weather: Overcast day or late afternoon to reduce transplant shock.
- ● Location: Full sun (6+ hours daily) and protection from strong winds.
Step-by-Step instructions for dividing iris rhizomes
Here's how to multiply your irises while ensuring each new plant thrives with vibrant blooms.
🌱 Step 1: Choose the Right Time and Prepare the Site
Divide iris rhizomes in early fall or late winter when the plant is dormant. This timing gives roots time to establish before the growing season. Choose a location with full sun—at least 6 hours daily—and well-draining soil. Irises hate soggy roots, so amend heavy soil with sand or grit if needed.
Clear the area of weeds and loosen the soil to a depth of 12 inches with a garden fork. Work in a 2-foot circle around each clump to avoid disturbing nearby plants. The goal is to create loose, aerated soil that encourages root spread. If your soil is poor, mix in 2 inches of compost—just enough to improve drainage without making it too rich.
✂️ Step 2: Dig Up and Separate the Rhizomes
Use a spade to carefully lift the entire iris clump, keeping the rhizomes intact. Shake off excess soil to reveal the fan-shaped roots and thick, horizontal rhizomes. Look for 3-4 mature rhizomes connected by smaller offshoots—this is your division point. Each section should have at least one healthy fan of leaves and 2-3 rhizome segments.
Gently pull or cut the clump apart with a sharp knife, ensuring each piece has roots and a growth point. Discard any shriveled or mushy rhizomes—they won’t regrow. Here’s the thing: don’t rush—take your time to avoid damaging the delicate roots. If a piece feels too small, leave it attached to a larger section rather than forcing a weak division.
💧 Step 3: Replant the Divided Rhizomes
Dig small holes 2-3 inches deep and 12 inches apart—irises need space to spread. Place each rhizome segment halfway exposed above the soil. The top should curve upward slightly, never buried completely. This positioning prevents rot while allowing roots to grow downward.
Backfill with soil and water lightly to settle the roots. Avoid heavy watering—irises are drought-tolerant once established. Mulch with 1 inch of gravel or coarse sand around the base to improve drainage and deter weeds. This step is critical: never cover the rhizomes entirely, or they’ll suffocate.
☀️ Step 4: Maintain and Encourage Blooms
Keep the soil dry to the touch for the first 2-3 weeks after replanting. Irises thrive on neglect once established—water only during prolonged dry spells. Fertilize lightly in early spring with a balanced 10-10-10 formula, using ½ teaspoon per plant. Too much nitrogen leads to leafy growth but fewer blooms.
Deadhead spent blooms by cutting the flower stalk at the base. This redirects energy to next year’s flowers. In late fall, trim the leaves back by ⅓ to reduce winter damage. You’ll see new growth in spring—bold, repeat blooms are your reward for proper division. Watch for yellowing leaves in summer; this signals overwatering or poor drainage.
Tips & tricks for perfect iris rhizome division
A few key insights will help you avoid common mistakes and ensure your divided iris rhizomes thrive for years to come.
The Timing Factor: Early fall or late winter division gives roots time to establish before the growing season kicks in. I've learned this the hard way—dividing in spring can stress plants when they're already pushing new growth. If you miss these windows, you can still divide in early summer, but be prepared to provide extra care like consistent watering during the first growing season.
Root Health Check: When separating rhizomes in Step 2, look for firm, plump segments with smooth surfaces. Shriveled or mushy sections won't survive—discard them immediately. Here's what nobody tells you: the rhizome's top should curve upward naturally. If it's flat or concave, it's likely been overwatered or damaged. Cut only between the segments where you see natural divisions, never through healthy tissue.
Planting Position: The half-exposed planting method in Step 3 is crucial—never bury the rhizomes completely. I've seen beginners cover them entirely, which leads to rot. The top should curve upward slightly above soil level, with only the roots buried. This positioning mimics their natural habitat and prevents suffocation. Use a small stick to mark each planting spot if you're working with many divisions—it helps maintain proper spacing.
Post-Planting Care: Those first 2-3 weeks after replanting are critical. Keep soil dry to the touch—irises are drought-tolerant once established, but newly divided roots need time to adapt. I've made the mistake of overwatering during this period, which led to yellowing leaves and poor blooms. After the initial 2-3 weeks, you can reduce watering to only during prolonged dry spells, but don't neglect completely—irises need some moisture to thrive.
Pro Tips for Iris Flower Rhizome
- A few key insights will help you avoid common mistakes and ensure your divided iris rhizomes thrive for years to come.
- The Timing Factor: Early fall or late winter division gives roots time to establish before the growing season kicks in.
- Root Health Check: When separating rhizomes in Step 2, look for firm, plump segments with smooth surfaces.
Frequently asked questions
Got questions about iris rhizomes?
You’re not alone! Whether you're a beginner or a seasoned gardener, these answers will help you grow stunning irises with confidence.
When is the best time to divide iris rhizomes?
The ideal time to divide iris rhizomes is late summer to early fall (after blooming but before the first frost). This gives the roots time to establish before winter. Avoid spring division—new growth may be damaged by late frosts.
How do I know if my iris rhizome is healthy enough to divide?
A healthy rhizome is firm, plump, and has multiple fan-shaped leaves (each fan = one plant). Avoid dividing shriveled, mushy, or pest-damaged rhizomes—these may not survive. Look for rhizomes with at least 2-3 leaves per section for best results.
Can I divide iris rhizomes in pots? What’s the best container size?
Yes! Use containers at least 12 inches deep with drainage holes. Place rhizomes half-buried (top exposed to sunlight) in well-draining soil. Pots limit root spread, so divide every 2-3 years to prevent overcrowding.
Why aren’t my iris rhizomes blooming after division?
Newly divided irises often take 1-2 years to rebloom. Ensure they get full sun (6+ hours/day) and well-draining soil. Overwatering or poor light can delay flowers. Patience pays off!
What can I do with extra iris rhizomes I don’t need?
Share them! Iris rhizomes multiply easily—gift them to fellow gardeners or trade for other plants. You can also dry and store healthy rhizomes in a cool, dark place for future planting (replant in spring). Just avoid overwatering stored rhizomes.
Wrapping up and next steps
Growing iris flower rhizomes is a rewarding journey that unlocks bold, repeat blooms year after year! 🌸 Whether you're a seasoned gardener or a beginner, mastering root division ensures vibrant, healthy plants. The key? Timing, patience, and proper care—now you’re equipped with all the secrets to success.
Ready to transform your garden? Start by dividing your rhizomes this fall or early spring, and watch your irises thrive. Share your progress or ask questions—we’re here to cheer you on! 🌿✨