
Shrubs
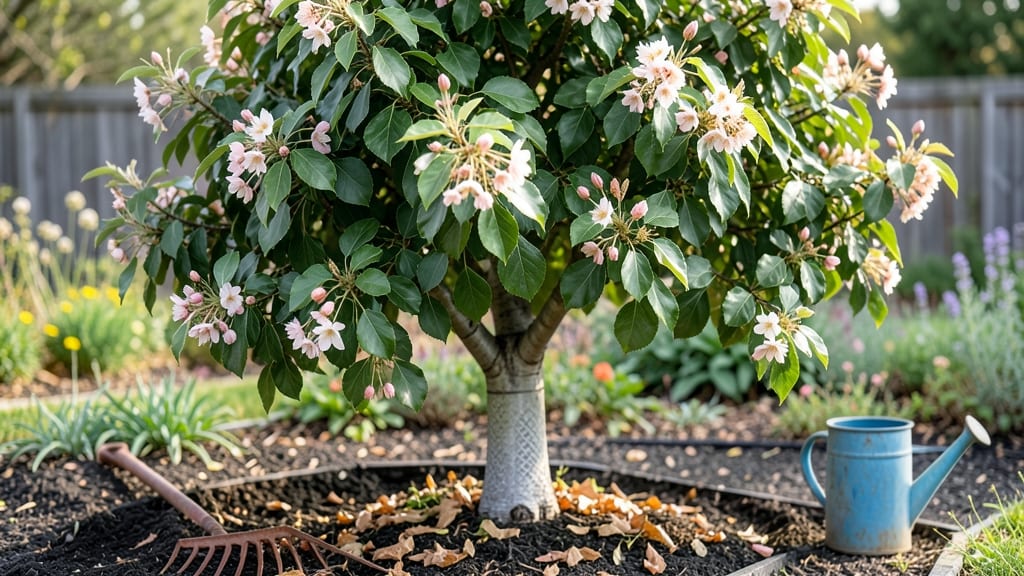
Flowering pear leaf shrubs can throw a tantrum with yellowing, spotted, or curling leaves—usually because of overwatering, pests, or fungal infections. I’ve nursed back more than my share of stressed shrubs, and the key is catching problems early before they spiral.
The first step is figuring out what’s actually wrong: Is it powdery mildew clinging to the undersides of leaves, or are those tiny bumps scale insects? Once you know the enemy, you can prune strategically and treat it without harming the plant.
Pruning isn’t just about shaping—it’s about airflow and sunlight. When you see those telltale signs of stress, start by removing any dead or diseased branches first. Use clean, sharp pruners and cut just above a leaf node or bud to encourage new growth.
For fungal issues like powdery mildew, prune in the morning so the plant dries quickly, and avoid wetting the leaves when watering. If pests are the culprit, a strong spray of water can knock off scale insects, and neem oil is your best organic ally for long-term control.
After pruning, your shrub should bounce back with fresh, vibrant leaves and even more blooms next season. The goal is to keep it looking lush and healthy, not just cutting back.
Focus on the areas that need the most attention—like the center where branches crowd together—and you’ll see a noticeable difference within weeks. The right approach turns a struggling shrub into a showstopper that keeps flowering all season long.
This method works for both young and mature flowering pear leaf shrubs, whether you’re dealing with a single plant or a row of them. The key is consistency: check your shrubs regularly, prune as needed, and treat problems before they spread.
With a little attention, your shrubs will reward you with stunning blooms and glossy leaves year after year.
📚 In This Guide
- What you need
- Instructions
- Tips and common mistakes
- Wrapping up and next steps
What you need
- ● Pruning shears: Bypass pruners with sharp, clean blades (for cuts up to ½ inch thick). Pro tip: Sterilize with rubbing alcohol before and after use to prevent disease spread! 🔥
- ● Loppers: One pair with a 6-8 inch blade (for thicker branches up to 2 inches in diameter).
- ● Pruning saw: A fine-toothed handsaw for branches thicker than 2 inches.
- ● Gloves: Heavy-duty gardening gloves (cut-resistant for safety).
- ● Disposable pruning bags or bucket: For collecting and disposing of clippings (1-2 gallon size).
- ● Rubbing alcohol (70% isopropyl) or bleach solution: For sanitizing tools between cuts.
- ● Sharpie or permanent marker: To label branches if you’re doing structured pruning (e.g., shaping).
- ● Ladder or step stool: If your shrub is taller than 6 feet (ensure it’s stable and rated for your weight).
- ● Hand pruners with a crimping tool: For sealing larger cuts and reducing sap bleed.
- ● Pruning sealant: (e.g., tree wound dressing) for cuts larger than ½ inch in diameter.
- ● Notebook or pruning log: To track cuts, dates, and growth progress over time.
- ● Safety glasses: To protect your eyes from debris.
- ● Knee pads or cushion: For comfort if you’re working on the ground.
Step-by-step pruning guide for flowering pear leaf shrubs
Here’s how to keep your flowering pear leaf shrub lush and blooming all season long.
Time Your First Pruning for Early Spring
Prune your flowering pear leaf shrub as soon as new growth begins in early spring, usually around late February to March. This is the best time because the plant is just waking up from dormancy, and fresh buds are forming. Avoid pruning in fall or winter, as cold stress can harm the plant.
Look for 1-2 inch green shoots at the base of the shrub—this is your signal that it’s time to start. If you prune too early, you risk cutting off next season’s blooms. If you wait too long, you may remove too much of the current year’s growth.
Remove Dead or Damaged Branches First
Start by cutting out any dead, broken, or diseased branches with clean, sharp pruners. These branches won’t produce blooms and can spread disease to healthy parts of the plant. Cut all the way back to the main stem or a healthy lateral branch.
If you see branches with blackened tips, holes, or odd growths, these are signs of pests or disease. Remove them immediately and dispose of them in the trash—not the compost—to prevent reinfestation. Healthy branches should have a smooth, green bark with no signs of damage.
Thin Out Crowded Branches for Better Airflow
Next, focus on thinning the shrub by removing overlapping or crossing branches that rub against each other. These branches compete for sunlight and nutrients, which weakens the plant and reduces blooms. Aim to create an open, airy shape that allows light to reach the center.
Cut branches back to a healthy lateral branch or bud, making sure to leave a slight outward angle. This encourages outward growth rather than a dense, inward-facing canopy. If a branch is too thick to cut by hand, use your pruners to make a clean cut just outside the branch collar.
Shape the Shrub for Balanced Growth
Now, lightly shape the shrub by trimming back overly long branches to maintain a natural, rounded form. Avoid cutting more than one-third of the shrub’s total growth in a single season—this can stress the plant and reduce flowering. Focus on branches that are growing too tall or leggy.
Make cuts just above a leaf node or outward-facing bud to encourage new growth in the right direction. If you’re unsure where to cut, look for a small bump or swelling on the branch—this is where new growth will emerge. Step back occasionally to check your progress and ensure the shrub looks balanced.
Lightly Prune After Each Blooming Cycle
Once your flowering pear leaf shrub finishes blooming, give it a light trim to remove spent flowers and encourage another round of blooms. This is called deadheading, and it keeps the plant looking tidy while stimulating new growth. Use your fingers or small pruners to pinch off faded blooms just above the next set of leaves.
If the shrub looks overly full after blooming, you can also thin out a few branches to improve airflow and prevent disease. Avoid heavy pruning at this stage—just a light touch keeps the plant healthy and encourages continuous flowering. Water deeply after pruning to help the shrub recover.
Tips & tricks for perfect flowering pear leaf shrub pruning
Mastering the art of pruning your flowering pear leaf shrub transforms it from a simple garden plant into a year-round showstopper. Here are the key insights I’ve gathered after years of working with these beauties.
Timing is Everything: The late February to March window for your first pruning is non-negotiable. I’ve learned the hard way that pruning too early risks cutting off next year’s flower buds while waiting too long removes too much current growth. Look for those 1-2 inch green shoots as your definitive signal—this is when the plant is actively preparing for its blooming season. If you miss this window, you’ll notice fewer blooms later in the year.
Tool Preparation Matters: Never underestimate the importance of clean, sharp pruners. I always sterilize my tools with rubbing alcohol before starting to prevent spreading any potential diseases between cuts. For thicker branches, make sure your pruners are sharp enough to cut cleanly without tearing the bark. This clean cut promotes faster healing and reduces the risk of infection. I also keep a small spray bottle of water handy to clean my tools between cuts when dealing with diseased branches.
Visual Pruning Cues: When shaping your shrub in Step 4, focus on the outward-facing buds when making your cuts. These buds will grow away from the center of the plant, creating that beautiful rounded shape we’re aiming for. I always step back every few cuts to check the overall shape—this helps me see what needs more attention. Look for those small bumps or swellings on the branches; these are your growth points and should be your target when pruning for shape.
Seasonal Maintenance Strategy: After your initial spring pruning, establish a light maintenance routine. Deadheading spent blooms right after they fade encourages more flowers to form. I’ve found that giving the plant a deep watering immediately after pruning helps it recover faster and reduces stress. For larger shrubs, I schedule a light thinning every 6-8 weeks during the growing season to maintain airflow and prevent disease buildup.
Pro Tips for Flowering Pear Leaf
- Mastering the art of pruning your flowering pear leaf shrub transforms it from a simple garden plant into a year-roun...
- Timing is Everything: The late February to March window for your first pruning is non-negotiable. I’ve learned the ha...
- Tool Preparation Matters: Never underestimate the importance of clean, sharp pruners. I always sterilize my tools wit...
Frequently asked questions
Got questions about keeping your flowering pear leaf shrub thriving?
Here are answers to the most common concerns—from pruning timing to troubleshooting leaf issues—so you can enjoy lush blooms all season!
When is the best time to prune a flowering pear leaf shrub?
The ideal time is late winter or early spring (before buds swell) to shape the shrub and encourage new growth. Avoid pruning in fall or during flowering season, as this can reduce next year’s blooms. For light shaping, you can also prune lightly after blooming, but avoid heavy cuts.
How do I prune dead or diseased branches?
Use clean, sharp pruners to cut just above a healthy bud or branch at a 45-degree angle. Remove any branches that are brown, mushy, or oozing sap—these are signs of disease. Sterilize your tools with rubbing alcohol between cuts to prevent spreading pathogens. Pro tip: Bag and dispose of infected branches immediately!
Why are my flowering pear leaves turning yellow?
Yellowing leaves (chlorosis) often signal overwatering, nutrient deficiency, or fungal issues. Check soil moisture—pearl leaf shrubs prefer well-draining soil. If yellowing starts at the edges, it may be iron deficiency; amend soil with chelated iron or compost. For fungal spots, prune affected leaves and apply fungicide if needed.
Can I still get flowers if I prune too late?
Pruning after mid-summer risks removing next year’s flower buds (which form on old wood). However, if you prune lightly for shape or safety, you’ll still get some blooms—just fewer. For heavy pruning, wait until late winter to avoid sacrificing flowers. Pro tip: Focus on removing only dead or crossing branches if late pruning is unavoidable.
What’s a good alternative if my pear leaf shrub isn’t blooming?
If your shrub struggles with blooms, consider ‘Aristocrat’ or ‘Capital’ varieties, which are more reliable. Alternatively, try ornamental pear (Pyrus calleryana) or serviceberry (Amelanchier) for similar foliage and flowers. Both thrive in similar conditions but may offer better bloom consistency. Bonus: Mulch and fertilize with low-nitrogen, high-phosphorus food to boost flowering!
Wrapping up and next steps
Mastering the art of pruning your flowering pear leaf shrub is all about timing, technique, and a little patience—just like nurturing any beloved plant! With the right tools, a clear plan, and seasonal care, you’ll enjoy stunning, season-long blooms that turn heads year after year. 🌸
Ready to take your shrub to the next level? Start small: pick one pruning session this season to practice, then gradually refine your approach. Before you know it, your flowering pear will be the star of your garden! 🌿