
Tools
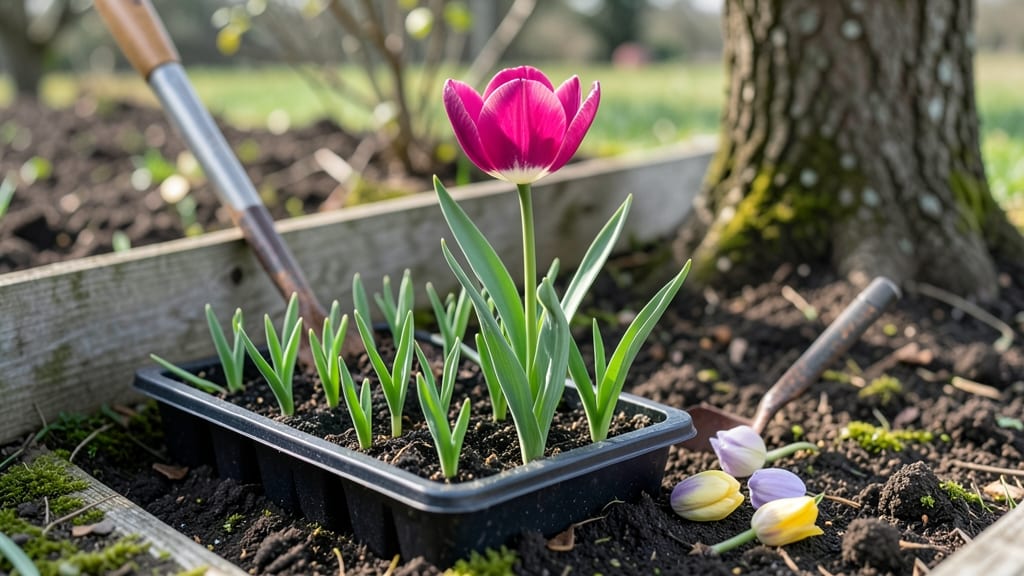
A flower bulb garden bursting with color doesn’t need constant watering or high-maintenance care—just the right drought-resistant varieties planted in layers.
I learned this the hard way after my first garden wilted under summer heat, but now my front yard stays vibrant from early spring through late fall with almost no extra effort.
The secret lies in pairing bulbs that thrive together, like alliums with lavender or daffodils with ornamental grasses, creating a tapestry that blooms in waves.
Start with a sunny spot and well-draining soil—most drought-tolerant bulbs hate soggy roots. My go-to combo includes tulips, alliums, and crocosmia, which handle dry spells once established. For containers, mix daffodils with sedum or hyacinths with sempervivum—both stay lush with minimal watering.
The key is spacing bulbs 3–6 inches apart so they fill in without competing for moisture, and mulching with gravel or straw to lock in what little rain you get.
Picture this: purple alliums popping against silver foliage in June, followed by golden crocosmia swaying in August, then red amaryllis lighting up November. The colors shift seasonally, but the garden never looks bare.
Even in Zone 5 winters, these bulbs return year after year, their deep roots anchoring them through droughts and cold snaps. You’ll spend less time fussing and more time admiring how effortlessly beautiful it stays.
Works in borders, pots, or meadow-style plantings—just adjust spacing for the look you want. For extra staying power, add perennials like catmint or Russian sage to fill gaps between bulb blooms.
The best part? Once planted, these gardens practically take care of themselves. Ready to create a low-water showstopper that keeps coming back?
📚 In This Guide
- What you need
- Instructions
- Tips and common mistakes
- Wrapping up and next steps
What you need
- ● Flower bulbs: Choose drought-resistant varieties like Allium, Daffodils, Lavender, or Tulips. Aim for 10–20 bulbs per square foot (adjust based on size).
- ● Well-draining soil: Mix 1 part compost with 2 parts native soil (or use pre-mixed bulb planting soil).
- ● Organic mulch: 2–3 inches of shredded bark, straw, or wood chips to retain moisture.
- ● Garden trowel or bulb planter (for precise digging).
- ● Garden fork or spade (to loosen soil).
- ● Measuring tape or ruler (for spacing bulbs 3–6 inches apart, depending on variety).
- ● Watering can or hose with a gentle nozzle (for post-planting hydration).
- ● Drip irrigation system (to automate watering in dry spells).
- ● Slow-release fertilizer (like bone meal or bulb-specific granules).
- ● Garden stakes or labels (to track varieties and planting dates).
- ● Rain gauge (to monitor drought conditions).
Step-by-step guide to designing a drought-resistant flower bulb garden
Here's how to create a vibrant, low-maintenance flower bulb display that thrives with minimal water.
Select the Right Drought-Tolerant Bulbs
Choose bulbs known for their resilience in dry conditions, such as daffodils, alliums, lavender, and agapanthus. These varieties store moisture efficiently and require far less supplemental watering once established. I always prioritize bulbs with thick, fleshy roots or waxy leaves—they're nature's water tanks. For a 4-plant garden, select a mix of early, mid, and late-season bloomers to ensure continuous color from spring through fall.
Check the USDA hardiness zone recommendations for each bulb type to ensure they'll survive your local winters. For example, daffodils thrive in zones 3-8, while agapanthus prefers zones 7-10. Planting outside these zones risks poor growth or bulb rot. I recommend sticking to bulbs rated for your specific zone to avoid disappointment.
Prepare the Soil for Optimal Drainage
Bulbs rot quickly in soggy soil, so focus on creating a well-draining foundation. Amend your native soil with 2-3 inches of coarse sand or perlite mixed into the top 6 inches of planting area. This creates pockets for excess water to escape. For containers, use a blend of 50% potting mix and 50% perlite or pumice—this mimics the fast-draining conditions bulbs crave.
Test your soil's drainage by digging a 6-inch hole, filling it with water, and timing how long it takes to drain. If it takes longer than 10-15 minutes, add more sand or create raised beds. Bulbs planted in heavy clay soil often fail because their roots suffocate. A quick fix is to mound soil into a small hill where you'll plant, ensuring the bulbs sit above the surrounding grade.
Plant Bulbs at the Correct Depth and Spacing
Dig holes 3 times as deep as the bulb's height—for example, a 2-inch-tall bulb goes in 6 inches deep. Planting too shallow risks frost damage in winter or poor root establishment. Space bulbs 3-6 inches apart, depending on their mature size, to allow room for foliage growth. I like to arrange them in odd-numbered groups (3, 5, or 7) for natural-looking clusters that catch the eye.
Place each bulb with its pointed end facing upward—this ensures the shoot grows toward the surface. If you're unsure, the heavier base naturally orients correctly. After planting, cover the area with 2-3 inches of mulch to retain minimal moisture and suppress weeds. Avoid organic mulches like wood chips, which can compact and reduce drainage over time.
Water Deeply After Planting and Adjust Care
Water the garden immediately after planting to settle the soil around the bulbs, then reduce irrigation to once every 2-3 weeks unless your region experiences extreme heat. Overwatering is the fastest way to kill bulbs—roots rot in saturated conditions. Instead, focus on deep waterings that encourage strong root development. You'll know you're doing it right when the soil feels dry 2 inches below the surface between waterings.
Fertilize lightly in early spring with a balanced, slow-release bulb fertilizer (10-10-10 ratio) to support bloom production. Avoid high-nitrogen fertilizers, which promote leafy growth at the expense of flowers. Once foliage yellows after blooming, stop watering entirely to allow the bulbs to store energy for next year. This dormancy period is critical for drought-resistant varieties.
Maintain and Extend the Garden's Lifespan
Deadhead spent blooms promptly to redirect the plant's energy into bulb storage rather than seed production. For bulbs like alliums, simply snip the flower stalk at the base once it browns. In contrast, leave the foliage intact until it turns yellow—this process recharges the bulb for next season. I mark each planting spot with a small stake or pebble to avoid disturbing bulbs during maintenance.
After 3-4 years, divide and replant bulbs that have multiplied or crowded their neighbors. Dig up clumps in early summer, separate the bulbs gently, and replant the healthiest specimens. This rejuvenates the garden and prevents disease spread from overcrowded roots. With proper care, your drought-resistant bulb garden will reward you with years of low-water, high-impact color.
Tips & tricks for perfect drought-resistant flower bulb gardens
Creating a thriving bulb garden that requires minimal water isn't just about selecting the right varieties—it's about understanding their unique needs and implementing strategies that maximize their natural resilience.
Bulb Selection Strategy: While daffodils, alliums, lavender, and agapanthus are excellent choices, consider adding crocus or grape hyacinths for early spring color—they're equally drought-tolerant once established. For containers, I recommend smaller bulbs like snowdrops or muscari as they handle confined spaces better. Always check the bulb's mature height to ensure proper spacing; for example, agapanthus can reach 3-4 feet tall, while alliums typically stay under 2 feet. This prevents overcrowding that leads to weaker blooms.
Soil Preparation Insight: The 10-15 minute drainage test is your best friend when preparing soil. If water lingers beyond this timeframe, you're dealing with clay-heavy soil that needs significant amendment. For heavy clay soils, consider creating raised beds with a 50-50 mix of native soil and coarse sand or perlite—this dramatically improves drainage while maintaining nutrient availability. In containers, I've found that adding a 2-inch layer of gravel or expanded shale at the bottom creates additional drainage space without sacrificing planting depth.
Planting Depth Precision: The "3 times the bulb's height" rule is non-negotiable for winter hardiness, but there's a nuance: for bulbs planted in containers, you can reduce this to 2.5 times since container soils warm up faster in spring. When planting in groups of 3, 5, or 7, I recommend staggering the bulbs slightly rather than planting them in perfect rows—this creates a more natural, layered look that catches the eye from multiple angles. For larger bulbs like agapanthus, consider planting them slightly deeper than the standard rule to provide additional frost protection.
Watering Wisdom: The "dry 2 inches below the surface" guideline is perfect for most climates, but in extremely hot regions, you might need to adjust to checking at 3 inches deep—bulbs in these areas develop deeper root systems. When watering, aim for 1 inch of water per week during the growing season, delivered in one deep session rather than frequent shallow waterings. This encourages roots to grow deeper in search of moisture, making them more drought-resistant over time. I've seen bulbs that receive this deep watering regimen survive on half the water of those given frequent light waterings.
Pro Tips for Flower Bulb Garden
- Creating a thriving bulb garden that requires minimal water isn't just about selecting the right varieties—it's about...
- Bulb Selection Strategy: While daffodils, alliums, lavender, and agapanthus are excellent choices, consider adding cr...
- Soil Preparation Insight: The 10-15 minute drainage test is your best friend when preparing soil. If water lingers be...
Frequently asked questions
Got questions about creating a stunning, low-maintenance flower bulb garden?
You’re not alone! Here are answers to the most common queries—from planting tips to troubleshooting—so you can dive in with confidence.
When is the best time to plant flower bulbs for year-round blooms?
Most bulbs thrive when planted in fall (6–8 weeks before the ground freezes), but timing varies by climate. Spring-bloomers like tulips and daffodils go in autumn, while summer varieties (e.g., dahlias) wait until spring. Check your USDA hardiness zone for specifics—cool seasons are key for root establishment!
How do I keep my drought-resistant bulb garden thriving with minimal water?
Drought-tolerant bulbs (like Allium or Lavender) store water naturally, but mulching with 2–3 inches of organic matter (straw, wood chips) locks in moisture. Water deeply once a week during dry spells—bulbs hate soggy soil, so ensure well-draining soil. Group plants with similar needs to simplify care!
What’s the easiest way to protect bulbs from pests like squirrels or deer?
Squirrels and deer adore tulips and crocuses! Use chicken wire cages (temporarily) or plant bulbs near daffodils—their toxic sap deters critters. For deer, opt for wildflower bulbs (e.g., Camassia) or apply repellent sprays in early spring. A little prevention saves a lot of frustration!
Can I grow flower bulbs in containers, or do they need a garden bed?
Containers work great for small bulbs like hyacinths or grape hyacinths. Use pots with drainage holes, fill with bulb-specific soil mix, and plant 3–4 bulbs per 6-inch container. Place in sunny spots and overwinter indoors if temps drop below 20°F. Just avoid overcrowding—bulbs need room to multiply!
What should I do if my bulbs don’t bloom the first year?
Don’t panic! Many bulbs (especially perennials like Allium) take 1–2 years to establish roots before flowering. Ensure they’re in full sun (6+ hours/day), well-draining soil, and protected from frost. If leaves die back early, they may need more nutrients—add a balanced fertilizer in early spring. Patience pays off!
How do I revive a bulb garden that’s looking tired or overgrown?
Dig up and divide clumps every 3–5 years to refresh growth. Separate offset bulbs, discard soft/moldy ones, and replant healthy sections. Add compost to replenish soil, and rotate varieties to prevent disease. Deadheading faded blooms also encourages stronger regrowth next season!
Wrapping up and next steps
Creating a flower bulb garden with drought-resistant varieties is a rewarding way to bring year-round color to your outdoor space while conserving water. 🌸 From selecting the right bulbs to mastering planting techniques, every step ensures a vibrant, low-maintenance display that thrives in any season.
Whether you're a beginner or a seasoned gardener, the key is patience and a little planning—your future blooms will thank you!
Ready to dive in? Start small—pick 3-5 bulbs to experiment with this fall—and watch your garden transform! For extra inspiration, sketch a simple layout or browse bulb catalogs to find your perfect palette. Happy gardening! 🌱