
Flowers
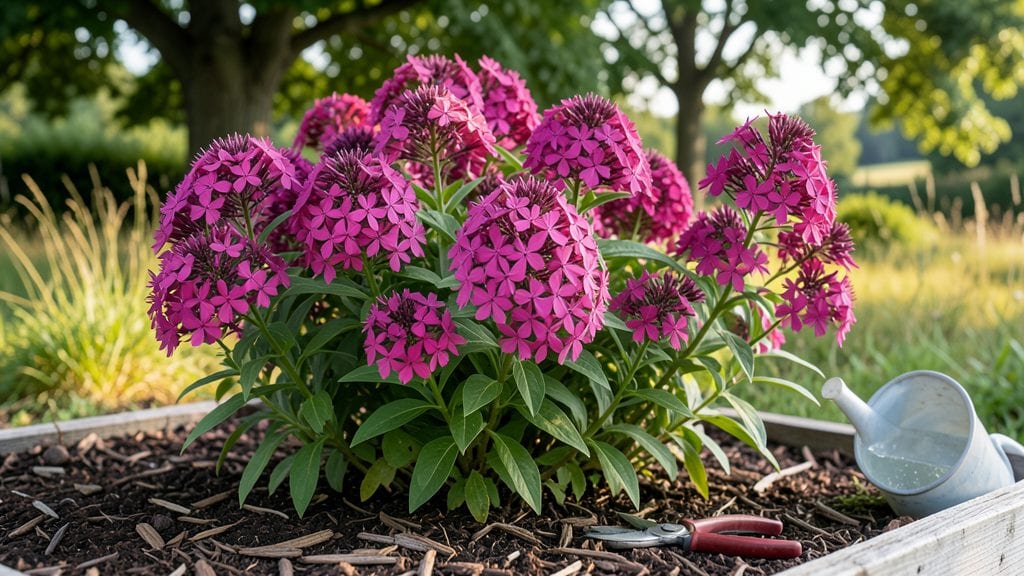
Summer phlox flowers transform any garden into a buzzing, blooming paradise that lasts from June until frost. 🌸 I’ve grown them for years, and nothing beats the sight of bees, butterflies, and hummingbirds swarming these clusters of color—especially when they keep flowering like clockwork all season long.
The secret to their performance starts with the right conditions: full sun, well-draining soil, and consistent moisture without soggy roots. Most gardeners overlook soil prep, but amending with compost at planting time makes all the difference. Once established, these hardy perennials need minimal fuss—just regular deadheading to encourage more blooms.
You’ll end up with vibrant clusters in shades of pink, purple, and white that stay fresh until fall. The fragrance alone makes them worth growing, but the pollinator traffic?
That’s the real magic. Prune back in early spring to keep them tidy, and you’ll have a showstopper that outshines annuals every time.
Works in borders, containers, or cutting gardens—just give them room to spread. Here’s how to keep them thriving all summer long.
📚 In This Guide
- What you need
- Instructions
- Tips and common mistakes
- Wrapping up and next steps
What you need
- ● Summer phlox seeds or plants: Choose from varieties like Phlox paniculata (garden phlox) or Phlox drummondii (annual phlox). Pro tip: 💡 Opt for heirloom or pollinator-friendly seeds for extra vibrancy!
- ● Well-draining potting mix or garden soil: 5–10 gallons (for containers) or amended garden beds (for in-ground planting). Mix in compost (1 part compost to 3 parts soil) for nutrient-rich soil.
- ○ Organic fertilizer: A balanced 10-10-10 or phosphorus-rich (5-10-10) fertilizer to encourage blooming. Optional: Slow-release granules for convenience.
- ● Mulch: 2–3 inches of organic mulch (e.g., shredded bark or straw) to retain moisture and suppress weeds.
- ● Garden trowel or transplant spade (for digging holes, 6–8 inches deep).
- ● Gloves (gardening or work gloves to protect your hands).
- ● Watering can or hose with a gentle spray nozzle (phlox loves consistent moisture!).
- ● Pruning shears (for deadheading spent blooms and shaping plants).
- ○ Optional: Container pots (5–7 inches in diameter for each plant if growing in containers).
- ● Stakes or plant supports (for taller varieties like Phlox paniculata).
- ● Pollinator-friendly companion plants (e.g., bee balm or coneflowers) to attract even more buzzing friends! 🐝
- ● Sunlight: Full sun (6–8 hours daily) for optimal blooming. Partial shade (4–6 hours) works for cooler climates.
- ● Watering schedule: Keep soil consistently moist (not soggy) during the growing season. Drought-tolerant once established!
- ● Planting time: Start seeds indoors 8–10 weeks before last frost or transplant seedlings after frost risk passes. Annual phlox can be sown directly in spring.
- ● Spacer: 12–18 inches between plants (24 inches for large varieties) to allow airflow and prevent disease.
Step-by-Step guide to planting summer phlox for a vibrant pollinator garden
Here’s how to establish these hardy bloomers for months of color and buzzing activity.
🌱 Step 1: Choose the Perfect Planting Site and Prepare the Soil
Summer phlox thrives in full sun to partial shade, with at least 6 hours of direct sunlight daily for optimal blooming. I always test the site first—if the area stays dry and hot by mid-afternoon, add afternoon shade to prevent wilting. The soil should drain well but retain moisture; amending with 2-3 inches of compost improves fertility without compacting.
Dig a hole twice as wide as the root ball but only as deep—phlox roots spread horizontally, so burying too deep suffocates them. Loosen the sides of the hole to encourage root expansion. Real talk: phlox hates soggy feet, so if your soil drains poorly, mix in 1 part perlite to the existing soil before planting.
🪴 Step 2: Plant Bare-Root or Container-Grown Phlox Correctly
For bare-root plants, soak the roots in lukewarm water for 30 minutes before handling to revive them. Position the plant so the top of the root ball sits level with the soil surface—burying the crown too deep causes rot, while planting too high stresses the plant. Gently backfill with the amended soil, pressing lightly to eliminate air pockets.
If using container-grown phlox, remove the plant from its pot and tease the roots outward at the bottom of the hole. This encourages faster establishment. Water deeply immediately after planting to settle the soil and eliminate gaps. You’ll see the first sign of success when new shoots emerge within 2-3 weeks—that’s your cue the roots have taken hold.
💧 Step 3: Water Deeply and Establish a Consistent Routine
Water once a week for the first month, soaking the soil to a depth of 6 inches—this encourages deep root growth. After that, phlox becomes drought-tolerant, but mulch with 2-3 inches of shredded bark to retain moisture and suppress weeds. I always check soil moisture by sticking my finger 2 inches down; if it feels dry, it’s time to water.
Here’s the thing—phlox blooms best with consistent moisture, but overwatering leads to weak stems and fungal issues. You’ll know you’re nailing it when the foliage stays vibrant green and the stems remain sturdy, not floppy.
✂️ Step 4: Prune for Bushier Growth and Extended Blooms
After the first flush of flowers fades, cut back spent blooms to the nearest set of leaves—this triggers a second round of flowering. I always use clean, sharp pruners to avoid tearing stems. For established plants, a light trim in early summer encourages thicker, more compact growth. Deadhead regularly throughout the season to prevent seed formation, which drains energy from new blooms.
If your phlox starts looking leggy by mid-season, a harder prune (cutting back by ⅓) in late June can revive it. You’ll see fresh, bushier growth within 2-3 weeks, and the flowers will rebound with even more vigor.
☀️ Step 5: Fertilize and Protect for Season-Long Performance
Feed phlox once in early spring with a balanced, slow-release fertilizer (10-10-10) to support root and foliage growth. Avoid high-nitrogen fertilizers later in the season—they promote leafy growth at the expense of flowers. I also add a handful of bone meal at planting time for phosphorus, which strengthens blooms.
Watch for aphids or Japanese beetles—they love phlox! A neem oil spray applied in early morning prevents infestations. If you notice leaves curling or holes in petals, act fast: a soapy water spray (1 tsp mild dish soap per gallon) knocks pests back without harming pollinators.
Tips & tricks for perfect summer phlox planting
A few simple strategies will help you create a thriving pollinator garden that blooms all season long.
Soil Preparation Secret: Before planting, conduct a simple soil test using the finger method: press your finger 2 inches down into the soil. If it feels compacted or stays clumpy when squeezed, your phlox will struggle. The 2-3 inches of compost mentioned in Step 1 isn't just about nutrients—it's about creating that perfect balance of aeration and moisture retention. I've found that adding 1 part perlite to heavy clay soil makes all the difference in preventing root rot while maintaining moisture for those critical first 2-3 weeks of establishment.
Root Revival Technique: That 30-minute lukewarm water soak for bare-root phlox in Step 2 is non-negotiable. Cold water shocks the roots, while boiling water can damage them. I always use water that's warm enough to feel comfortable to the touch but not hot. For container-grown plants, gently teasing the roots outward at the bottom of the hole creates micro-fractures that encourage faster root expansion into the surrounding soil.
Watering Wisdom: The 6 inches deep watering in Step 3 is crucial for establishing deep roots, but timing matters just as much. Water in the early morning so the foliage has time to dry before evening—this prevents fungal issues that can plague phlox. I've learned the hard way that skipping this timing leads to powdery mildew, especially in humid climates. That 2-inch soil moisture check is your best friend for maintaining consistent moisture without overwatering.
Pruning Precision: When deadheading in Step 4, always cut back to the nearest set of leaves rather than just snipping off the spent bloom. This simple technique encourages bushier growth by signaling the plant to produce new side shoots. For that ⅓ prune in late June, I recommend doing it on a cloudy day to reduce stress on the plant. You'll notice fresh, vibrant growth appearing within those 2-3 weeks as the plant responds to this rejuvenating cut.
Pro Tips for Summer Phlox Flowers
- A few simple strategies will help you create a thriving pollinator garden that blooms all season long.
- Soil Preparation Secret: Before planting, conduct a simple soil test using the finger method: press your finger 2 inches down into the soil.
- Root Revival Technique: That 30-minute lukewarm water soak for bare-root phlox in Step 2 is non-negotiable.
Frequently asked questions
When is the best time to plant summer phlox?
For Phlox paniculata (summer phlox), plant bare-root or container-grown plants in early spring (as soon as the soil is workable) or early fall (6–8 weeks before your first frost). This gives roots time to establish before summer heat. If planting in late spring, keep soil consistently moist until roots take hold.
How long do summer phlox flowers last?
With proper care, summer phlox blooms 6–8 weeks from mid-to-late summer, often extending into early fall. To prolong blooming, deadhead spent flowers regularly and fertilize lightly every 4–6 weeks. Some varieties, like ‘David,’ rebloom lightly if given a mid-season trim.
Why aren’t my phlox flowers opening, or they’re small and sparse?
Small, sparse blooms often signal overcrowding or poor nutrition. Thin plants to 12–18 inches apart for airflow, and feed with a balanced, low-nitrogen fertilizer (like 10-10-10) in spring. Powdery mildew (a fungal issue) can also stunt blooms—prevent it with spaced plants and afternoon shade in hot climates.
Can I grow summer phlox in containers? What’s the best setup?
Choose large containers (12+ inches wide) with drainage holes, and use a well-draining potting mix (add perlite or sand). Pick compact varieties like ‘Jeana’ or ‘Lipstick’. Water daily in containers—they dry out faster than in-ground plants—and fertilize every 2 weeks during bloom season.
Are there phlox alternatives for pollinators that require less maintenance?
If summer phlox feels high-maintenance, try these low-fuss pollinator magnets:
- Coneflower (Echinacea): Drought-tolerant, perennial, and monarch butterfly favorite.
- Black-eyed Susan (Rudbeckia): Thrives in poor soil, blooms late summer.
- Butterfly Weed (Asclepias): Native, deer-resistant, and milkweed for monarchs.
- Salvia (Perennial Sage): Drought-resistant, long bloom time, and hummingbird-friendly.
For a phlox-like look, try Garden Phlox (Phlox drummondii)—annual but self-seeds easily and blooms earlier in summer.
Wrapping up and next steps
Summer phlox flowers aren’t just a feast for the eyes—they’re a lifeline for pollinators and a joy for gardeners. With their vibrant hues, easy care, and long bloom season, they’re the perfect addition to any sunny space.
Whether you’re a seasoned gardener or just starting, planting phlox is a rewarding way to support local ecosystems while adding beauty to your outdoor oasis.
Ready to transform your garden? Start small—pick a sunny spot, grab some phlox seeds or plants, and let nature do the rest! 🌸 Need inspiration? Browse our garden design tips or pollinator-friendly plant guides next to plan your dream summer garden!