
Landscaping
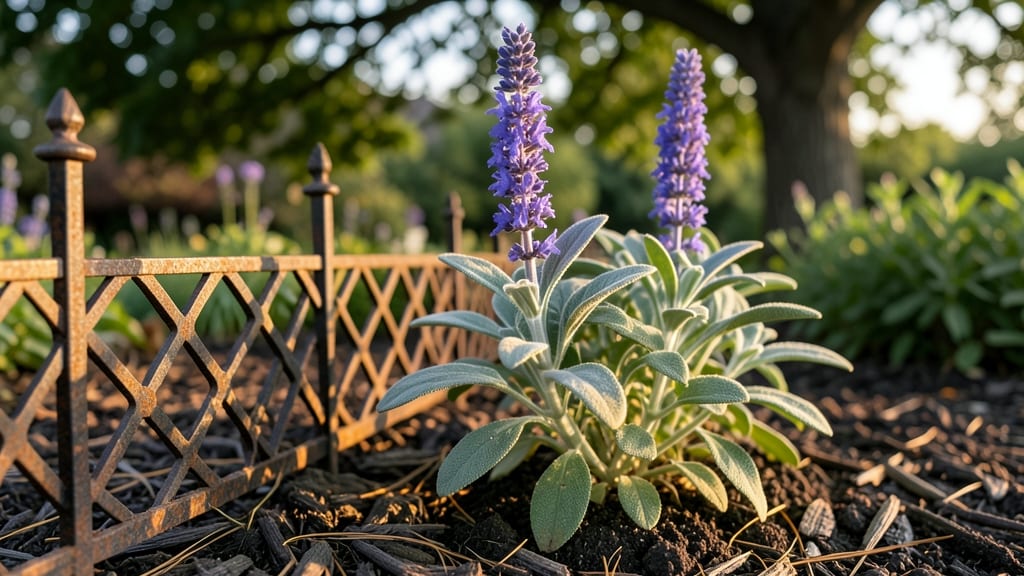
A small fence for flower bed can transform your garden from chaotic to curated in under an hour. I remember the first time I installed one—my wildflower patch finally looked intentional, not just overgrown.
The right fence does more than contain plants; it creates a sense of order, keeps critters out, and makes weeding easier by defining edges.
You don’t need heavy materials or complex designs—lightweight options like vinyl, metal, or wooden pickets work perfectly for flower beds. A 3-foot-tall fence gives enough height to deter rabbits while keeping the look airy.
For a rustic vibe, choose weathered cedar; for modern, go with sleek black powder-coated metal. The key is matching the fence to your garden’s style without overwhelming it.
Once installed, you’ll notice how much easier it is to maintain neat borders and spot weeds before they spread. The fence also adds height to smaller plants, making them visible in the landscape.
Think of it as the unsung hero of garden design—functional yet elegant, and impossible to overlook once it’s in place.
Works for any garden size, from tiny urban plots to sprawling backyard borders. Let’s get those edges looking polished without the fuss.
📚 In This Guide
- What you need
- Instructions
- Tips and common mistakes
- Wrapping up and next steps
What you need
- ● Fence panels or pickets: Wooden: 4–6 ft tall, 12–24 inches wide (quantity depends on flower bed size; ~1 panel per 3–4 ft of length for a 3-ft-tall fence). Metal/vinyl: Pre-cut sections or roll stock (measure your bed’s perimeter first!).
- ● Posts: Wooden (4x4 inches): 1 post every 4–6 ft (or as per manufacturer guidelines). Metal/vinyl: Use included brackets or screws for attachment.
- ● Hardware: Galvanized screws/nails (2–3 inches long, ~10–20 per panel). Concrete mix (5–10 lbs, for securing posts) or post anchors. Hinges (if adding a gate, 1–2 per project).
- ● Measuring tape, pencil, and level.
Step-by-Step instructions for installing a small flower bed fence
Here's how to create clean, defined garden borders that keep plants contained and pests out.
Measure and Mark Your Flower Bed Layout
Start by measuring the perimeter of your flower bed with a tape measure. I like to use wooden stakes and a string line to outline the exact shape—I find it easier to visualize the final fence this way. For a 4-foot-wide bed, mark the outer edge where the fence will sit, keeping it at least 6 inches away from any existing plants to avoid root damage.
Double-check your measurements by walking the perimeter and adjusting the string line until it feels balanced. Use a level to ensure the stakes are perfectly vertical—this prevents the fence from leaning later. If you're working with curves, bend the string line gently to follow the natural shape of your garden.
Dig Post Holes and Set Corner Anchors
Begin at one corner and use a post hole digger to create holes 6 inches deep and 4 inches wide—this gives your fence posts enough stability without requiring excessive digging. Place a corner anchor post in each hole, ensuring it stands vertically before backfilling with soil. Tap the post gently with a mallet to settle it into place.
For straight sections, space posts 3 feet apart—this keeps the fence sturdy without overcrowding. If you're using a 4-foot-tall fence, dig slightly deeper for taller posts to ensure they sit flush with the ground. Water the soil around each post lightly to help it settle before moving to the next one.
Attach Fence Panels or Pickets
If you're using pre-made panels, align them between the corner posts and secure them with screws or brackets designed for your fence material. For individual pickets, start at one corner and attach them to the post with 2-inch deck screws, spacing them 1 inch apart for a uniform look. Use a level to keep each picket perfectly straight before tightening the screws.
Leave a small gap (1/8 inch) between the bottom of the fence and the ground—this prevents moisture buildup and rot. If you're working with a curved bed, cut pickets to length with a handsaw and miter box for clean, angled ends. Test-fit each piece before securing it to avoid mistakes.
Secure the Top Rail and Final Touches
Install a top rail along the very top of the fence, screwing it into the posts at 16-inch intervals for maximum stability. This rail keeps the fence from sagging over time. For added durability, pre-drill holes in the rail to prevent wood splitting when you drive in the screws.
Once everything is secure, step back and inspect the fence for gaps or uneven sections. Touch up any paint or stain immediately to protect the wood. If you're using a decorative fence, add finials or caps to the top posts for a polished finish. Water the base of the posts one last time to help the soil compact around them.
Maintain and Enjoy Your Defined Space
After installation, check the fence weekly for the first month to ensure no posts have shifted. If you notice a post leaning, dig around it, adjust the soil, and firm it back into place. Mulch the flower bed with 2-3 inches of organic mulch to retain moisture and suppress weeds—this also keeps the fence looking neat.
Every 6 months, inspect the fence for signs of wear, such as loose screws or splintering wood. Tighten screws and apply a fresh coat of sealant as needed. With proper care, your small fence will last for years, keeping your flower bed looking tidy and your plants thriving.
Tips & tricks for perfect small flower bed fences
A few key strategies will help you avoid common mistakes and create a fence that lasts for years. These practical tips focus on stability, aesthetics, and long-term care for your garden borders.
Precision in Step 1: When marking your flower bed layout, I recommend using a garden hose to temporarily outline the shape before driving stakes. This lets you visualize the final fence more clearly and adjust the string line without disturbing the soil. For curved sections, wrap the string line around a curved board or use a flexible measuring tape to maintain smooth, consistent curves throughout your design.
Post Hole Consistency: In Step 2, maintaining uniform post hole depth and width is crucial for stability. Use a level to check vertical alignment as you place each corner anchor post, and consider using a post hole digger with a depth gauge to ensure all holes are exactly 6 inches deep. For straight sections, mark the 3-foot spacing with spray paint on the ground before digging to keep everything aligned and prevent uneven gaps.
Material Prep Tip: Before attaching pickets in Step 3, pre-drill screw holes in each picket to prevent wood splitting when you secure them to the posts. This small step saves time and frustration later. For curved sections, cut pickets to length using a miter box set to a 45-degree angle—this creates clean, professional-looking ends that blend seamlessly with your design.
Long-Term Stability: When installing the top rail in Step 4, use stainless steel screws instead of regular deck screws to prevent rust and corrosion over time. I also recommend pre-drilling holes in the rail itself to avoid splitting the wood when you drive in the screws. This extra precaution will keep your fence looking new for years, especially in areas with high humidity or frequent rain.
Pro Tips for Small Fence For Flower Bed
- A few key strategies will help you avoid common mistakes and create a fence that lasts for years.
- Precision in Step 1: When marking your flower bed layout, I recommend using a garden hose to temporarily outline the shape before driving stakes.
- Post Hole Consistency: In Step 2, maintaining uniform post hole depth and width is crucial for stability.
Frequently asked questions
Got questions about creating a small fence for your flower bed? You’re not alone! Here are answers to the most common concerns to help you plan like a pro.
What’s the best material for a quick, low-maintenance small fence?
A vinyl or metal fence is ideal for speed and durability—both resist weather and pests. For a budget-friendly option, bamboo or cedar stakes are easy to install and blend naturally. If you want something temporary, decorative wire mesh or flexible lattice panels work great for seasonal gardens.
How long does it take to install a small flower bed fence?
Most DIY-friendly fences (like T-posts with wire mesh or pre-made panels) take 1-3 hours for a 4-foot section. If you’re using concrete posts, add 24 hours for curing time. Pro tip: Measure twice, mark once—this cuts setup time by 50%!
Can I install a fence in my flower bed without harming plants?
Yes! Use stakes or low-profile panels that won’t block sunlight or roots. For existing plants, dig a shallow trench (3-4 inches deep) and place the fence outside the bed’s edge. Avoid heavy materials that could compact soil—bamboo or lightweight plastic are plant-friendly choices.
Are there affordable alternatives to traditional fencing?
Try these budget hacks:
- PVC pipes (painted to match your garden) – Costs ~$10-$15 per 6-foot section.
- Salvaged wood (check local reuse centers) – Often free or under $20.
- Living edges – Use ornamental grasses or shrubs (like boxwood) as natural barriers.
For a zero-cost option, stack large rocks or logs creatively!
What’s the easiest way to fix a wobbly or uneven fence?
If your fence is unstable:
- Check the base—ensure posts are buried 6+ inches deep or secured with concrete.
- For panels, tighten screws or brackets and add corner braces if needed.
- Use landscape screws (not nails) for flexibility—they adjust better over time.
For a quick fix, backfill with gravel around posts to improve stability.
Wrapping up and next steps
A small fence for your flower bed isn’t just a border—it’s a game-changer for your garden’s organization, beauty, and longevity. Whether you choose a sleek metal picket, rustic wooden pickets, or a charming wrought iron design, the right fence elevates your landscaping while keeping weeds and pets in check.
With the right materials and a little DIY know-how, you can create a stunning, functional border in minutes!
Ready to transform your flower bed? Start by sketching your design, gathering your tools, and picking a fence style that matches your garden’s vibe. Roll up your sleeves—your dream garden is just a few steps away! 🌸✨