
Tools
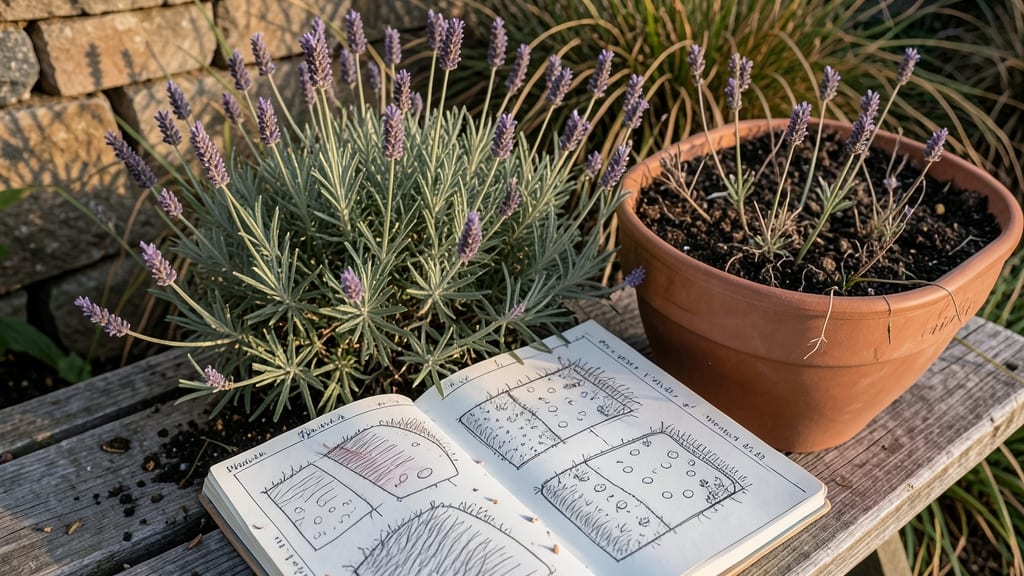
Planning a flower garden that blooms from spring to frost isn't just possible—it's easier than you think. I designed my first season-long garden after years of patchy blooms and empty summer gaps, and now I'm sharing the exact framework that keeps my yard vibrant all year.
The key isn't complicated: it's about layering plants by height, bloom time, and sunlight needs while planning your pruning schedule upfront. Most gardeners skip this step and end up with a colorful spring followed by weeks of bare stems.
You'll need a sketch pad, measuring tape, and a few hours on a sunny afternoon to map out your space. Start by dividing your garden into three zones: foreground for low-growing annuals, mid-height perennials in the middle, and tall shrubs or grasses at the back.
My design uses three simple layers—each with its own pruning timeline—to ensure something's always in bloom. The pruning schedule alone prevents that mid-summer slump everyone hates.
By the time you're done, you'll have a garden that looks like a professional display all season long. Picture it: velvety purple coneflowers in July, fiery red salvias in August, and delicate asters stretching into October.
The best part? You'll spend less time deadheading and more time enjoying the show. This system works for cottage gardens, modern borders, or even small containers on a patio.
Confession: my first attempt had a glaring gap in June. Now I use a simple color-coded chart to track bloom times and pruning deadlines. You'll never again wonder why your garden looks tired in August—because you'll have planned for it from day one. Let's get your blueprint started!
📚 In This Guide
- What you need
- Instructions
- Tips and common mistakes
- Wrapping up and next steps
What you need
- ● Soil: 10 bags (50 lbs each) of high-quality garden soil or potting mix (check for organic matter and drainage).
- ● Compost: 2-3 bags (40 lbs each) of well-aged compost to enrich the soil.
- ● Mulch: 5-10 bags (2-3 cubic feet each) of wood chips, straw, or pine bark to retain moisture and suppress weeds.
- ● Fertilizer: Slow-release granular fertilizer (10-10-10 or 20-20-20) or organic options like fish emulsion or compost tea.
- ● Flower Seeds/Bulbs: Choose season-appropriate varieties (e.g., tulips, daffodils, marigolds, petunias). Plan for 3-5 plants per square foot for full coverage.
- ● Gardening Gloves: 1 pair of durable, breathable gloves (e.g., leather or nitrile-coated).
- ● Hand Trowel: A stainless steel or ergonomic trowel for digging and transplanting.
- ● Pruning Shears: Sharp, bypass pruners for clean cuts (avoid anvil pruners).
- ● Watering Can or Hose: A lightweight can (2-3 gallons) or soaker hose for gentle watering.
- ● Measuring Tape: A 10-25 ft retractable tape for marking garden beds.
- ● Stakes or Trellis: Bamboo stakes or metal cages for supporting climbing flowers (e.g., clematis, morning glories).
- ● Garden Markers: Biodegradable labels or flags to track plant varieties.
- ● Knee Pads: For comfort during long planting sessions.
- ● Wheelbarrow: A 5-cubic-foot capacity for hauling soil and mulch.
- ● Soil pH Test Kit: To check and adjust soil acidity (aim for 6.0-7.0 for most flowers).
- ● Drip Irrigation Kit: For automated, efficient watering (especially for large gardens).
- ● Sunlight Meter: To identify full sun (6+ hrs), partial shade (3-6 hrs), or full shade (<3 hrs) areas.
Instructions for designing a season-long flower garden
Here's how I create a vibrant flower garden that blooms from spring through fall.
Map Your Garden Layout Based on Sun Exposure
Start by walking your yard at noon to identify sun patterns. Divide your space into three zones: full sun (6+ hours of direct light), partial shade (3-6 hours), and full shade (less than 3 hours). I sketch a rough outline of each area on graph paper, labeling sun exposure and noting any obstacles like trees or fences that might affect growth.
For each zone, select plants that thrive in those conditions. For example, sun-loving perennials like coneflowers and black-eyed Susans belong in the full-sun area, while shade-tolerant plants like hostas or astilbes work well in darker spots. This ensures every plant gets the right conditions to flourish and bloom.
Plan for Seasonal Color Progression
To keep your garden vibrant year-round, group flowers by bloom time. Start with early spring bloomers like tulips or daffodils, followed by mid-season favorites such as peonies or daylilies, and finish with late-season bloomers like chrysanthemums or asters. I overlap bloom times slightly so there’s always color in the garden.
Consider height and placement too. Taller flowers like delphiniums or hollyhocks go in the back, while shorter varieties like marigolds or pansies fill the front. This creates a layered look that draws the eye and maximizes visual impact. Sketch your design on paper first to visualize the flow before planting.
Schedule Pruning and Maintenance Tasks
Pruning keeps your garden healthy and encourages continuous blooms. I mark key dates on my calendar: early spring for cleaning up dead growth, mid-summer for deadheading spent blooms, and late fall for trimming back perennials. This timeline ensures your plants stay tidy and produce more flowers.
For example, deadheading spent blooms on annuals like zinnias or petunias encourages new growth, while cutting back perennials like coneflowers in early spring removes old foliage and makes room for fresh shoots. I also note when to fertilize—usually in early spring and mid-summer—to support strong, vibrant blooms.
Add Mulch and Watering Plan
Spread 2-3 inches of mulch around plants to retain moisture, suppress weeds, and regulate soil temperature. I use organic mulch like shredded bark or straw, keeping it 2 inches away from plant stems to prevent rot. This layer also breaks down over time, adding nutrients to the soil.
Water deeply 2-3 times per week in the first month, then adjust based on rainfall. I check soil moisture by sticking my finger 1 inch deep—if it’s dry, it’s time to water. Drip irrigation or soaker hoses work best to deliver water directly to the roots without wetting the foliage, which helps prevent disease.
Monitor and Adjust Throughout the Season
Keep an eye on your garden for signs of pests, disease, or struggling plants. I inspect foliage weekly for chewed leaves, yellowing, or wilting. If I spot issues early, I can treat them before they spread. For example, aphids on roses can be blasted off with a strong spray of water, while fungal issues may require a fungicide.
Adjust your design as needed—if a plant isn’t thriving, swap it out for a better-suited variety. I also take notes each season to refine my approach for the next year. This way, your garden keeps improving and stays full of color and life.
Tips & tricks for perfect season-long flower garden design
A few thoughtful strategies will help you transform your garden into a year-round showstopper without the guesswork.
Sun Exposure Secrets: In Step 1, when mapping your zones, I recommend using a small flag or stake to mark each area's boundaries in your yard. This visual reference prevents confusion when you're ready to plant. Also, note that morning sun behaves differently from afternoon sun—morning light is gentler and better for delicate flowers like impatiens, while afternoon sun suits hardier varieties like coneflowers. Trust me, this simple step saves hours of trial and error later.
Layering Like a Pro: When planning your seasonal progression in Step 2, think vertically as well as horizontally. I always allocate about 30% of my garden space to ground covers like creeping thyme or ajuga, which prevent weeds and add texture. These plants create a living mulch that reduces watering needs while giving taller flowers a sturdy foundation to show off their colors.
Pruning Precision: The maintenance timeline in Step 3 is your secret weapon for continuous blooms. I've found that adding a quick "spring cleanup" in late winter (just before buds appear) gives many perennials a head start. For example, cutting back ornamental grasses in late winter reveals fresh new growth while making room for early spring bloomers. Mark these dates on your calendar right now—you'll thank me when your garden stays vibrant all season.
Mulch Magic: The 2-3 inches of mulch in Step 4 isn't just about looks—it's a game-changer for soil health. I recommend applying half the mulch right after planting, then adding the remaining layer 6-8 weeks later. This two-step approach prevents the mulch from smothering new plants while still providing all the benefits. Plus, the second layer helps suppress weeds more effectively as they emerge.
Pro Tips for Planning Flower Garden
- A few thoughtful strategies will help you transform your garden into a year-round showstopper without the guesswork.
- Sun Exposure Secrets: In Step 1, when mapping your zones, I recommend using a small flag or stake to mark each area's...
- Layering Like a Pro: When planning your seasonal progression in Step 2, think vertically as well as horizontally. I a...
Frequently asked questions
Got questions about planning your dream flower garden? Here are answers to some of the most common ones to help you get started on the right foot!
When is the best time to start planning my flower garden?
The best time to start planning is late winter or early spring (February–March in most climates). This gives you time to research plants, test soil, and prepare beds before the growing season kicks off. If you’re in a warmer zone, you can start as early as January!
How do I create a pruning timeline for my flower garden?
Pruning timelines vary by plant type, but a general rule is:
- Spring: Prune dead or damaged growth from perennials and shrubs after the last frost.
- Summer: Lightly trim flowering plants after they bloom to encourage more flowers.
- Fall: Cut back perennials to ground level once they’ve died back (but leave seed heads for winter interest!).
- Winter: Prune evergreens and shape shrubs when they’re dormant.
Check specific plant tags for exceptions—some, like roses, need unique care!
Can I mix annuals and perennials in the same garden?
Annuals (like petunias or marigolds) add vibrant color and can fill gaps, while perennials (like coneflowers or black-eyed Susans) return year after year. For harmony, group plants with similar sunlight and water needs and use annuals to highlight focal points.
What are common mistakes to avoid when planning a flower garden?
Watch out for these pitfalls:
- Ignoring sunlight needs: Place sun-lovers (e.g., lavender) in full sun and shade-tolerant plants (e.g., hostas) under trees.
- Overcrowding: Give plants enough space to grow—check spacing guidelines on seed packets or plant tags.
- Skipping soil prep: Test your soil and amend it with compost or fertilizer before planting.
- Neglecting mulch: Mulch retains moisture, suppresses weeds, and regulates soil temperature.
How do I troubleshoot a garden that isn’t blooming?
If your flowers aren’t blooming, check these factors:
| Issue | Solution |
|---|---|
| Too much shade | Move sun-loving plants to a sunnier spot or choose shade-tolerant varieties. |
| Over-fertilizing with nitrogen | Switch to a balanced or bloom-boosting fertilizer (high in phosphorus). |
| Not enough water | Water deeply 1–2 times per week (adjust for climate). |
| Pruning at the wrong time | Prune after flowering for most plants (except spring-bloomers like clematis). |
If problems persist, consult a local nursery or extension service for tailored advice!
Wrapping up and next steps
Planning your season-long bloom garden is all about balancing timing, variety, and care—and you’re already on the right track! 🌸 By selecting the right flowers, mapping out your pruning schedule, and preparing your soil, you’ll create a vibrant, low-maintenance haven that thrives year-round.
The key is patience and consistency, so don’t rush—let your garden grow into its full potential.
Ready to take the next step? Start small—pick one section or a single plant type to test your plan, then expand as you gain confidence. Happy gardening, and may your blooms bring joy (and maybe a few bees!) to your space. 🌿✨