
Landscaping
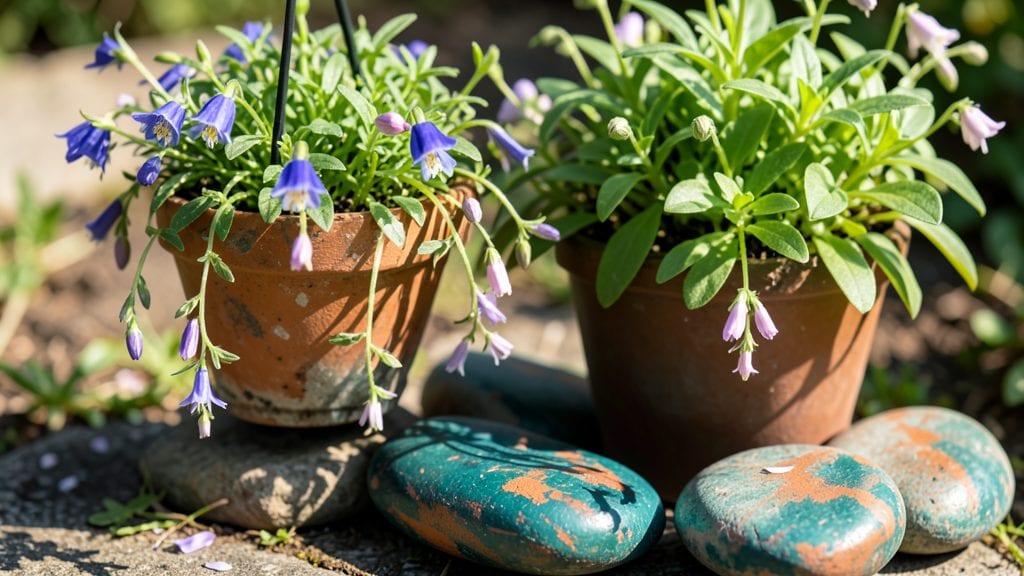
Discover creative painted rock flower garden ideas that turn plain stones into vibrant focal points, elevating any yard with a splash of color and whimsy. 🌿 The first time I painted smooth river stones to mark my herb beds, neighbors asked where I bought them—until I showed them my stash of dollar-store rocks and acrylic paint.
Now I use them to define borders, line pathways, and create whimsical focal points that last year-round without fading or needing replanting.
You don’t need fancy supplies—just smooth rocks, outdoor paint, and a little creativity. I start with 3-5 inch stones for borders and larger ones as stepping stones, choosing colors that complement my flowers while adding unexpected pops.
For example, lavender rocks beside purple coneflowers create a dreamy, cohesive look, while bright yellow stones make a cheerful contrast against deep red salvias. The best part? These painted accents stay vibrant through all four seasons, requiring zero maintenance beyond an occasional wipe-down.
Imagine your garden pathways framed by tiny painted mushrooms or fireflies, or your flowerbeds outlined with rocks that match your blooms. The possibilities are endless, and the effect is pure magic—especially when evening light catches the painted surfaces and makes your garden glow.
Once you try it, you’ll wonder how you ever gardened without these cheerful little accents.
Works equally well in containers, raised beds, or ground-level gardens, and adapts to any style—from cottage charm to modern minimalism. The key is playing with scale and color placement to make your garden feel like a curated art piece. Let’s get those rocks painted and your garden transformed!
📚 In This Guide
- What you need
- Instructions
- Tips and common mistakes
- Wrapping up and next steps
What you need
- ● Smooth rocks: Collect or purchase flat, medium-sized rocks (2-4 inches in diameter). Aim for 15-30 rocks depending on garden size.
- ● Acrylic paint: Use non-toxic, outdoor-rated paint in vibrant colors (e.g., pink, purple, yellow, blue). A 4-oz bottle per color is ideal.
- ● Paintbrushes: Include 1 fine-tip brush (size 0 or 2) for details and 1 medium brush (size 6-8) for backgrounds.
- ● Sealer spray: Choose a waterproof, UV-resistant sealer (e.g., Mod Podge Outdoor or Rust-Oleum Clear Gloss) to protect your masterpieces.
- ● Sandpaper: Fine-grit (220-400) to smooth rough edges on rocks.
- ● Newspaper or drop cloth: Protect your workspace from paint splatters.
- ○ Optional tools: Stencils (for intricate designs)
- ● Toothpicks (for fine details or texture)
- ● Palettes or paper plates (for paint mixing)
- ● Ruler or compass (for geometric shapes)
- ● Prerequisites: A sunny, outdoor space (garden bed, patio, or container)
- ● Basic drawing skills (or printed flower templates)
- ● Patience and creativity! 🌸
Step-by-step instructions for creating painted rock flower garden decor
Transform ordinary rocks into charming garden accents that add color and whimsy without needing sunlight.
🪴 Step 1: Gather and Prepare Your Rocks
Collect smooth, flat rocks from your yard or purchase them from a garden center. Aim for stones that are at least 2-3 inches wide—they need enough surface area for painting details. Rinse them thoroughly with water to remove dirt, then let them dry completely in the sun. I like to soak stubbornly grimy rocks in a bucket of warm, soapy water for 10 minutes before scrubbing with a stiff brush.
Once dry, sort your rocks by size and shape. Group them by similar dimensions so they look cohesive in your garden. Here's the thing—rough edges or uneven surfaces can make painting tricky, so smooth out any sharp spots with fine-grit sandpaper if needed. This step ensures your painted designs will look crisp and professional.
🎨 Step 2: Sketch and Paint Your Designs
Use a pencil or fine-tip marker to lightly sketch your flower designs on the rocks. I prefer simple, symmetrical flowers like daisies or roses because they’re easier to paint freehand. Place your rock on a newspaper-covered surface to protect your workspace, and trace the design with a ruler for straight lines or a compass for perfect circles.
Apply a base coat of acrylic paint in the color of your choice, using thin, even strokes. Let it dry completely—this usually takes about 1-2 hours—before adding details. For a glossy finish, seal the paint with a clear acrylic sealer applied with a soft brush. Pro tip: If you make a mistake, let the paint dry, then lightly sand it with 220-grit sandpaper and repaint.
✂️ Step 3: Add Finishing Touches and Seal
Once the paint is fully dry, use a fine-tip paintbrush to add intricate details like petal veins or centers. For extra durability, apply a second coat of sealer, focusing on edges and high-traffic areas. Let everything dry for at least 24 hours before placing the rocks in your garden—this prevents smudging from handling or weather.
I know it seems tedious, but patience here pays off. If you rush, the paint may chip when you move the rocks. For added longevity, store your painted rocks indoors for a few days before outdoor placement, especially if rain is forecasted. This gives the sealer time to fully cure.
🌿 Step 4: Arrange Your Painted Rocks in the Garden
Place your painted rocks in sunny or partially shaded spots where they’ll be visible year-round. I like to group them in odd-numbered clusters (3, 5, or 7 rocks) for a natural, balanced look. Bury them slightly into the soil or nestle them among plants to create a seamless, artistic touch.
Watch how the colors pop against foliage and flowers—this is where your garden truly comes alive. For extra magic, add a few small solar-powered lights nearby to highlight your painted rocks after dark. They’ll glow softly and create a cozy, enchanting atmosphere.
Tips & tricks for perfect painted rock flower garden decor
A few simple tricks will help your painted rock flowers look professional and last for years in your garden.
Rock Selection Matters: The 2-3 inch size requirement isn't arbitrary—smaller rocks can't hold detailed designs well, while larger ones may be too heavy to move. Look for flat rocks with smooth surfaces (I avoid porous ones that absorb too much paint). If you find rough edges, smooth them with fine-grit sandpaper before painting. This makes your designs look crisp and prevents paint from chipping at the edges.
Sketching Secrets: Before you start painting, trace your designs with a pencil first. I like to use a compass for perfect circles and a ruler for straight lines—this gives me clean reference points. For intricate details, practice on scrap paper first. The 1-2 hour drying time between coats is perfect for sketching multiple rocks in one session, so plan accordingly.
Sealing Strategy: Don't skip the second coat of sealer, especially on edges—this is where most wear happens. I focus on high-traffic areas like where you'll handle the rocks. The 24-hour drying time before outdoor placement is crucial; if you rush, rain can wash away your hard work. For extra durability, consider adding a third coat to the edges only after the first 24 hours.
Placement Pro Tip: When arranging your painted rocks, think about color coordination with your existing garden. I like to place brighter colors near darker foliage to make them pop. For a cohesive look, group similar-sized rocks together. The odd-numbered clusters (3, 5, or 7) create natural-looking groupings that feel intentional rather than random.
Pro Tips for Painted Rock Flower Garden Ideas
- A few simple tricks will help your painted rock flowers look professional and last for years in your garden.
- Rock Selection Matters: The 2-3 inch size requirement isn't arbitrary—smaller rocks can't hold detailed designs well, while larger ones may be too heavy to move.
- Sketching Secrets: Before you start painting, trace your designs with a pencil first.
Frequently asked questions
Got questions about transforming your garden with painted rock flower ideas?
You’re not alone! Here are some of the most common queries—and their answers—to help you create a stunning, low-maintenance garden that’s as unique as you are.
What kind of paint should I use for painted rock flowers?
Use acrylic craft paint for vibrant, durable colors that hold up to weather. Opt for outdoor-rated paints if your rocks will be exposed to rain or sun. Avoid spray paints—they can be toxic and uneven. For extra longevity, seal your painted rocks with a clear outdoor sealant (like Mod Podge Outdoor or polyurethane).
How long does it take for painted rocks to dry before placing them in the garden?
Most acrylic paint dries to the touch in 15–30 minutes, but full curing takes 24–48 hours. If you’re working in layers or adding intricate details, wait at least 24 hours before sealing or placing them outside. Patience ensures your colors stay bright and the paint doesn’t smudge!
Can I use painted rocks in a real flower garden, or are they just decorative?
Painted rocks complement real flowers beautifully—they add whimsy, define garden beds, or even mimic blooms. Place them near actual flowers for a “hidden gem” effect, or use them as pathway markers or centerpieces in pots. Just avoid burying them too deep; they’re meant to be seen!
What if my painted rocks fade or chip over time?
Fading or chipping is normal, but you can refresh them! Lightly sand rough spots, touch up with paint, and reseal. For extra durability, avoid placing rocks in direct sunlight for long periods or use UV-resistant sealant. If a rock becomes damaged beyond repair, repaint it or replace it—it’s a fun opportunity to experiment with new designs!
Are there eco-friendly alternatives to traditional paint?
Yes! Try milk paint (non-toxic and biodegradable) or natural dyes like beet juice (for pink) or turmeric (for yellow). For sealing, use beeswax or linseed oil. These options are safer for pets, kids, and the environment—though they may require more frequent touch-ups.
What’s the best size for painted rock flowers?
Size depends on your vision! Small rocks (1–3 inches) work for delicate flowers or ground cover, while larger rocks (4+ inches) make bold statements. For a cohesive look, stick to similar sizes within a section. Pro tip: Sketch your design first to visualize spacing before painting!
Wrapping up and next steps
Transforming your outdoor space with painted rock flower gardens is a creative, budget-friendly way to add color and charm that lasts all year. Whether you’re a beginner or a seasoned crafter, these whimsical designs bring joy and personality to any yard—no green thumb required! 🌸✨
Ready to bloom with inspiration? Grab your supplies, pick a theme, and start painting those rocks today. Share your masterpiece with us—we’d love to see your garden flourish! 📸💬