
Shrubs
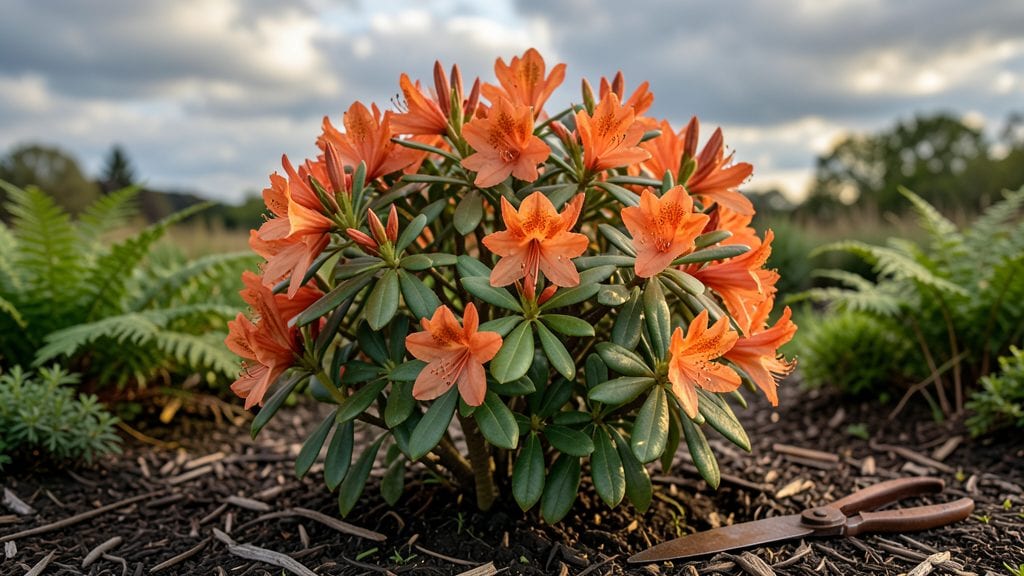
Orange flowered azaleas bring a bold pop of color to shady spots where most plants struggle. 🌸 I’ve used them as dramatic borders in my woodland garden, and they’ve become the star of my spring displays—no fuss, just vibrant blooms that last for weeks.
Their deep green foliage provides year-round structure, while the flowers create a stunning contrast against darker evergreens or lighter ferns.
The key to making them shine is placement. They thrive in partial shade, so position them where they’ll get morning sun and afternoon dappled light. In cottage gardens, they pair beautifully with hydrangeas and hostas, while modern landscapes love their structured shape alongside boxwoods or heucheras.
Their fragrant blooms also attract hummingbirds, adding another layer of interest.
What you’ll love most is how they transform a dull corner into a showstopper. Imagine a shady border bursting with fiery orange blooms against a backdrop of ferns or a focal point that draws the eye through the garden.
The scent alone makes them worth growing—like a burst of sunshine in the shade.
Works equally well in formal hedges, wildflower meadow edges, or as a single statement plant. Once established, they’re low-maintenance yet high-impact—exactly the kind of plant that makes gardening feel effortlessly rewarding.
📚 In This Guide
- What you need
- Instructions
- Tips and common mistakes
- Wrapping up and next steps
What you need
- ● Orange flowered azalea plants: 1–3 mature nursery-grown shrubs (3–5 years old for faster blooms)
- ● OR 50–100 seeds (if starting from scratch—patience required!)
- ● Well-draining acidic soil: pH 4.5–6.0 (test kits or meters recommended)
- ● Organic mulch: 2–3 inches of pine bark, oak leaves, or peat moss
- ● Slow-release fertilizer: Acid-loving plant formula (e.g., 10-10-10 or 8-3-9)
- ● Watering can or hose with a gentle spray nozzle
- ● Garden trowel or shovel (for digging)
- ● Pruning shears (sterilized with rubbing alcohol)
- ● Gloves (to protect from thorns and soil)
- ● Measuring tape or ruler (for spacing plants 3–5 feet apart)
- ○ Optional: Soil moisture meter (to monitor hydration)
- ● Drip irrigation system (for consistent watering)
- ● Plant supports (if training young stems)
- ● A shady or partially shaded spot (2–6 hours of dappled sunlight daily)
- ● Protective barrier (e.g., wire mesh) if deer or rabbits are pests in your area
- ● Patience! Azaleas may take 1–2 years to bloom fully from seeds.
Step-by-Step guide to planting and caring for orange flowered azaleas
Here's how to nurture these vibrant, shade-loving beauties into a thriving garden centerpiece.
🪴 Step 1: Select the Perfect Planting Site
Orange azaleas thrive in partial shade—think 4-6 hours of morning sun with afternoon shade protection. I always choose a spot with well-draining soil because soggy roots will kill them. Test your soil by squeezing a handful—if it stays clumped, amend with 2-3 inches of compost or sand to improve drainage.
These plants hate alkaline soil, so aim for a pH between 4.5 and 6.0. You can test this with a simple soil kit from your garden center. If your soil is too alkaline, add sulfur or peat moss to lower the pH gradually. Mulch heavily with 3-4 inches of pine needles or bark to maintain acidity and retain moisture.
🌱 Step 2: Plant at the Right Depth and Spacing
Dig a hole twice as wide as the azalea’s root ball but only as deep as the container it came in. Gently remove the plant from its pot and loosen the roots if they’re circling. Place it in the hole so the top of the root ball sits 1 inch above ground level—this prevents rot from sitting water.
Space your azaleas 3-5 feet apart for mature size. I always backfill with the native soil mixed with 20% compost to avoid shocking the roots with new soil. Press gently around the base to remove air pockets, then water deeply to settle everything. You’ll know it’s right when water drains freely from the bottom of the hole.
💧 Step 3: Water Deeply and Maintain Consistent Moisture
Water your azalea once a week during the first growing season, providing 1-2 gallons per plant each time. Let the top 2 inches of soil dry out between waterings—this prevents root rot while keeping the plant hydrated. In hotter climates, you may need to water every 5-7 days, but always check the soil first.
Mulch again after watering with 2-3 inches of organic mulch (like pine bark) to lock in moisture and keep roots cool. Avoid letting mulch touch the stem—keep it 2-3 inches away to prevent rot. If leaves yellow or droop, it’s usually a sign of overwatering or poor drainage, not thirst.
☀️ Step 4: Feed and Prune for Healthy Growth
Fertilize in early spring with an acid-loving plant food (look for one with high phosphorus for blooms). I use ½ the recommended dose to avoid burning roots. Repeat in early summer after the first flush of flowers fades. Avoid fertilizing in fall—your azalea needs to rest and prepare for winter.
Prune right after blooming to shape the plant and encourage next year’s flowers. Remove dead or crossing branches first, then trim back any leggy growth to maintain a rounded shape. Never cut into old wood—new growth only comes from the current season’s stems. A light pruning keeps the plant bushy and full of blooms.
⏰ Step 5: Protect in Winter and Prepare for Next Season
Azaleas are hardy but benefit from winter protection in colder zones. Once temperatures drop below 20°F, wrap the plant (not the mulch) with burlap or frost cloth to shield it from drying winds. Remove protection in early spring when new growth appears—usually by late March or April, depending on your climate.
In late winter, rake away old mulch and replace it with fresh. This refreshes the soil’s acidity and gives roots room to breathe. Watch for buds forming in late winter—this is your cue to reduce watering slightly so the plant focuses energy on blooming, not just leaf growth.
Tips & tricks for perfect orange flowered azaleas
A few simple tricks will help your orange azaleas thrive and bloom spectacularly year after year.
Soil Test Tip: Don't guess about your soil's pH—test it first! I've seen azaleas fail because the soil was too alkaline. If your test shows a pH above 6.0, add sulfur or peat moss gradually over time. Remember, azaleas need that 4.5-6.0 pH range to absorb nutrients properly. The 3-4 inches of pine bark mulch helps maintain this acidity naturally once established.
Planting Depth Secret: That 1-inch above ground level placement of the root ball in Step 2 isn't just arbitrary—it prevents water from pooling around the stem. I learned this the hard way when my first azalea developed rot from being planted too deep. Also, gently loosening circling roots before planting gives them room to spread and establish faster.
Watering Wisdom: The once-a-week watering schedule during the first growing season works perfectly in most climates, but here's the trick: water deeply each time. You want that 1-2 gallons per plant to penetrate down to the roots. Check the top 2 inches of soil—if it's dry, it's time to water. In hotter areas, you might need to water every 5-7 days, but always let that top layer dry between waterings to prevent root rot.
Winter Protection Hack: When temperatures drop below 20°F, I wrap my azaleas with burlap but leave the mulch alone. The mulch actually helps insulate the roots, while the burlap protects the foliage from drying winds. Remove the wrap in early spring when you see new growth—usually around late March or April. This timing gives your plant a head start on the growing season.
Pro Tips for Orange Flowered Azalea
- A few simple tricks will help your orange azaleas thrive and bloom spectacularly year after year.
- Soil Test Tip: Don't guess about your soil's pH—test it first!
- Planting Depth Secret: That 1-inch above ground level placement of the root ball in Step 2 isn't just arbitrary—it prevents water from pooling around the stem.
Frequently asked questions
Got questions about your orange flowered azalea? You’re not alone! Here are some of the most common queries—and their answers—to help you nurture these stunning shade-loving beauties with confidence.
How do I keep my orange flowered azalea blooming every year?
Consistent care is key! Prune right after flowering (late spring) to encourage new buds. Feed with an acidic, slow-release fertilizer (like a rhododendron blend) in early spring and fall. Mulch with pine bark or peat moss to retain moisture and acidify the soil. Pro tip: Avoid overwatering—soggy roots can stress the plant and reduce blooms!
When is the best time to plant an orange flowered azalea?
Fall (September–November) is ideal! The cooler temps help roots establish before winter, and spring planting (March–April) works too—just water deeply afterward. Avoid planting in summer heat or during frost. If you’re transplanting, do it on a cloudy day to reduce stress.
Can orange flowered azaleas grow in full sun?
While they tolerate morning sun, they thrive in partial shade (2–6 hours of sunlight daily). Too much direct sun (especially afternoon rays) can scorch leaves and reduce blooms. If your yard is sunny, plant them where they get dappled light or near trees with high canopies.
Why are the leaves on my azalea turning yellow or brown?
Yellowing leaves often signal overwatering or poor drainage, while brown edges can mean underwatering or sunburn. Check soil moisture—it should stay evenly damp but not soggy. Brown patches on older leaves? It might be natural aging. For pests like lace bugs or spider mites, spray with water or use insecticidal soap.
What are some great alternatives to orange flowered azaleas?
If you love shade-loving, fragrant blooms, try:
- Rhododendrons (hardier, similar care)
- Camellias (evergreen, winter blooms)
- Hydrangeas (varied colors, loves shade)
- Pieris japonica (early spring flowers, glossy leaves)
Wrapping up and next steps
Your orange flowered azalea is more than just a splash of color—it’s a fragrant, low-maintenance star for shady spots! With the right care, these beauties will reward you with vibrant blooms year after year, turning even the dimmest corners of your garden into a lively retreat. 🌸
Ready to watch your azalea thrive? Start by observing its needs—whether it’s adjusting sunlight, pruning for shape, or troubleshooting pests—and take that next step toward a lush, fragrant garden. Happy gardening!