
Shrubs
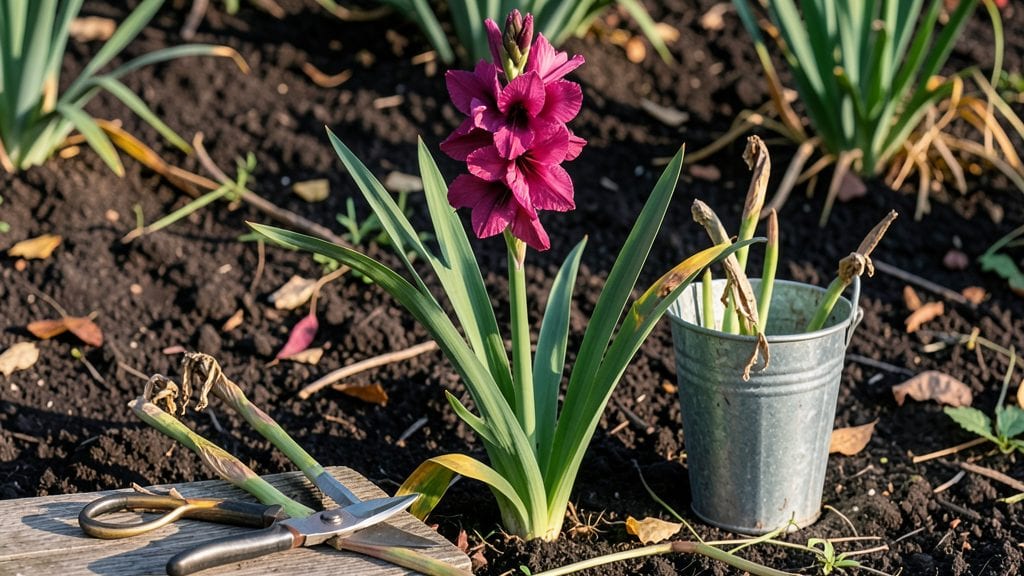
Gladioli after flowering don’t mean the end of their story—this is where you unlock next year’s showstopping spikes. ✨ I’ve watched my gladioli go from dramatic summer blooms to winter dormancy, and the secret to repeat performances lies in what you do after those last petals fall.
The right moves now mean corms that multiply, flower earlier, and stand taller than ever.
First, cut back the faded flower stalks to the base—this redirects energy from seed production to the corms below. Most gardeners stop there, but the real magic happens with the corms themselves.
Decide whether to dig them up for winter storage (ideal in colder climates) or leave them in the ground (perfect for mild winters). I’ve had my best luck lifting and storing corms in Zone 6, but your local frost patterns will dictate the right choice.
You’ll end up with stronger, more prolific blooms next season if you fertilize lightly after flowering and keep the soil moist until the foliage yellows naturally. The corms you save will be ready to replant in early spring, giving you a head start on summer’s boldest vertical accents.
Here’s exactly how to make it happen without losing a single corm to rot or frost.
This method works whether you’re a first-timer or a seasoned grower—just adjust timing for your climate. The key is consistency: same care every year, and those gladioli will reward you with taller, fuller stalks that turn heads at every garden party. Let’s get those corms prepped for next summer’s drama.
📚 In This Guide
- What you need
- Instructions
- Tips and common mistakes
- Wrapping up and next steps
What you need
- ● Pruning shears or sharp garden scissors – Clean, sterilized tools to avoid disease spread.
- ● Gloves – Heavy-duty gardening gloves to protect hands from thorns and dirt.
- ● Compost or well-aged manure – 5–10 lbs per plant to replenish nutrients.
- ● Balanced fertilizer (10-10-10 or similar) – 1–2 tbsp per plant for root revival.
- ● Mulch (straw, shredded leaves, or pine needles) – 2–3 inches thick to insulate roots.
- ● Watering can or hose with a gentle spray nozzle – For deep but controlled hydration.
- ○ Label tags (optional but helpful) – To track varieties if you have multiple types.
- ● Epsom salt (magnesium sulfate) – 1 tbsp dissolved in a gallon of water for a quick nutrient boost.
- ● Fungicide spray – Preventative measure if your area has a history of gladiolus rot.
- ● Garden fork or trowel – For gentle soil aeration around the base.
- ● Plant food with micronutrients – To support long-term bulb health.
- ● Camera or sketchbook – To document your gladioli’s progress over the season!
Instructions for reviving gladioli after flowering
Here's how to nurse your gladioli back to strength after their showy blooms fade.
✂️ Step 1: Cut Back the Flower Stalks
Once the last bloom on a stalk wilts completely, snip it off at the base with clean, sharp pruners. I always leave about 1-2 inches of stem below the soil line—this helps redirect the plant's energy back into its corms instead of wasting it on dead flowers. Avoid tearing the foliage; a clean cut prevents disease from entering through jagged edges.
Watch for the stalks to turn completely brown and crispy—this is your signal that all energy has been pulled from the flowers. If you cut too early, the plant may still try to produce more blooms, weakening the corms for next season. Patience here pays off in bigger, bolder flowers next year.
🌿 Step 2: Leave the Foliage Until It Dies Back
Never remove the green leaves after flowering—this is how your gladioli store energy for next season. Let them stay until they turn yellow and crispy on their own, usually by late fall. The leaves photosynthesize even after blooming, building up nutrients in the corms below ground.
I know it looks messy, but resist the urge to tidy up. If you cut the foliage too soon, your corms won't bulk up properly, resulting in smaller or fewer flowers next year. This is the most critical step—don't skip it, even if your neighbors are already pruning theirs.
💧 Step 3: Reduce Watering Gradually
As the foliage begins to yellow, slowly reduce watering over 2-3 weeks. Gladioli need less moisture once they're entering dormancy. Water just enough to keep the soil from drying out completely, but avoid soggy conditions that can rot corms. Aim for 1 inch of water per week during this transition period.
You'll know you're doing it right when the leaves start wilting naturally from the top down. If they turn yellow too quickly, you're watering too much. If they stay green too long, you're not giving them enough time to prepare for dormancy. This balance is key for healthy corms.
🪴 Step 4: Dig Up and Store Corms for Winter
Once the foliage has completely died back, dig up the corms in late fall, after the first hard frost. Use a fork to gently lift them from the soil, being careful not to pierce the corms themselves. Shake off excess soil and let them dry in a shady, well-ventilated area for 1-2 weeks. This drying process helps prevent rot during storage.
Store the corms in a cool, dark place with temperatures between 35-50°F and good airflow. I use a mesh bag in my garage—this keeps them from touching each other, which reduces the risk of mold. Check them monthly to remove any that feel soft or mushy, as these won't survive until next season.
⏰ Step 5: Prepare for Next Season's Planting
In early spring, about 4-6 weeks before your last frost date, take your stored corms out of storage and inspect them. Discard any that are shriveled, moldy, or soft to the touch. Healthy corms should feel firm and plump. Plant them 4-6 inches deep and 6 inches apart, with the pointed end facing up.
Water them lightly after planting, then wait until the soil feels dry to the touch before watering again. This prevents rot and gives the corms time to establish roots before new growth appears. You'll see fresh shoots emerge within 2-3 weeks, signaling that your gladioli are ready to grow again for next season's bold display.
Tips & tricks for reviving gladioli after flowering
A few key strategies will help you maximize next season's blooms while keeping your gladioli healthy through dormancy.
The Cutting Timeline: Don't rush to cut back those flower stalks! Wait until they're completely brown and crispy before snipping. I've learned this the hard way—cutting too early can trick the plant into trying to produce more blooms, which drains energy from the corms. That 1-2 inch stem you leave below soil is crucial for redirecting energy back underground. Think of it like giving your gladioli a final energy boost for next year's show.
Foliage Patience Pays Off: I know it looks untidy, but those yellowing leaves are working hard to store nutrients in the corms. If you're tempted to tidy up early, resist! The foliage needs to stay until it completely dies back naturally—usually by late fall. This process can take several weeks, but it's worth it for those bigger, bolder blooms next season. Trust me, your future self will thank you when you see those dramatic stalks emerging.
Storage Temperature Secrets: That 35-50°F range for storing corms isn't just arbitrary—it's the sweet spot for preventing rot while keeping them dormant. I store mine in a mesh bag in my garage where temps naturally stay around 45°F. The airflow from the mesh prevents moisture buildup that could cause mold. Check them monthly and remove any that feel soft—they won't make it through winter. A cool, dark basement or unheated garage works well too, as long as it stays consistently cool.
Spring Planting Prep: When you're ready to plant in early spring, give your corms a quick inspection before putting them in the ground. Discard any that feel shriveled or mushy—these won't produce good blooms. The 4-6 inch depth recommendation might seem deep, but it protects the corms from temperature fluctuations that could stress them. Planting with the pointed end up ensures proper growth orientation, just like planting potatoes with the "eyes" facing up.
Pro Tips for Gladioli After Flowering
- A few key strategies will help you maximize next season's blooms while keeping your gladioli healthy through dormancy.
- The Cutting Timeline: Don't rush to cut back those flower stalks!
- Foliage Patience Pays Off: I know it looks untidy, but those yellowing leaves are working hard to store nutrients in the corms.
Frequently asked questions
Got questions about caring for your gladioli after they’ve put on their stunning floral show? Here are some of the most common concerns—plus expert tips to keep your plants thriving for next season!
Should I cut back gladioli after flowering?
Yes! Once the blooms fade, cut the flower stalks back to the ground—but leave the leaves for now. The foliage continues photosynthesizing, feeding energy into the corms (underground bulbs) for next year’s growth. Only remove dead or yellowed leaves later in the season.
When is the best time to cut back gladioli?
Trim the flower stalks immediately after blooming to redirect energy to the corms. However, wait until the leaves turn brown and crispy (usually late fall) before removing them entirely. This ensures the corms store enough nutrients for spring.
Can I replant gladioli corms right after flowering?
Not yet! Wait until the foliage dies back completely (6–8 weeks after flowering). Dig up the corms in early fall, separate any offsets, and replant them in well-draining soil. Replanting too soon can stress the corms and reduce next year’s blooms.
What if my gladioli leaves turn yellow after flowering?
Yellowing leaves are normal as they senesce, but if it happens early or with black spots, your plants may have fungal issues (like rust or botrytis). Improve airflow, water at the base, and consider a fungicide if needed. Remove affected leaves promptly.
Are there alternatives to cutting back gladioli?
While cutting back is standard, you can leave the stalks for seed heads (if you’re growing heirloom varieties). However, this weakens the corms. For bold blooms next year, always cut back stalks post-flowering. If space is tight, deadhead spent blooms to encourage reblooming (though gladioli rarely rebloom reliably).
Pro Tip:
Mark your gladioli beds with stakes or flags after cutting back—it’s easy to forget where they’re planted until spring! This helps with digging and replanting later.
Wrapping up and next steps
Caring for gladioli after flowering is all about strategic pruning, soil love, and a little patience—and you’ve got this! 🌱 By cutting back stalks, dividing bulbs, and nourishing the soil, you’re setting the stage for next season’s stunning blooms.
Think of it as a rewarding ritual that keeps your garden thriving.
Now that you’re armed with the know-how, roll up your sleeves and give your gladioli the TLC they deserve. Ready to watch them bounce back even bolder? Start with one simple step—like dividing those bulbs or prepping the soil—and enjoy the journey! 🌸