
Tools
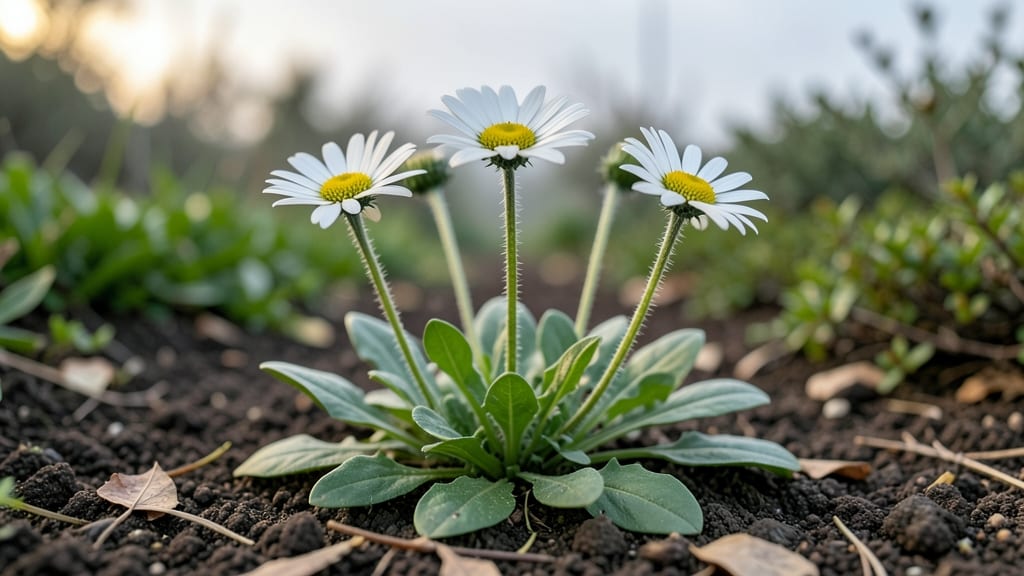
The garden daisy flower transforms any yard into a buzzing, blooming paradise with minimal effort. 🌼 I’ve grown them for years, and they’re the secret weapon for pollinator-friendly gardens—cheerful, hardy, and coming back stronger every season.
The key lies in their love for full sun and well-drained soil, but even beginners can’t mess up with these forgiving perennials.
Start with the right varieties: English daisies (Bellis perennis) for borders, or oxeye daisies (Leucanthemum) for cut flowers. Plant in spring or fall, spacing them 12–18 inches apart in loose, sandy soil.
They thrive on neglect but reward you with nonstop blooms from early summer until frost—and sometimes even through winter in mild climates.
Water deeply once a week, but don’t drown them. A light fertilizer in spring keeps them lush, and a quick trim after each bloom wave encourages even more flowers.
The best part? Butterflies, bees, and birds flock to them like a five-star resort. By mid-summer, your garden will hum with life.
Watch for powdery mildew in humid areas—just space plants for airflow and avoid overhead watering. With these simple steps, you’ll have daisies that multiply, spread, and keep your garden vibrant for years. Ready to get started?
📚 In This Guide
- What you need
- Instructions
- Tips and common mistakes
- Wrapping up and next steps
What you need
- ● Garden Daisy Seeds or Seedlings: 1–2 packets of seeds (500–1,000 seeds per packet) or 3–5 healthy seedlings (6–8 inches tall)
- ● Well-Draining Potting Mix or Garden Soil: 5–10 gallons (for containers) or Enough to fill a 6–12 inch deep garden bed
- ● Compost or Organic Fertilizer: 1–2 cups of balanced 10-10-10 fertilizer or compost tea
- ● Watering Can or Hose with Gentle Nozzle
- ● Garden Gloves (to protect your hands from thorns)
- ● Trowel or Hand Shovel (for digging)
- ● Pruners or Scissors (for deadheading and trimming)
- ● Measuring Tape or Ruler (to space plants 12–18 inches apart)
- ○ Mulch (Optional but Recommended): 2–3 inches of straw, wood chips, or shredded leaves
- ● Full sun exposure (6+ hours of direct sunlight daily)
- ● Moderate to well-draining soil (pH 6.0–7.0)
- ● Patience! Daisies thrive with consistent care but bloom best in their second year.
Step-by-Step instructions for planting garden daisies
Here’s how to create a vibrant pollinator haven with these cheerful blooms—simple steps for year-round color.
🌱 Step 1: Choose the Perfect Planting Spot
Garden daisies thrive in full sun—at least 6-8 hours daily—but they tolerate partial shade in hotter climates. I always pick a spot with good airflow to prevent fungal diseases. Avoid low-lying areas where water pools, as soggy soil leads to root rot.
Test your soil’s drainage by digging a 6-inch deep hole and filling it with water. If it drains within 2 hours, the spot is ideal. Amend heavy clay soil with 2-3 inches of compost to improve texture and fertility. Daisies grow best in slightly acidic to neutral soil (pH 6.0-7.0)—test your soil with a kit if unsure.
🪴 Step 2: Prepare the Soil and Plant
Loosen the soil to a depth of 12 inches with a garden fork or tiller to encourage root growth. Mix in 1 cup of balanced 10-10-10 fertilizer per 4 square feet of planting area to give your daisies a nutrient boost. Space plants 12-18 inches apart—closer spacing creates a lush, dense border, while wider gaps work for taller varieties.
Dig a hole twice as wide as the root ball but no deeper. Gently remove the plant from its container, tease apart any circling roots, and place it in the hole so the top of the root ball sits level with the soil surface. Fill the hole with soil, pressing lightly to remove air pockets. Water deeply to settle the roots.
💧 Step 3: Water and Mulch for Healthy Growth
Water your daisies once a week for the first month, ensuring the soil stays evenly moist but not waterlogged. After establishment, they’re drought-tolerant but bloom best with 1 inch of water per week. I like to water in the early morning to reduce evaporation and fungal risks.
Spread 2 inches of mulch around each plant, keeping it 2 inches away from the stem to prevent rot. Use shredded bark, straw, or pine needles—anything that suppresses weeds while retaining moisture. Mulch also regulates soil temperature, helping daisies thrive in both heat and cool seasons.
☀️ Step 4: Prune and Maintain for Long-Lasting Blooms
Deadhead spent blooms by snipping the stem ½ inch below the faded flower to encourage continuous flowering. I do this every 2-3 days during peak bloom season—it’s a small effort that keeps your garden looking fresh all summer. Fertilize lightly in early spring and mid-summer with a low-nitrogen (5-10-10) formula to promote blooms over foliage.
Cut back worn-out stems to 6 inches in late fall to tidy the plant and encourage new growth in spring. Daisies are hardy perennials, so they’ll return year after year with minimal care. Just watch for aphids or powdery mildew—treat early with neem oil or insecticidal soap to keep your pollinator friends happy.
⏰ Step 5: Enjoy Year-Round Beauty and Pollinator Support
Once established, garden daisies need little attention beyond occasional deadheading. Their bright blooms attract butterflies, bees, and beneficial insects, making them a pollinator magnet. Group plants in odd-numbered clusters (3, 5, or 7) for a natural, eye-catching display.
In colder climates, daisies may go dormant in winter but return stronger in spring. If you live in a mild zone, they’ll often bloom intermittently year-round. The key is consistency—sun, good soil, and light pruning keep them thriving with minimal effort.
Tips & tricks for perfect garden daisy planting
Creating a thriving garden daisy haven takes a few key strategies—here's what I've learned to ensure your plants flourish and attract pollinators all season long.
Sunlight Strategy: While daisies tolerate partial shade, the 6-8 hours of full sun mentioned in Step 1 is absolutely critical for vibrant blooms. I've noticed that when planted in partial shade, flowers produce fewer blooms and have less intense color. If you're in a hotter climate, opt for morning sun with afternoon shade to prevent wilting while still getting that essential sunlight.
Soil Preparation Secret: When amending heavy clay soil with 2-3 inches of compost in Step 1, don't just top-dress—work it into the 12-inch deep loosened soil from Step 2. This creates a nutrient-rich zone where roots can thrive. I've found that adding a handful of perlite to the mix improves drainage even further, especially in clay-heavy soils.
Planting Depth Cue: The instructions mention placing the root ball so it sits level with the soil surface in Step 2, but here's what nobody tells you: If your soil is particularly sandy, you can plant slightly deeper (up to ½ inch below soil level) to help stabilize the plant. In heavier soils, plant slightly higher to prevent water pooling around the stem.
Watering Wisdom: During the first month, when you're watering once a week as instructed, check soil moisture by sticking your finger about 2 inches deep. If it feels dry, water again—daisies prefer consistent moisture but hate soggy roots. After establishment, let the soil dry slightly between waterings to encourage deeper root growth. I've found that watering at the base rather than overhead reduces fungal risks significantly.
Pro Tips for Garden Daisy Flower
- Creating a thriving garden daisy haven takes a few key strategies—here's what I've learned to ensure your plants flou...
- Sunlight Strategy: While daisies tolerate partial shade, the 6-8 hours of full sun mentioned in Step 1 is absolutely ...
- Soil Preparation Secret: When amending heavy clay soil with 2-3 inches of compost in Step 1, don't just top-dress—wor...
Frequently asked questions
Got questions about growing and caring for your garden daisy flower? You’re not alone! Here are some of the most common queries—plus straightforward answers to help you cultivate a thriving pollinator haven.
How do I encourage garden daisies to bloom longer?
Deadhead spent blooms regularly to redirect energy into new flowers. Plus, ensure they get at least 6 hours of sunlight daily and well-draining soil. Mulch around the base to retain moisture and discourage weeds. Overcrowding? Thin seedlings to 12–18 inches apart for better airflow and blooms.
When is the best time to plant garden daisies?
For spring blooms, sow seeds in early spring (as soon as soil is workable). For fall/winter interest, plant in late summer. If your climate has mild winters, they may self-seed and return year after year! Hardy varieties like Leucanthemum × superbum thrive in zones 3–9.
Are garden daisies good for attracting pollinators?
Daisies are a pollinator magnet, especially for bees, butterflies, and beneficial insects. Their flat, open blooms provide easy access to nectar. Plant in clusters for maximum impact, and avoid pesticides to keep these helpful visitors around.
Why are my garden daisies wilting or turning yellow?
Yellowing leaves often signal overwatering or poor drainage. Let soil dry slightly between waterings, and amend heavy clay soil with compost. Wilting could also mean underwatering—daisies prefer consistent moisture but hate soggy roots. Check for pests like aphids or fungal spots too!
Can I grow garden daisies in containers?
Yes! Choose compact varieties like ‘White Swan’ or ‘Becky’ for pots. Use a well-draining mix with perlite or sand, and ensure containers have drainage holes. Aim for at least 12-inch-deep pots (bigger is better for long-term growth). Place in full sun and water regularly.
Pro Tip:
For cut flowers, harvest daisies in the morning when buds are just opening. Strip leaves from the stems and place them in cool water immediately—they’ll last 5–7 days in a vase!
Wrapping up and next steps
Growing garden daisies is a rewarding journey that brings vibrant color, resilience, and life to your outdoor space—while supporting pollinators like bees and butterflies! 🌼 Whether you’re a beginner or seasoned gardener, these cheerful blooms thrive with minimal fuss, making them the perfect addition to borders, meadows, or containers.
Start small, experiment with varieties, and soon you’ll enjoy a year-round tapestry of beauty and biodiversity.
Ready to dive in? Grab your seeds or cuttings, pick a sunny spot, and let nature do the rest. Your garden—and the pollinators—will thank you! 🌱