
Tools
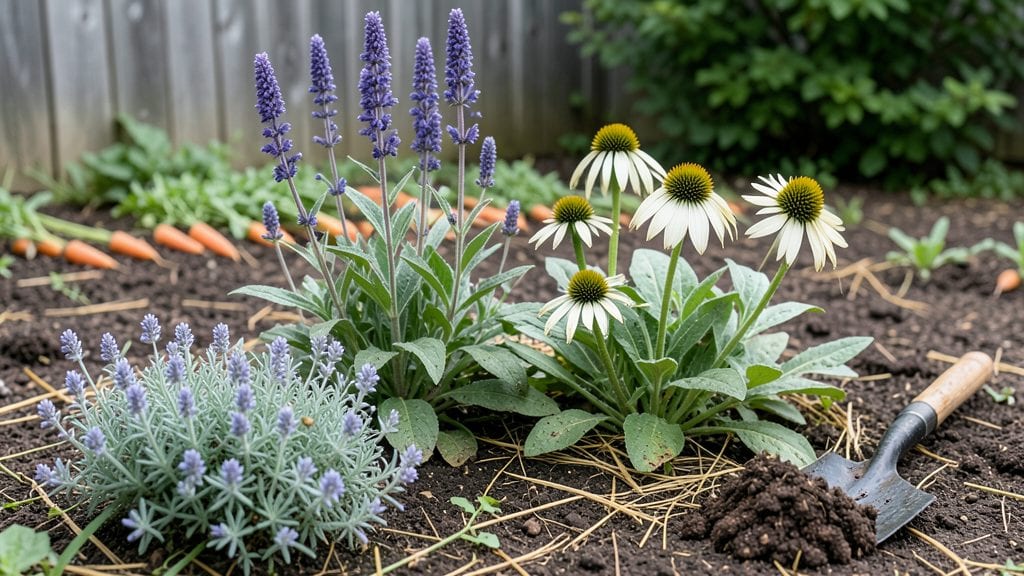
Proper flower garden preparation ensures your season of vibrant blooms begins with the right foundation—soil, tools, and timing. I’ve learned that skipping even one step can mean weaker plants, fewer flowers, and more work later.
The key is testing your soil first, gathering the right tools, and planning your layout before the first seed or bulb goes in the ground.
You’ll need basic supplies like gloves, a trowel, and a soil test kit, but the real game-changer is knowing when to prune, fertilize, or mulch based on your climate.
For example, in cooler regions, early spring is the time to prune perennials, while warmer zones might need a second round in late winter. A well-prepared bed also means less weeding and stronger roots—soil health is everything.
By the time you’re done, your garden will be ready for healthy, long-lasting blooms with minimal effort. The payoff comes in summer when your flowers thrive without constant intervention. Let’s break down the steps so you can get started confidently.
This approach works for both beginners and seasoned gardeners, whether you’re reviving an old bed or starting fresh. The secret is consistency—small, deliberate steps now prevent headaches later. Here’s how to make it happen.
📚 In This Guide
- What you need
- Instructions
- Tips and common mistakes
- Wrapping up and next steps
What you need
- ● Garden soil: 10–20 bags (50-lb) of high-quality potting mix or native soil amended with compost (aim for 60% topsoil, 30% compost, and 10% perlite/sand for drainage).
- ● Organic fertilizer: Slow-release granular (e.g., 10-10-10) or liquid bloom booster (follow package rates).
- ● Mulch: 2–3 bags (2–3 cubic feet each) of shredded bark or cocoa hulls to retain moisture and suppress weeds.
- ● Seeds/plants: Choose native perennials (e.g., coneflowers, black-eyed Susans) and annuals (e.g., marigolds, zinnias) for continuous color. Buy 1–2 flats of transplants or seeds (check packet for spacing).
- ● Garden tools: 1 garden fork (for aerating soil).
- ● 1 hand trowel (for precision planting).
- ● 1 pruners (bypass-style for clean cuts).
- ● 1 wheelbarrow (2–3 cubic feet capacity).
- ● 1 hose with adjustable nozzle (or soaker hose for deep watering).
- ● Protective gear: Gloves (waterproof), knee pads, and a wide-brim hat for sun protection.
- ● Soil test kit: To check pH (aim for 6.0–7.0 for most flowers).
- ● Epsom salt: 1–2 lbs for magnesium-rich soil (great for blooms!).
- ● Garden stakes/trellis: For climbing flowers (e.g., clematis, morning glories).
- ● Bird/bug deterrents: Netting or neem oil spray for pest control.
- ● Garden journal: To track plant progress and notes on care.
Step-by-Step instructions for flower garden preparation
Here’s how to create a thriving flower garden that blooms all season long.
Choose the Perfect Location
Sunlight is the most critical factor for a healthy flower garden. Most annuals and perennials need at least 6 hours of direct sun daily, while shade-loving varieties like impatiens or hostas thrive with 4-6 hours. Observe your yard: mark areas that get full sun, partial shade, or full shade throughout the day.
Once you’ve identified your sun zones, consider airflow. A spot with gentle breezes helps prevent fungal diseases like powdery mildew. Avoid low-lying areas where cold air settles—this can damage tender plants in early spring or late fall. If your yard has poor drainage, plan to amend the soil or raise beds to keep roots healthy.
Clear and Prepare the Soil
Remove weeds, rocks, and debris from the garden area using a garden fork or trowel. I like to pull weeds when the soil is moist—it’s easier and reduces regrowth. If your soil is compacted, loosen it to a depth of 6-8 inches to encourage root growth. This is especially important for heavy clay or sandy soils.
Test your soil’s pH and fertility using a simple kit from your local garden center. Most flowers prefer a slightly acidic to neutral pH (6.0-7.0). If your soil is too alkaline or acidic, amend it with lime (to raise pH) or sulfur (to lower pH) according to the test results. Mix in 2-3 inches of compost to improve drainage, retain moisture, and provide essential nutrients for strong, healthy plants.
Plan Your Layout for Long-Lasting Blooms
Group flowers by their sun and water needs to simplify maintenance. Place tall plants like delphiniums or hollyhocks at the back or center of borders, while shorter flowers like marigolds or petunias can fill the front. This creates a natural, layered look that’s both beautiful and functional.
For a season-long display, layer plants so that early bloomers (like tulips or daffodils) transition into mid-season flowers (like roses or lavender), and finally into late-season bloomers (like chrysanthemums or asters). This ensures your garden stays vibrant from spring through fall. Space plants according to their mature size—crowding leads to poor airflow and disease.
Amend and Fertilize the Soil
Before planting, mix in 1-2 inches of organic matter like compost or well-rotted manure to improve soil structure and fertility. This step is especially important if your soil is sandy or clay-heavy. For nutrient-rich blooms, add a slow-release, balanced fertilizer (10-10-10 or 20-20-20) at planting time, following the package instructions for application rates.
For acid-loving plants like hydrangeas or blueberries, incorporate peat moss or pine needles into the soil to lower the pH naturally. Avoid over-fertilizing—too much nitrogen promotes leafy growth at the expense of flowers. Instead, focus on a moderate feeding schedule (every 4-6 weeks during the growing season) to encourage strong, healthy blooms.
Mulch to Protect and Retain Moisture
Spread 2-3 inches of organic mulch (like shredded bark, straw, or wood chips) over the soil surface after planting. Mulch helps retain moisture, suppress weeds, and regulate soil temperature. Keep the mulch 2-3 inches away from plant stems to prevent rot and pest issues. Replenish mulch as it breaks down to maintain its benefits throughout the season.
For added protection in cold climates, apply a thicker layer (3-4 inches) in late fall to insulate plant roots during winter. In hot, dry areas, mulch also helps keep roots cool and reduces water evaporation. Choose a mulch that matches your garden’s aesthetic—dark mulches like bark absorb heat, while lighter mulches like straw reflect sunlight and keep roots cooler.
Tips & tricks for perfect flower garden preparation
Creating a thriving flower garden starts with the right approach—these tips will help you avoid common pitfalls and maximize your garden's potential for vibrant, healthy blooms.
Sunlight Precision: When assessing sunlight in Step 1, use a simple trick: place a white board or piece of paper in potential spots at different times of day. Observe how much sunlight it receives—this gives you a clear visual of your sun zones. Remember, even partial shade can vary throughout the day, so take multiple observations. I've seen gardens fail because homeowners underestimated how much shade trees cast at different times.
Soil Prep Technique: In Step 2, don't just loosen the soil to 6-8 inches—think about the texture you're creating. Aim for soil that crumbles easily between your fingers when moist, like cake crumbs. For clay soil, mix in equal parts compost and coarse sand to improve drainage. In sandy soil, add more compost to help retain moisture. This texture test helps you gauge whether you've improved your soil structure enough for healthy root development.
Layering Strategy: For Step 3's layered planting approach, create a simple sketch of your garden layout before purchasing plants. This visual plan helps you visualize how each plant will contribute to the overall design and ensures you're spacing them properly. I've found that grouping plants by height and bloom time not only looks beautiful but also makes maintenance much easier—you'll be watering and fertilizing similar plants together.
Fertilizer Timing: When applying fertilizer in Step 4, remember that less is often more. The 4-6 week feeding schedule is ideal because it prevents salt buildup in the soil, which can actually harm plant roots. I recommend applying fertilizer in the morning so it has time to absorb before evening watering. Also, always water thoroughly after fertilizing to help distribute nutrients evenly through the soil.
Pro Tips for Flower Garden Preparation
- Creating a thriving flower garden starts with the right approach—these tips will help you avoid common pitfalls and maximize your garden's potential for vibrant, healthy blooms.
- Sunlight Precision: When assessing sunlight in Step 1, use a simple trick: place a white board or piece of paper in potential spots at different times of day.
- Soil Prep Technique: In Step 2, don't just loosen the soil to 6-8 inches—think about the texture you're creating.
Frequently asked questions
Got questions about prepping your flower garden for a season of stunning blooms?
You’re not alone! Here are answers to the most common concerns to help you get started with confidence.
When is the best time to start preparing my flower garden?
The ideal time depends on your climate and plants, but early spring (before the last frost) is perfect for most regions. In warmer zones, late winter works too. For perennials, prep in fall—it gives roots time to establish before spring growth. Pro tip: Check your local frost dates and plant hardiness zone for precision!
Can I prepare a flower garden in containers or raised beds?
Containers and raised beds are great alternatives—they offer better drainage, control over soil quality, and are ideal for small spaces or poor soil. Just ensure they’re at least 6-12 inches deep (deeper for perennials) and use lightweight, well-draining potting mix. Add a layer of gravel or fabric at the bottom to prevent root rot.
What should I do if my soil is rocky or clay-heavy?
Don’t stress—amend it! Mix in 2-3 inches of compost or aged manure to improve texture and fertility. For clay soil, add sand or perlite (up to 20% of the mix) to loosen it. Rocky soil? Focus on mulching and using container gardening for delicate flowers. Pro tip: A soil test ($10-20) reveals exactly what your garden needs!
How do I prevent pests and weeds before planting?
Start with healthy soil—strong plants resist pests better! Use mulch (2-4 inches) to block weeds and retain moisture. For pests, neem oil or diatomaceous earth (food-grade) are natural deterrents. Plant companion flowers like marigolds or lavender to repel bugs. Pro tip: Rotate crops yearly if growing edibles nearby!
Do I need to fertilize before planting, or is compost enough?
Compost is a fantastic start, but a balanced fertilizer (10-10-10) can give flowers a growth boost, especially in nutrient-poor soil. For organic options, try fish emulsion or bone meal. Avoid over-fertilizing—it can burn roots! Test your soil first to tailor your approach.
Wrapping up and next steps
Preparing your flower garden is the foundation for a vibrant, thriving bloom all season long! By selecting the right tools, understanding your soil, and planning strategically, you’ve set yourself up for stunning success. 🌸
Now that you’re armed with knowledge, it’s time to roll up your sleeves and get growing! Start by marking your calendar for your first planting date—whether it’s spring or fall—and take pride in watching your hard work transform into a breathtaking garden oasis. Happy gardening!