
Shrubs
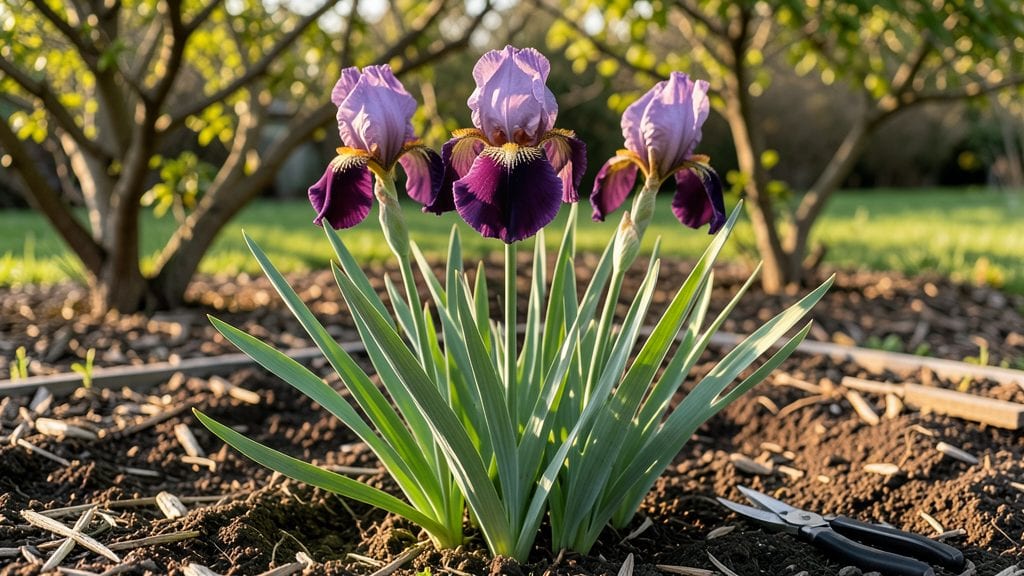
Early flowering iris varieties burst into color when most gardens are still gray and brown, offering bold purple, blue, and yellow blooms that brighten containers before other perennials even think about waking up.
I’ve grown them in pots for years, and the secret to their early performance lies in timing—planting in late summer or early fall gives roots time to establish before winter, so they’re ready to explode in late winter or early spring.
The key difference from traditional bearded irises is their shorter growing season: these varieties prioritize early blooms over summer heat tolerance, making them perfect for cooler climates or container gardens where roots can’t spread freely in the ground.
You’ll need well-draining soil mix (equal parts potting soil and perlite or sand), a container at least 12 inches deep with drainage holes, and a spot that gets full sun to partial shade—morning sun and afternoon shade works best in hotter zones.
Fertilize lightly in early spring with a balanced 10-10-10 formula, then water consistently but avoid soggy roots. Unlike their summer-blooming cousins, early irises don’t need heavy feeding—they reward patience with weeks of vibrant color when most gardens are still dormant.
The payoff comes in late winter or early spring, when your containers become a splash of color against bare branches and frost-kissed lawns.
These irises thrive in USDA zones 3-9, but timing varies: in cooler zones (3-5), plant in late summer for spring blooms; in warmer zones (7-9), fall planting ensures winter or early spring flowers. After blooming, let the foliage die back naturally—it stores energy for next year’s display.
For long-term success, divide clumps every 3-4 years in late summer, and repot if growth becomes crowded. The trade-off? Early irises have shorter vase life than summer varieties, but their seasonal timing makes them a standout early-season star.
Once you’ve seen a container full of these blooms in March, you’ll never wait for summer again.
📚 In This Guide
- What you need
- Instructions
- Tips and common mistakes
- Wrapping up and next steps
What you need
- ● Early flowering iris rhizomes: 3–5 per container (choose varieties like Iris reticulata or Iris histrioides for compact, early blooms).
- ● Well-draining potting mix: 1 part perlite or pumice + 2 parts peat-free compost (or cactus/succulent mix).
- ● Containers: Shallow pots (6–8" deep) with drainage holes—terracotta or fabric pots work best!
- ● Gravel or sand: 1–2" layer for the bottom of the pot (ensures drainage).
- ● Slow-release fertilizer: Balanced 10-10-10 or bulb-specific fertilizer (follow package rates).
- ● Gloves: Heavy-duty for handling rhizomes (they’re tough but sharp!).
- ● Trowel or small shovel: For planting and mixing soil.
- ● Watering can with a fine rose: Gentle watering avoids displacing rhizomes.
- ○ Mulch (optional): ¼" of pebbles or grit to keep rhizomes exposed (they need airflow!).
- ○ Stakes (optional): For tall varieties to prevent flopping in wind.
Step-by-Step instructions for growing early flowering iris in containers
Here’s how to coax vibrant spring blooms from iris rhizomes—no green thumb required.
Prepare the Right Containers and Drainage
Start with 12-inch deep containers—iris rhizomes need room to spread and roots to breathe. Choose pots with drainage holes; if yours don’t, drill them yourself. I like terra cotta because it wicks away excess moisture, but plastic works too. Line the bottom with 1 inch of small gravel—this prevents root rot by keeping water from pooling.
Test your drainage by filling the pot with water. If it drains within 5 minutes, you’re good. If not, add more gravel or switch to a container with larger holes. Iris hate soggy feet, and poor drainage is the fastest way to kill them. Place a wire mesh screen over the holes to keep gravel in place while allowing water to escape.
Layer Soil and Position Rhizomes Correctly
Fill the bottom 2 inches of the pot with well-draining potting mix. Iris rhizomes rot easily in dense soil, so avoid garden soil or anything labeled "moisture-retentive." Mix in 1 part perlite for every 3 parts potting mix to improve aeration. Gently press the soil down—just enough to remove air pockets, but don’t compact it.
Place the iris rhizomes on top of the soil, spreading them out with the fan of roots facing upward. They should sit half-buried, with the top third exposed to light. If you’re planting multiple rhizomes, space them 4-6 inches apart. This mimics their natural growth habit and prevents overcrowding. Water lightly to settle the soil around them, but don’t soak the mix—rhizomes need to stay slightly dry at first.
Water and Provide the Ideal Light Setup
Give the newly planted rhizomes a deep but gentle watering—enough to moisten the soil 2 inches down, but no more. Overwatering now will smother the roots and trigger rot. Let the top inch of soil dry out between waterings. Iris are drought-tolerant once established, but they need consistent moisture during their first 4-6 weeks of growth.
Move the containers to a spot with full sun—at least 6 hours daily. A south-facing window or patio works, but if you’re using grow lights, position them 6-8 inches above the plants and keep them on for 12-14 hours a day. You’ll know the light is right when the leaves stand upright and the rhizomes show new green growth within 2-3 weeks. If the leaves bend toward the light, your setup isn’t bright enough.
Fertilize and Monitor for Blooms
Wait 6 weeks after planting before fertilizing. Once new growth appears, apply a balanced, water-soluble fertilizer (like 10-10-10) at half-strength every 4-6 weeks during the growing season. Iris don’t need much—too much fertilizer leads to leafy growth at the expense of flowers. After fertilizing, water deeply to help the nutrients soak into the soil.
Watch for flower stalks to emerge in early spring—these look like thin, upright shoots taller than the leaves. Once blooms open, deadhead spent flowers by snipping the stalks 1 inch below the bloom. This redirects the plant’s energy into stronger roots and next year’s flowers. If your iris aren’t blooming by late spring, they may need more sunlight or a cooler winter dormancy period. Move them to a shadier spot for 2-3 weeks in summer to mimic natural conditions.
Tips & tricks for perfect early flowering iris in containers
Growing vibrant iris in containers takes just a few key tricks to avoid common pitfalls and ensure those bold spring blooms appear right on schedule.
Drainage is Everything: The 5-minute drainage test in Step 1 is non-negotiable. If your container fails this test, you risk root rot that can kill iris within days. I’ve seen terra cotta pots work wonders because they wick away moisture, but if you’re using plastic, drill extra holes if needed. The wire mesh screen over drainage holes prevents gravel from clogging while still allowing water to escape freely.
Soil Mix Matters More Than You Think: In Step 2, that 1:3 perlite-to-potting mix ratio creates the perfect balance of aeration and moisture retention. I’ve tried skipping the perlite, and the rhizomes struggled to establish roots properly. Press the soil gently but don’t compact it—think "light as a cloud" rather than "firm as a brick." This prevents waterlogging while still giving roots something to anchor to.
Light Requirements Are Non-Negotiable: The instructions mention 6 hours of sun, but I’ve found that iris actually thrive with 8-10 hours when possible. In Step 3, if you’re using grow lights, position them 6-8 inches above and run them for the full 12-14 hours. Watch for leaves bending toward light—that’s your signal to move the container closer or increase light duration. Yellowing leaves usually mean too much direct sun during hot afternoons.
Fertilizer Timing is Critical: Waiting those full 6 weeks before fertilizing in Step 4 gives rhizomes time to establish roots. I’ve seen beginners fertilize too early, and the plants put all their energy into leaves instead of blooms. When you do fertilize, always use half-strength solution—iris are light feeders. After fertilizing, give that deep watering to help nutrients penetrate to the roots where they’re needed most.
Pro Tips for Early Flowering Iris
- Growing vibrant iris in containers takes just a few key tricks to avoid common pitfalls and ensure those bold spring blooms appear right on schedule.
- Drainage is Everything: The 5-minute drainage test in Step 1 is non-negotiable.
- Soil Mix Matters More Than You Think: In Step 2, that 1:3 perlite-to-potting mix ratio creates the perfect balance of aeration and moisture retention.
Frequently asked questions
Got questions about bringing bold spring color to your containers with early flowering iris? Here are some answers to help you grow with confidence!
What’s the best time to plant early flowering iris for container growing?
Plant your early flowering iris in early fall (6–8 weeks before your first frost) or late winter (4–6 weeks before your last frost). This gives roots time to establish before blooming. Avoid planting too early—they can rot in soggy soil!
How do I keep my container iris blooming year after year?
After flowering, trim spent blooms but leave the foliage until it yellows (6–8 weeks). Divide clumps every 3–4 years in early fall to prevent overcrowding. Use well-draining soil and containers with drainage holes to avoid root rot.
Can early flowering iris survive harsh winters in containers?
Yes, but with care! Move containers to a sheltered spot (like a garage or under eaves) before freezing temps. Mulch the soil with straw or leaves for insulation. Hardier varieties (like Iris germanica) tolerate colder climates better than tender types.
What’s the easiest way to propagate early flowering iris for more containers?
Divide mature clumps in early fall—lift the plant, separate the rhizomes (keeping the "fan" of roots intact), and replant the strongest sections. You can also grow from seed, but it takes 2–3 years for blooms. Rhizome division is faster and foolproof!
Why aren’t my container iris blooming this year?
Common culprits: too much shade (they need 6+ hours of sun), overcrowded roots, or poor drainage. Check soil moisture—iris hate soggy feet! If they’re healthy but not blooming, try fertilizing lightly in early spring with a balanced, low-nitrogen formula.
Wrapping up and next steps
Growing early flowering iris in containers is a fantastic way to welcome vibrant spring color to your space—without the fuss! With the right soil mix, sunlight, and care, these stunning blooms will reward you with months of beauty.
Whether you’re a seasoned gardener or just starting out, your containers are now ready to shine.
Ready to dive in? Pick your favorite early iris varieties and start planting—your garden (and pollinators!) will thank you. 🌸