
Pruning
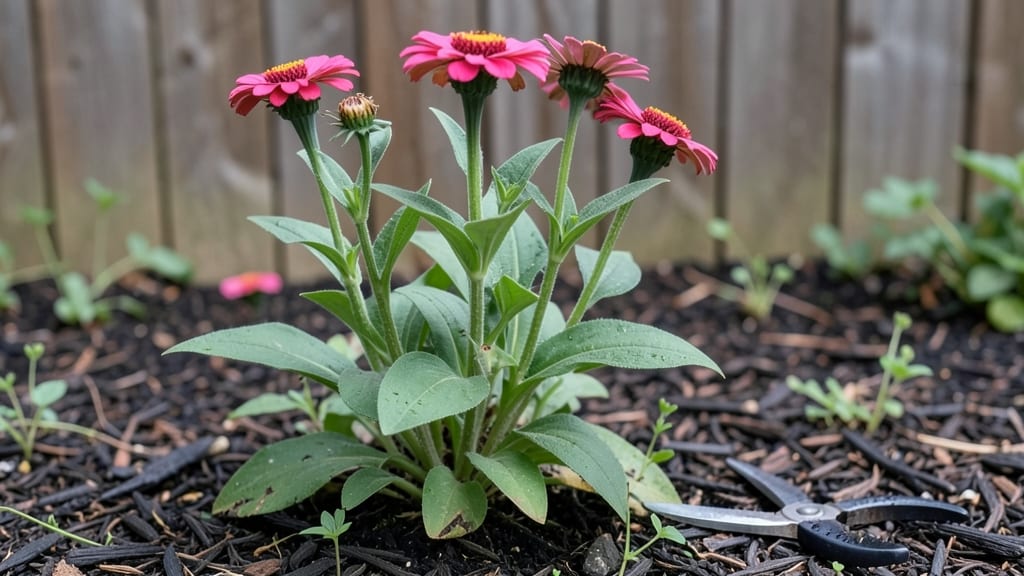
Deadheading spent flowers is the secret weapon for gardens that bloom all season long. ✨ I used to watch my favorite annuals fizzle out after their first flush of flowers, but a few snips with the right timing changed everything—now my marigolds and zinnias keep producing like they’re on a never-ending show.
The trick is simple: remove faded blooms before they set seed, and the plant redirects energy into new flowers instead of making seeds. You’ll need sharp pruners or even your fingers for delicate stems, and timing matters—morning is best when blooms are still crisp and easy to spot.
Annuals like petunias and perennials like coneflowers respond instantly, while roses need a slightly different approach to avoid damaging their canes.
Within days, you’ll notice fresh buds forming where there were none before. The plants grow bushier, too, because they’re not wasting energy on seed production. Plus, your garden stays vibrant for pollinators, who get a steady buffet of fresh nectar all season.
The key is consistency—just a few minutes every few days keeps the blooms coming.
This method works for almost any flowering plant, from container annuals to border perennials. The only exceptions are plants that rely on seed heads for winter interest, like ornamental grasses or black-eyed Susans.
For those, let the flowers go until they turn brown and brittle—then you can trim them back for a clean look.
📚 In This Guide
- What you need
- Instructions
- Tips and common mistakes
- Wrapping up and next steps
What you need
- ● Pruning shears or hand pruners – Sharp, clean, and bypass-style (avoid anvil pruners to prevent crushing stems).
- ● Gloves – A pair of gardening gloves (nitrile or leather) to protect your hands from thorns or sap.
- ● Deadheading target flowers – Focus on spent blooms (wilted, brown, or seed-podded flowers) from annuals, perennials, or shrubs.
- ● Bucket or compost bin – A 5-gallon bucket or compost bag to collect pruned flowers and stems.
- ○ Water & mild soap (optional but recommended) – A spray bottle with water and a drop of mild dish soap to sterilize tools between cuts (prevents disease spread).
- ● Knee pads or stool – For comfort if you’re deadheading low-growing plants or large garden beds.
- ● Disposable pruning bags – Convenient for mess-free cleanup (great for pet owners or tidy gardens!).
- ● Label markers & notebook – To track which plants you’ve pruned and note any new growth patterns.
- ● Sunhat & sunscreen – Because even pollinator-friendly gardening can get sun-intensive!
Instructions for deadheading spent flowers
Here’s how to keep your blooms flourishing—and your garden buzzing with pollinators—with simple, effective pruning.
🌿 Step 1: Identify Flowers Ready for Deadheading
Look for blooms that have fully opened and are starting to fade. These will have wilted petals or seed pods forming at the center. I always check in the morning when petals are crisp and easy to spot. Avoid cutting flowers that still have vibrant color or are attracting bees—those are still doing their pollinator work.
If you’re unsure, pinch off just the spent flower head (the cluster of petals) and leave the stem intact. This prevents accidental pruning of healthy buds hiding below. For flowers like zinnias or daisies, you’ll see the center turn brown first—that’s your cue to act.
✂️ Step 2: Use Clean Tools and the Right Technique
Grab your pruning shears or sharp scissors and make a clean cut just above a set of healthy leaves or a leaf node. This encourages new growth from that point. I like to angle my cuts slightly downward to prevent water from pooling on the stem, which can cause rot.
For delicate stems like those of petunias, pinch the flower head off by hand instead of cutting. This avoids damaging the stem and keeps the plant looking tidy. Always sterilize your tools with rubbing alcohol between plants to prevent spreading disease.
🌱 Step 3: Encourage More Blooms and Pollinator Support
After deadheading, step back and look for new buds forming. These will often appear within a few days to a week, depending on the plant. I’ve found that regular deadheading can extend the blooming season by 3-4 weeks for many annuals and perennials.
Leave some spent flowers on the plant if you notice bees or butterflies visiting them. These pollinators rely on seed heads for late-season food. For example, let coneflowers or black-eyed Susans develop their seed pods—they’re a vital food source for birds and insects in winter.
💧 Step 4: Water and Fertilize for Strong Regrowth
After pruning, give your plants a deep watering to help them recover. Focus on the base of the plant rather than the leaves to avoid fungal issues. I water in the early morning so the foliage has time to dry out before evening.
If your plants look tired after deadheading, add a balanced, water-soluble fertilizer to the soil. Follow the package instructions for dilution, but I’ve found that half-strength is often enough. This gives them a gentle boost without overstimulating leafy growth at the expense of flowers.
☀️ Step 5: Monitor and Repeat Regularly
Check your plants every 3-5 days during peak blooming season. This keeps your garden looking neat and encourages continuous flowering. I set a reminder on my phone for weekly deadheading sessions—it’s a great way to stay on top of it without it becoming a chore.
If you notice any stems with yellowing leaves or blackened spots after pruning, remove those entirely and dispose of them in the trash (not the compost). This prevents disease from spreading to healthy parts of the plant. With consistent care, your garden will stay vibrant and full of life all season long.
Tips & tricks for perfect deadheading
A few simple tricks will help you extend your garden's beauty while keeping pollinators happy—without the guesswork.
The Right Time of Day: I always deadhead in the morning when petals are crisp and dew has evaporated. This makes it easier to spot faded blooms and prevents water from dripping onto fresh cuts, which could encourage fungal growth. The morning light also reveals any hidden buds you might accidentally trim.
Tool Selection Matters: For tougher stems like roses, use sharp pruning shears to make clean cuts. For delicate flowers like petunias, my fingers work perfectly—no need for tools that can damage stems. Always keep a small bottle of rubbing alcohol handy to wipe down tools between cuts; this prevents spreading disease from plant to plant.
Look for the Leaf Node: When making cuts, aim for just above a leaf node (the bump where leaves grow). This little detail makes all the difference—new growth will sprout from that node, giving you more blooms. If you're unsure where the node is, look for the small bump or indentation on the stem.
Pollinator-Friendly Exceptions: Not all spent flowers need deadheading! Leave seed heads on plants like coneflowers or black-eyed Susans—they provide vital food for birds and insects in late season. I make a point to leave at least one flower per plant to support local wildlife while still keeping my garden looking neat.
Pro Tips for Deadhead Spent Flowers
- A few simple tricks will help you extend your garden's beauty while keeping pollinators happy—without the guesswork.
- The Right Time of Day: I always deadhead in the morning when petals are crisp and dew has evaporated.
- Tool Selection Matters: For tougher stems like roses, use sharp pruning shears to make clean cuts.
Frequently asked questions
Got questions about deadheading? You’re not alone! Here are some of the most common queries—and straightforward answers—to help you master this pollinator-friendly pruning technique.
What exactly does “deadhead” mean?
Deadheading simply means removing spent blooms (those that have faded or wilted) from your plants. This encourages new growth and blooms, extending your garden’s beauty while also supporting pollinators by keeping plants productive. Think of it as giving your flowers a fresh start!
When is the best time to deadhead?
Timing depends on your plant, but generally, deadhead right after a bloom wilts or loses color. For annuals like zinnias or petunias, this might be weekly. For perennials like coneflowers or black-eyed Susans, wait until the seed head forms but hasn’t fully dried. Pro tip: Morning is ideal—cooler temps reduce stress on the plant.
Do I need special tools to deadhead?
Not at all! While clean, sharp pruners or shears make the job easier, you can also use your fingers for delicate blooms. Just avoid tugging—snip or pinch just above a leaf node (where leaves grow) to promote new shoots. For large or thorny plants, gloves and pruners are your best friends!
Will deadheading kill my plant?
Nope! Deadheading won’t harm healthy plants—it actually revitalizes them. However, avoid over-pruning (never cut more than ⅓ of the plant at once) or deadheading new growth (like buds or fresh leaves). If your plant looks stressed, it might need a break or extra water instead.
Does deadheading help bees and butterflies?
By removing spent blooms, you’re prolonging the plant’s flowering season, giving pollinators a longer buffet. Plus, leaving some seed heads (like those from coneflowers) provides food for birds and shelter for beneficial insects. It’s a win-win for your garden and wildlife!
What if my flowers keep dying after deadheading?
Check these fixes:
- Water issues: Over- or under-watering can stress plants. Stick your finger in the soil—if it’s dry 1–2 inches down, water deeply.
- Nutrients: Feed with a balanced fertilizer (like 10-10-10) if new growth is slow.
- Pests/disease: Yellowing leaves or spots? Isolate the plant and treat with neem oil or fungicide.
- Light: Some flowers (like impatiens) need shade; others (like sunflowers) thrive in full sun.
Wrapping up and next steps
Deadheading spent flowers isn’t just about keeping your garden tidy—it’s a simple, powerful act that boosts pollinator health and extends your blooms.
By mastering this technique, you’re not only supporting bees, butterflies, and hummingbirds but also giving your plants the energy to thrive. Start small, stay consistent, and watch your garden flourish!
🌱 Ready to Try?
Grab your pruners and visit one flower bed at a time. Even 10 minutes a week makes a difference—your garden (and pollinators!) will thank you. Share your progress or tag us—we love seeing your blooming success!