
Pruning
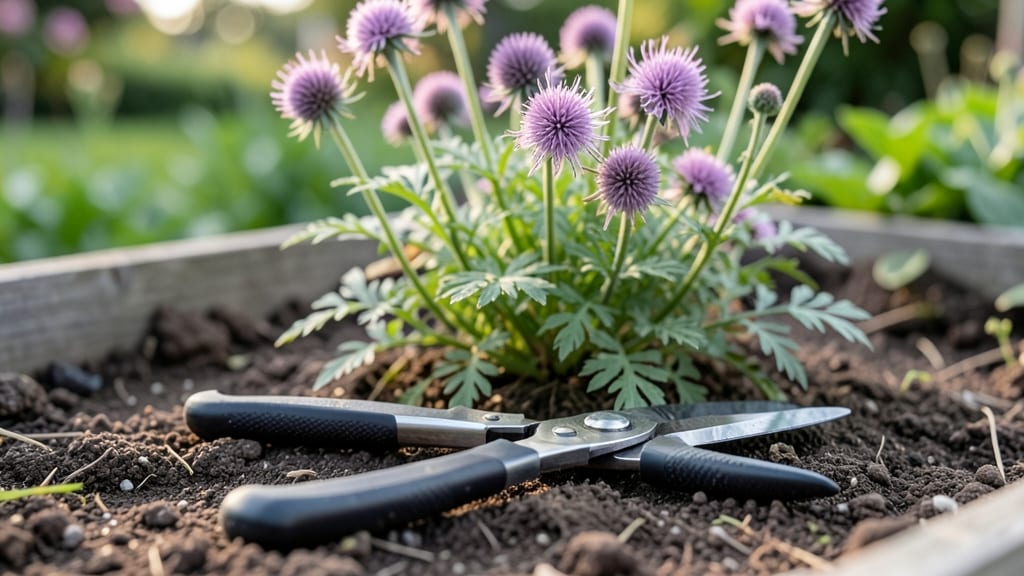
Deadheading pincushion flowers (Scabiosa) is the easiest way to turn a single summer bloom into weeks of fresh flowers—no fancy tools or green thumb required. ✨ I’ve kept my pincushions flowering straight through August by mastering just three cuts, and the secret lies in knowing exactly where (and when) to snip.
The tools you need are simpler than you’d think: a pair of clean pruners or even your fingers work. For annuals, cut back the entire spent bloom stem to the base—this encourages bushier growth and more flowers.
Perennials, though, get a gentler trim: snip just above the first set of healthy leaves to avoid pruning into last year’s growth. Timing matters too—wait until the flower head starts wilting but hasn’t turned brown yet.
What you’ll notice after just one deadheading session is a plant that refuses to quit. Instead of one spent bloom, you’ll see three or four new buds opening within days, and the stems stay sturdy enough to support those heavy pincushion heads.
The flowers last longer too—cut back consistently, and you’ll enjoy blooms until frost.
Here’s the trick to avoid common mistakes: never cut into bare wood on perennials, and don’t over-trim annuals (a few inches above the soil is plenty). After cutting, give the plant a light drink of water to help it recover, and watch those new buds pop like clockwork.
Even my black thumb can’t mess this up.
📚 In This Guide
- What you need
- Instructions
- Tips and common mistakes
- Wrapping up and next steps
What you need
- ● Pruning shears or sharp scissors – Choose bypass pruners (clean cuts!) or small garden scissors (for precision). Sterilize with rubbing alcohol before use!
- ○ Gloves (optional but recommended) – Lightweight gardening gloves protect hands from thorns (common in Dipsacus) and dirt.
- ○ Deadheading shears (optional upgrade) – Specialized tools with angled blades for cleaner cuts (great for bulk pruning).
- ● Bucket or trash bag – A small container to collect spent blooms and debris.
- ○ Garden twine or rubber bands (optional) – Tie up leggy stems to encourage bushier growth.
- ● Sunny day with mild weather – Deadhead in the morning when blooms are dry (avoid wet flowers to prevent disease).
- ● Freshly sharpened tools – Dull blades crush stems, inviting pests. Test your shears on a piece of paper—if it tears, sharpen them!
- ● Know your plant’s growth habit – Pincushion flowers bloom on new wood, so avoid cutting back more than 1/3 of the plant at once.
Deadhead pincushion flowers: extend blooms with 3 simple cuts
Here's how to keep your pincushion flowers blooming all season with just a few precise cuts.
✂️ Step 1: Identify the Right Blooms to Cut
Pincushion flowers (like Scabiosa) have two types of blooms: the fuzzy, spherical center and the delicate petals around it. Only cut the spent petals—never the fuzzy center. Look for petals that have flattened or turned brownish. These are your targets. The fuzzy center will produce new petals for weeks to come.
I always wait until the petals are completely faded but still attached. Cutting too early removes blooms that could still attract pollinators. Use clean, sharp pruners to avoid crushing stems. If you're working with multiple plants, I like to gather a small handful of spent blooms first before making any cuts—this keeps the process efficient and prevents over-trimming.
✂️ Step 2: Make the Clean Cut at the Base
Position your pruners just above the fuzzy center where the petals meet the stem. Make a single, clean cut at a 45-degree angle about ¼ inch below the base of the spent bloom. This angled cut helps water run off the stem instead of pooling and causing rot. A straight cut across the stem can leave a flat surface where water collects.
If the stem feels woody or thick, use pruners with a sharp blade—snipping with dull tools crushes the stem and invites disease. I always wipe my pruners with rubbing alcohol between plants to prevent spreading any potential pathogens. After cutting, you’ll notice fresh green growth emerging from the fuzzy center within 3-5 days. This is your signal that the plant is responding well.
✂️ Step 3: Encourage New Growth With Light Pruning
Once you’ve removed all the spent petals, take a closer look at the plant’s overall shape. If any stems look leggy or overcrowded, trim them back by ⅓ of their length to encourage bushier growth. Focus on the oldest stems first—they’ve already had their chance to bloom and will benefit most from pruning.
Here’s the thing—pincushion flowers bloom best when they have good airflow. If you notice leaves touching or stems growing too close together, thin them out slightly. This prevents fungal issues and lets more light reach the center of the plant. After pruning, give the plant a light watering to help it recover. You’ll see new buds forming at the tips of the remaining stems within 7-10 days.
🌿 Step 4: Maintain for Continuous Blooms
Deadheading isn’t a one-time task—it’s an ongoing routine. Check your pincushion flowers every 5-7 days during peak bloom season (spring through fall). In cooler months or drought conditions, you can stretch this to 10-14 days, but don’t let spent blooms linger too long. The longer you wait, the more energy the plant wastes on seed production instead of new flowers.
I like to deadhead in the early morning when the blooms are fully open and the stems are still turgid. This gives the plant the rest of the day to recover and prepare for the next round of blooms. If you’re growing pincushions in containers, a quick inspection after watering helps you spot spent blooms more easily—they’ll stand out against the fresh green growth.
Tips & tricks for perfect pincushion flower deadheading
A few simple tricks will help you extend your pincushion flowers' blooming season with minimal effort.
Timing Tip: The early morning is the absolute best time to deadhead. This is when the stems are fully turgid with water, making them easier to cut cleanly. Plus, you'll avoid disturbing pollinators that are most active during the day. I've found that deadheading in the morning gives the plant the entire day to recover and prepare for new blooms.
Tool Technique: Don't have pruners? A clean, sharp pair of kitchen scissors works perfectly for pincushion flowers. The key is to make one smooth cut rather than crushing the stem. If you're working with multiple plants, I like to use a small bucket to collect the spent blooms—this keeps your workspace tidy and makes cleanup effortless.
Visual Cue: When checking for spent blooms, look for petals that have flattened completely against the fuzzy center. These will be noticeably lighter in color, often with brownish or yellowish edges. The fuzzy center should remain intact—this is where new petals will emerge within just 3-5 days after deadheading.
Maintenance Strategy: During peak bloom season, I set a reminder to check my pincushion flowers every 5-7 days. In cooler months, I extend this to 10-14 days, but I never let spent blooms remain longer than two weeks. The longer you wait, the more energy the plant diverts to seed production instead of creating new flowers. A quick inspection after watering helps me spot spent blooms more easily—they stand out against the fresh green growth.
Pro Tips for Deadhead Pincushion Flower
- A few simple tricks will help you extend your pincushion flowers' blooming season with minimal effort.
- Timing Tip: The early morning is the absolute best time to deadhead.
- Tool Technique: Don't have pruners?
Frequently asked questions
Got questions about deadheading pincushion flowers? You’re not alone! Here are some of the most common queries—and their easy answers—to keep your blooms thriving.
What’s the best time of day to deadhead pincushion flowers?
Deadhead pincushion flowers in the early morning when dew is still present. This reduces stress on the plant and gives it time to recover before the heat of the day. Avoid evening deadheading, as damp flowers may attract pests or fungal diseases.
How often should I deadhead pincushion flowers?
Check your pincushions weekly during peak bloom (spring/summer). Remove spent blooms immediately—they’ll redirect energy to new growth. For perennial varieties, cut back 1/3 of the stem after flowering to encourage bushiness for next season.
Can I use pruning shears or scissors to deadhead?
Yes! Use clean, sharp pruners (or scissors) for precision. Avoid dull tools—they crush stems and invite disease. For small pincushions, snip just above a leaf node; for larger clumps, opt for pruning shears to avoid tearing foliage.
What if my pincushion flowers stop blooming after deadheading?
Three likely causes:
- Over-pruning: Never cut more than 1/3 of the plant at once.
- Poor nutrition: Feed with balanced fertilizer (10-10-10) in early spring.
- Sunlight deficiency: Pincushions need 6+ hours of sun daily.
Are there alternatives to deadheading pincushion flowers?
If you’re short on time, try these low-maintenance options:
- Leave seed heads for winter interest (but remove them in spring to prevent self-seeding where unwanted).
- Use mulch to retain moisture and reduce stress on the plant.
- Plant companion flowers (like marigolds) to deter pests naturally.
Wrapping up and next steps
Mastering the art of deadheading pincushion flowers is a game-changer for any gardener! With just three simple cuts, you can keep those velvety blooms thriving all season long—saving time, effort, and even a few bucks on new plants.
Whether you’re a seasoned green thumb or a curious beginner, these techniques will transform your garden into a showstopper.
Ready to put your new skills to the test? Grab your pruners and head out there! Try one of these methods this weekend, and watch your pincushions reward you with bold, vibrant blooms for months to come. Happy gardening! 🌸✂️