
Pruning
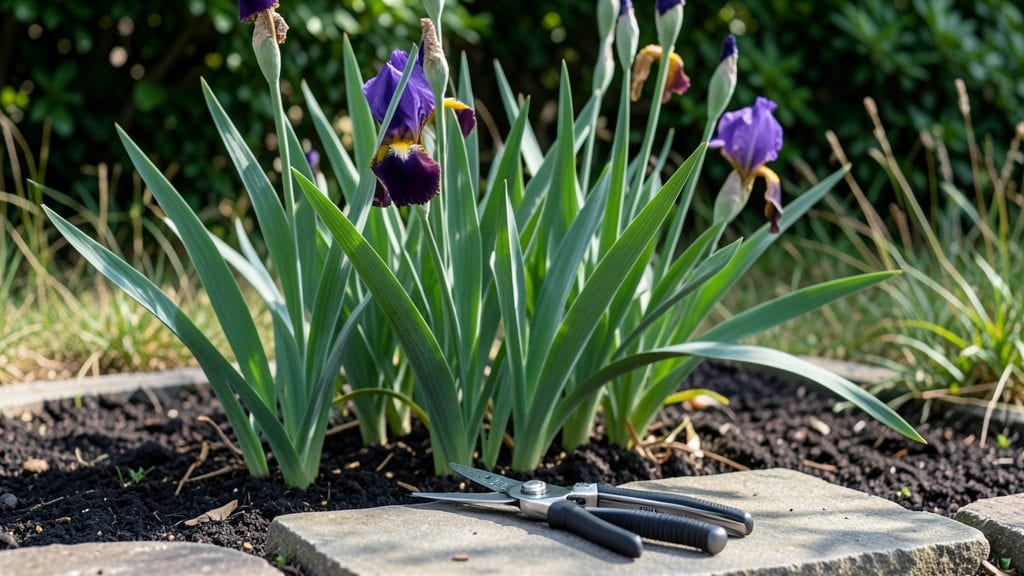
Cutting back iris after flowering is the secret to those showstopping purple plumes every spring. 🌿 I’ve learned the hard way—skipping this step means fewer blooms next year, not to mention the risk of fungal diseases lurking in last year’s dead foliage.
The timing matters almost as much as the cut itself, and I’ll show you exactly when to reach for those shears.
Here’s the deal: wait until late summer or early fall, after the blooms fade but before the seed pods form. You’ll know it’s time when about one-third of the foliage has yellowed naturally.
Grab your pruners and snip the old flower stalks at the base, then trim the fan-shaped leaves back to about two-thirds their height—never below the crown. This might sound drastic, but trust me, it’s what your irises need to store energy for next season.
The payoff? Stronger, healthier plants that push out more blooms in spring, with thicker, more vibrant foliage. You’ll also reduce the chance of iris borers and fungal issues that love to hide in old growth.
Plus, your garden beds will look tidier without sacrificing next year’s performance. Think of it as a spa day for your irises—rough on the surface, but they’ll thank you in bloom time.
If you’re in a warmer climate, like zones 8-10, you can trim a little later, even into early winter. Just avoid cutting back in freezing temperatures—that’s when the real damage happens. Now, grab those shears and let’s get to work!
📚 In This Guide
- What you need
- Instructions
- Tips and common mistakes
- Wrapping up and next steps
What you need
- ● Sharp bypass pruners or shears – Choose a pair with clean, stainless-steel blades (4-6 inches long) to avoid crushing stems. (Pro tip: 💡 Test sharpness by slicing a piece of paper—if it tears, sharpen those blades!)
- ● Hand pruners or loppers – For thicker stems (½ inch or larger), opt for bypass-style loppers with a 10-12 inch reach for leverage.
- ● Garden gloves – Nitrile-coated or heavy-duty leather (size medium/large) to protect hands from thorns and sharp edges.
- ● Disinfectant (70% isopropyl alcohol or bleach solution) – 1 part bleach to 9 parts water to sterilize tools between cuts and prevent disease spread.
- ● Garden kneeler or stool – For comfort, especially if your iris bed is large.
- ● Rake or hoe – To clear debris and mulch after trimming.
- ● Compost bin or bag – For disposing of spent foliage (avoid composting if disease is suspected).
- ● Markers or flags – To label new plantings or divide sections for future reference.
- ● Timing – Wait until 6-8 weeks after flowering (or when foliage turns yellow/brown) to trim.
- ● Weather check – Choose a dry, overcast day to avoid stressing the plant.
- ● Safety first! – Wear closed-toe shoes and avoid cutting in wet conditions to prevent slips.
Instructions for cutting back iris after flowering
Here’s how to revive your iris for next season’s showstopping blooms.
✂️ Step 1: Wait Until Flowers Fade Completely
Don’t rush—wait until the iris blooms have fully wilted and turned brown. This usually happens 4-6 weeks after flowering. Cutting too soon removes the plant’s energy reserves stored in the rhizomes, which feed next year’s growth. You’ll know it’s time when the flower stalks droop and the leaves stay limp, even in sunlight.
I always mark my calendar 6 weeks after the last bloom as my deadline. This gives the plant time to redirect nutrients back into the rhizomes. If you’re unsure, wait an extra week—your iris will thank you with stronger stems next spring.
✂️ Step 2: Cut Flower Stalks at the Base
Use clean, sharp pruners or shears to snip the flower stalks 1 inch above the rhizome. Avoid tearing the leaves—they’re still working to feed the plant. Cutting at the base prevents disease from lingering in old stalks and keeps the garden tidy.
Here’s the thing—don’t cut the fan of leaves. They stay until they turn yellow naturally, which can take 6-8 weeks. These leaves are the plant’s solar panels, converting sunlight into energy for next year’s blooms. If you remove them too soon, you’re stealing the iris’s food supply.
✂️ Step 3: Remove Yellowed or Damaged Leaves
Once leaves turn completely yellow or brown, trim them back to 2-3 inches above the rhizome. This prevents fungal issues and keeps the plant’s energy focused on the rhizome. I use sterilized pruners to avoid spreading disease between plants.
Don’t overdo it—leave a few healthy-looking leaves if possible. The rhizome needs those last bits of photosynthesis. If you’re unsure, leave the leaves until they’re fully crispy. You can always trim more later, but you can’t regrow what you cut too soon.
🌱 Step 4: Fertilize and Mulch for Winter Prep
After trimming, spread a 1-inch layer of compost around the base but not touching the rhizomes. This adds nutrients without smothering the plant. Water lightly to settle the mulch, but avoid soaking the rhizomes—rotting is the last thing you want.
I like to add a slow-release fertilizer now to give the rhizomes a head start on spring growth. Skip the heavy nitrogen—iris prefers a balanced formula. This step ensures your iris wakes up strong next year, not weak and struggling.
⏰ Step 5: Monitor for Spring Regrowth
In early spring, you’ll see new growth emerging from the rhizomes. This is your signal that last year’s trimming worked. Water lightly during dry spells, but avoid soggy soil—iris rhizomes rot easily. By mid-April, you should see fresh leaves pushing through.
Here’s what to watch for: if no new growth appears by late April, the rhizome may have died. But don’t panic—iris are tough. Sometimes they just need a year to recover. Adjust your approach next time, and you’ll be back on track for bold blooms.
Tips & tricks for perfect iris trimming after flowering
A few key insights that'll transform your iris care and ensure next year's showstopping blooms.
Timing is Everything: The 4-6 week window after flowering is critical because this is when your iris stores energy in its rhizomes for next season. I've learned the hard way—cutting too soon (like right after blooms fade) weakens the plant. Mark your calendar exactly 6 weeks after the last bloom to avoid this common mistake. If you're unsure, wait until the flower stalks are completely brown and crispy, even if it takes that extra week.
The Leaf Preservation Secret: Those fan-shaped leaves aren't just decoration—they're the plant's solar panels! In Step 2, resist the urge to trim them until they're fully yellow or brown. I've seen gardeners cut healthy leaves too soon, and their irises struggled the next year. Leave them until they're completely crispy (which can take up to 8 weeks), and you'll give your rhizomes the energy they need to produce strong stems.
Precision Cutting Technique: When you're ready to trim those yellowed leaves in Step 3, use sterilized pruners and cut back to just 2-3 inches above the rhizome. This prevents fungal issues and keeps the plant's energy focused where it matters. I always clean my tools with rubbing alcohol between plants to avoid spreading disease. And here's a pro tip: if you're unsure whether to trim a leaf, leave it—you can always cut more later, but you can't regrow what you remove too soon.
Winter Prep Insight: That 1-inch layer of compost in Step 4 isn't just decoration—it's insurance against winter stress. I've found that adding a slow-release, balanced fertilizer at this stage gives my irises a head start in spring. Avoid high-nitrogen fertilizers (like lawn fertilizers) because iris prefer a more balanced approach. This simple step makes all the difference when you see those fresh leaves pushing through in mid-April.
Pro Tips for Cutting Back Iris After Flowering
- A few key insights that'll transform your iris care and ensure next year's showstopping blooms.
- Timing is Everything: The 4-6 week window after flowering is critical because this is when your iris stores energy in its rhizomes for next season.
- The Leaf Preservation Secret: Those fan-shaped leaves aren't just decoration—they're the plant's solar panels!
Frequently asked questions
about cutting back iris after flowering—because even the pros need a little clarity! Here are answers to the most common questions to keep your irises thriving.When is the exact best time to cut back iris after flowering?
Trim iris foliage after the blooms fade but before the leaves turn yellow or die back naturally—usually 6–8 weeks post-flowering. For bearded iris, aim for late summer (August–September). Never cut too early! The leaves store energy for next year’s blooms.
Should I cut iris leaves all the way to the ground?
No! Only remove dead, brown, or damaged leaves—never trim healthy green foliage. Cutting too aggressively starves the rhizomes of nutrients. Leave at least 6–8 inches of green leaves intact until they yellow naturally in fall.
What if my iris leaves turn yellow after flowering—is that normal?
Yes, but it’s a signal, not a problem! Yellowing leaves mean the plant is redirecting energy to rhizomes. Don’t panic: Let them die back naturally, then trim only the dead foliage in late fall or early spring. Overwatering or fungal issues (like iris borers) can cause premature yellowing—check for pests!
Can I fertilize iris right after cutting back?
Wait 4–6 weeks after trimming before fertilizing. Use a balanced, low-nitrogen fertilizer (like 5-10-10) in early spring or after flowering. Avoid high-nitrogen feeds—it encourages leaf growth over blooms. Pro tip: A light layer of compost in spring works wonders!
My iris rhizomes look mushy or rotten after cutting back—what went wrong?
Mushy rhizomes usually mean overwatering, poor drainage, or fungal rot. If you see soft spots, black mold, or a foul smell:
- Stop watering immediately.
- Dig up affected rhizomes, trim only the rotten parts with sterilized tools.
- Replant in well-draining soil (add sand or grit if needed) and avoid wetting foliage.
- Consider fungicide if rot persists.
Wrapping up and next steps
Pruning your iris after flowering is a simple yet powerful way to keep your garden vibrant and full of life! By following these steps—timing it right, using the right tools, and mastering the cut—you’ll ensure a stunning rebloom next season while maintaining healthy rhizomes.
Don’t let hesitation hold you back; a little precision now means big rewards later!
Ready to take the next step? Grab your pruners and schedule a quick session—your iris will thank you with bold, beautiful blooms in no time! 🌸✂️