
Flowers
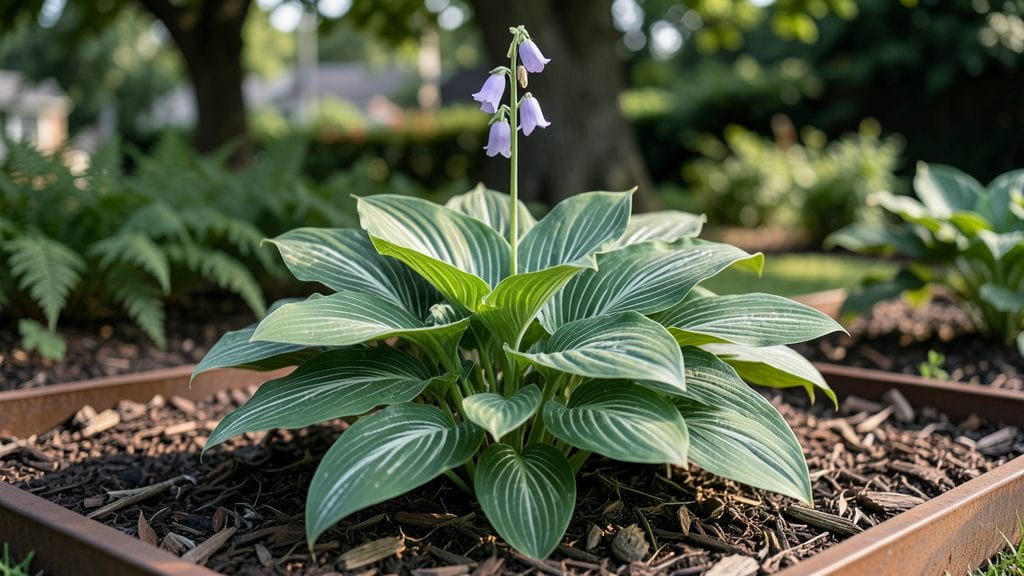
Cutting hosta flowers transforms your garden from a seasonal showstopper to a year-round foliage powerhouse. ✨ I learned the hard way—leaving those tall flower spikes standing drains energy from the leaves you actually planted hostas for.
The right timing and technique redirect that energy back into the bold, velvety foliage everyone admires.
You’ll need sharp pruners (clean blades prevent disease) and about 5 minutes per plant. The best time to cut hosta flowers is right after they finish blooming—usually late summer—when the seed pods start forming.
This prevents unwanted self-seeding and keeps your plants focused on leaf growth. For large clumps, work in sections to avoid overcrowding.
What you’ll notice immediately is thicker, more vibrant foliage by next spring. The plants stay healthier, resist pests better, and even spread more aggressively since they’re not diverting energy to seed production. Plus, your garden stays tidier without those floppy flower stalks flopping everywhere.
Here’s the secret: never cut hosta leaves in autumn—only the flower spikes. The leaves provide winter protection for the crown, and cutting them too early can leave your plant vulnerable to cold damage. This one simple habit keeps your hostas looking their best for years to come.
📚 In This Guide
- What you need
- Instructions
- Tips and common mistakes
- Wrapping up and next steps
What you need
- ● Pruning shears or sharp bypass pruners – Choose a pair with clean, sharp blades (4-6" length) for precise cuts.
- ○ Garden gloves – Heavy-duty, cut-resistant gloves (optional but recommended) to protect hands from jagged edges or sap.
- ● Disinfectant (rubbing alcohol or bleach solution) – 1 part bleach to 9 parts water—sterilize tools before and after pruning to prevent disease spread.
- ● Bucket or trash bag – For collecting spent flowers and debris (5+ gallon capacity works well).
- ○ Garden twine or floral preservative (optional) – If arranging cut flowers, twine bundles them, or use preservative (like floral food) to extend vase life.
- ● Timing – Prune after flowering (late summer/early fall) or in early spring before new growth emerges.
- ● Weather check – Work on a dry, overcast day to avoid stressing the plant.
- ● Healthy hosta plants – Only prune if leaves show no signs of disease (e.g., brown spots, wilting).
- ● Safety first! – Avoid pruning in direct sunlight to prevent dehydration or accidental cuts.
Instructions for cutting hosta flowers to keep plants thriving
Here’s how to prune those elegant blooms without stressing your hostas—keeping them lush and vigorous.
✂️ Step 1: Wait for the Right Time to Cut
Timing matters more than you’d think. Cut hosta flowers after they’ve fully bloomed and seed heads have formed, usually in late summer or early fall (around August to September). This ensures the plant has completed its reproductive cycle and won’t waste energy on seeds.
Look for brown or slightly wilted flower stalks—this is your cue. If you cut too early, you might remove buds that could’ve bloomed later. If you wait too long, the plant may already be redirecting energy to next year’s growth.
✂️ Step 2: Use Clean, Sharp Pruners for Precision Cuts
Grab your clean, sharp pruners (sterilized with rubbing alcohol) and cut the flower stalk about 1 inch above the base of the plant. This prevents disease from lingering in the wound and avoids damaging the crown where new leaves will emerge.
Angle the cut slightly downward to encourage water runoff. Avoid tearing or crushing the stalk—hostas are tough, but rough cuts stress them unnecessarily. If the stalk is thick, cut in two or three stages to avoid splintering.
✂️ Step 3: Remove Only the Flower Stalks—Leave the Foliage Alone
Focus only on the flower stalks (they’re the vertical, leafless stems rising from the center). Never trim the broad, decorative leaves—those are the plant’s energy factories. Cutting them back now would weaken the hosta for winter.
If you’re unsure which parts to remove, think of it this way: Keep what’s green and leafy; cut what’s brown and woody. This rule keeps your hostas healthy while maintaining their signature lushness.
🌱 Step 4: Clean Up Debris and Monitor for New Growth
After pruning, remove all cut flower stalks from the garden bed to prevent pests or diseases from hiding in the debris. Drop them in your compost bin (if disease-free) or trash them if you suspect any issues.
Over the next few weeks, watch for new foliage emerging from the center. Healthy hostas will bounce back with fresh leaves, signaling they’re storing energy for next season. If growth stalls, check for overwatering or poor drainage—hostas hate soggy roots.
⏰ Step 5: Schedule a Light Mulch Application for Winter Prep
Once the flower stalks are gone, apply a 2-inch layer of mulch (like shredded bark or leaves) around the base. This insulates the crown, protects against temperature swings, and keeps weeds at bay. Avoid piling mulch directly against the stems—leave a 1-inch gap to prevent rot.
This is also a great time to water deeply but infrequently—hostas go dormant in winter, so they need less moisture. A soak once every 2-3 weeks (unless it rains) keeps them hydrated without overdoing it.
Tips & tricks for perfect hosta flower pruning
Here's what I've learned after years of keeping hostas thriving—these little details make all the difference for your plants' long-term health.
Timing is Everything: The August to September window is critical because hostas redirect energy to their crowns after flowering. If you cut too early, you're removing potential seed production that could have helped next year's growth. I've seen hostas recover beautifully when pruned at the right time, but those cut too early often struggle through winter.
Tool Prep Matters: Sterilizing your pruners with rubbing alcohol isn't just about clean cuts—it's about preventing fungal infections that can linger in the plant's wounds. I always sterilize my tools between plants, especially when working with multiple hosta varieties. For thick stalks, making two or three staged cuts prevents splintering that could introduce pathogens.
Visual Cues for Healthy Pruning: When in doubt, remember the "green and leafy stays, brown and woody goes" rule. The flower stalks should be completely brown and dry at the base before cutting—this indicates the plant has finished its reproductive cycle. I've made the mistake of cutting green stalks, which stressed my hostas unnecessarily and delayed their fall recovery.
Post-Pruning Care Strategy: The 2-inch mulch layer and 1-inch stem gap aren't arbitrary measurements—they create the perfect microclimate for winter protection. I've found that hostas mulched this way show significantly less winter dieback. After pruning, I always do a final check for any remaining seed heads that might harbor pests over winter.
Pro Tips for Cut Hosta Flowers
- Here's what I've learned after years of keeping hostas thriving—these little details make all the difference for your plants' long-term health.
- Timing is Everything: The August to September window is critical because hostas redirect energy to their crowns after flowering.
- Tool Prep Matters: Sterilizing your pruners with rubbing alcohol isn't just about clean cuts—it's about preventing fungal infections that can linger in the plant's wounds.
Frequently asked questions
Got questions about cutting hosta flowers? You’re not alone! Here are some of the most common concerns—plus straightforward answers to keep your hostas thriving.
Why should I cut hosta flowers at all?
Cutting hosta flowers isn’t just about looks—it redirects energy back to your plant’s roots and foliage. Without pruning, hostas can become leggy or produce fewer leaves. Plus, removing spent blooms prevents seed production, keeping your garden tidy and encouraging stronger growth next season.
When is the best time to cut hosta flowers?
Timing matters! Trim flowers after they’ve faded (usually late summer to early fall) but before seed pods form. Avoid cutting in spring or early summer—this is when your hostas need all their energy to establish new growth. Pro tip: Wait until at least 50% of the blooms are browned out.
How do I cut hosta flowers without hurting the plant?
Use clean, sharp pruners or scissors to snip just above a leaf or node (about ¼ inch above). Avoid tearing stems—this can invite pests or disease. For large clumps, cut individual flower stalks one at a time. Never yank them out by hand, as this can damage the foliage.
What if I miss the window and flowers turn to seed?
No stress! If seed pods form, you can still remove them—just cut the entire stem at the base. While it’s ideal to prune early, late cuts won’t kill your hosta. Just be mindful: Seed pods can spread unwanted hosta seedlings in your garden, so remove them promptly to keep things under control.
Can I use hosta flowers for anything after cutting?
Wilted hosta blooms make charming additions to dried flower arrangements or compost (if disease-free). For a creative twist, press them in heavy books to preserve their delicate shapes. Just avoid using them in arrangements if pests like slugs are a problem in your area.
What if my hosta leaves look worse after pruning?
Don’t panic—this usually means your hosta is redirecting energy to leaf growth. If leaves still look sad (yellowing, wilting, or spotted), check for overwatering, pests, or fungal issues. Pruning alone won’t cause damage, but poor soil or disease might. Adjust care and monitor for improvement over 2–3 weeks.
Wrapping up and next steps
Cutting hosta flowers isn’t just about tidying up—it’s a simple way to boost your plants’ health and keep them looking vibrant all season! Whether you’re pruning for aesthetics, pest control, or energy conservation, the key is timing and technique.
With the right tools and a little patience, your hostas will thrive, rewarding you with lush foliage and even more stunning blooms next year.
Ready to give it a try? Grab your shears and start pruning! 🌿 For even more tips, explore how to extend your hostas’ beauty with seasonal care tips or dive into common hosta pests and how to prevent them.