
Flowers
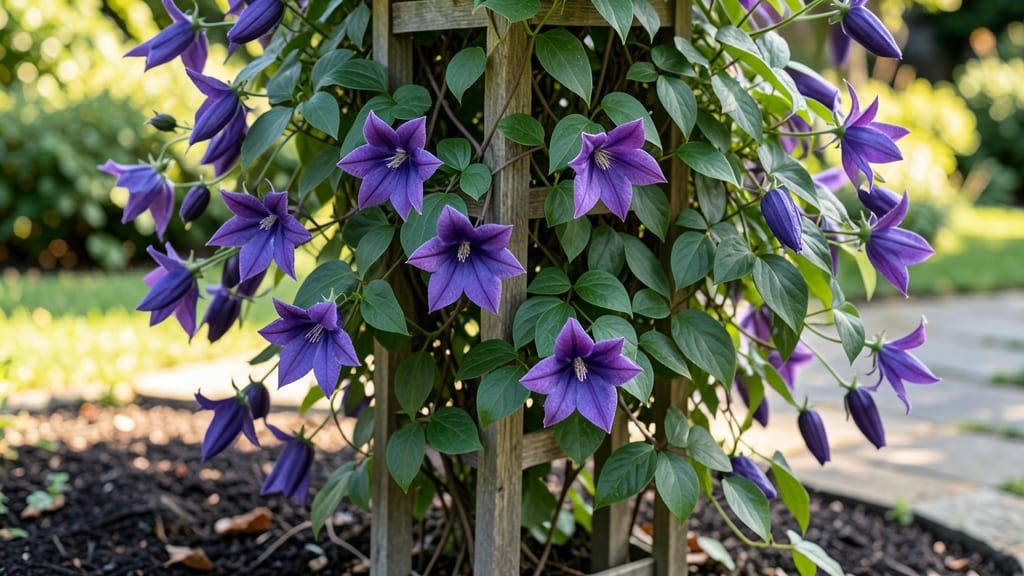
Growing clematis with large, showstopping flowers is like training a vine to perform a grand ballet—once you get the basics right, the rewards are breathtaking. 🌸 I’ve watched Clematis jackmanii and Nelly Moser transform bare walls into cascades of purple and pink, their blooms lasting from early summer until frost.
The secret isn’t just patience—it’s knowing exactly where to plant them, how to feed them, and when to prune without cutting off next year’s show.
These vines demand three things to thrive: rich, well-draining soil, a sturdy support structure (think trellis or arbor), and at least six hours of sunlight daily—though they’ll tolerate morning sun with afternoon shade in hot climates.
Most gardeners overlook soil prep, but amending with compost and ensuring good drainage prevents the dreaded "clematis wilt" that kills roots. Once established, they’re surprisingly low-maintenance, with deep roots that make them drought-tolerant once settled in.
What you’ll end up with is a vertical garden feature that outshines anything in your yard—imagine 6-inch-wide blooms in jewel tones climbing your fence or pergola. The key varieties like Jackmanii (deep purple) or Nelly Moser (pale pink) rebloom all season if you prune correctly in late winter.
Even better? They attract hummingbirds and butterflies, turning your garden into a living magnet for pollinators.
Here’s where most gardeners stumble: pruning at the wrong time or planting too deep. I’ll walk you through the Group 2/3 pruning schedule (yes, it’s different from early-blooming types) and how to spot the classic signs of overwatering or nutrient deficiency.
With these tweaks, your clematis will put on a show that makes neighbors ask, "What’s that vine doing up there?"
📚 In This Guide
- What you need
- Instructions
- Tips and common mistakes
- Wrapping up and next steps
What you need
- ● Clematis plants: Choose large-flowered clematis varieties (e.g., 'Jackmanii,' 'Nelly Moser,' or 'Princess Diana'). Buy 3–5 bare-root plants or potted specimens from a reputable nursery.
- ● Pruning shears: Sharp, bypass pruners (sterilized with rubbing alcohol) for clean cuts.
- ● Garden gloves: Heavy-duty, waterproof gloves to protect hands from thorns and soil.
- ● Support structure: A 5–8 ft trellis, arbor, or obelisk (metal or wooden) to train vines vertically.
- ● Compost or well-rotted manure: 5–10 lbs per planting hole for nutrient-rich soil.
- ● Mulch: 2–3 inches of organic mulch (e.g., wood chips or straw) to retain moisture.
- ○ pH test kit: Optional but helpful—clematis thrive in slightly acidic to neutral soil (pH 6.0–7.0).
- ● Sunlight: 6+ hours of full sun per day (morning sun + afternoon shade in hot climates).
- ● Well-draining soil: Amend heavy clay with sand or perlite to prevent root rot.
- ● Moisture control: Clematis hate soggy roots—ensure good drainage and water deeply 1–2 times per week (adjust for rain).
- ● Winter protection (Zone 5–8): Mulch heavily or wrap young vines in burlap for frost-prone areas.
Step-by-Step instructions for planting and cultivating clematis large flower varieties
Here's how to establish your bold clematis vines with confidence—season after season.
🪴 Step 1: Select the Perfect Planting Site and Prepare the Soil
Clematis thrives when planted in partial shade with morning sun and afternoon relief—think dappled light under deciduous trees. Avoid harsh afternoon sun in hot climates, which scorches leaves and reduces blooms. I dig a hole twice as wide as the root ball but only 12-18 inches deep—these vines hate being buried too deep.
Amend the native soil with 3-4 inches of organic compost mixed into the bottom half of the hole. Clematis roots need excellent drainage, so if your soil is heavy clay, blend in 20% perlite or coarse sand. The topsoil should remain untouched—this creates a natural barrier that prevents the stem from rotting when buried.
🌱 Step 2: Plant at the Right Depth and Stake for Support
Position the clematis so the top of the root ball sits 3-4 inches below soil level. This ensures the crown stays cool and moist while preventing stem rot. I plant mine against a sturdy trellis or fence, using 3-4 wooden stakes (6 feet tall) arranged in a square around the vine. Secure the main stems loosely with soft garden twine—too tight now will strangle as the vine thickens.
Fill the hole with soil, pressing gently to eliminate air pockets but not compacting. Water deeply until moisture seeps 6 inches down. Mulch the base with 2-3 inches of shredded bark, keeping it 6 inches away from the stem to prevent rot. This mulch ring regulates soil temperature and retains moisture without smothering the plant.
☀️ Step 3: Prune for First-Year Establishment and Seasonal Growth
First-year plants need no pruning—let them grow freely to establish a strong root system. You’ll see vigorous new shoots emerging from the base by mid-summer. In late winter or early spring (before buds swell), prune established large-flowering clematis varieties by cutting back last year’s growth to 3-6 strong buds from the base. This encourages robust flowering on new wood.
Remove any dead, crossing, or weak stems completely. I always sterilize my pruners with rubbing alcohol between cuts to prevent bacterial spread. Watch for new shoots emerging from the base—these are your future blooming stems. Never prune these early shoots; they’re the plant’s insurance policy for next year’s display.
💧 Step 4: Water Deeply and Fertilize Strategically
Water newly planted clematis twice weekly for the first month, then taper to once weekly once established. The soil should be damp but not soggy—probe 4 inches down with your finger to check. Overwatering in winter causes crown rot, while drought stress weakens stems. I water at the base only, avoiding foliage to prevent fungal diseases like powdery mildew.
Feed in early spring with a balanced 10-10-10 fertilizer (1 tablespoon per plant) and again after the first flush of blooms with a high-phosphorus 5-10-5 to encourage more flowers. Avoid high-nitrogen fertilizers—they produce lush foliage at the expense of blooms. I also top-dress with compost in fall to replenish nutrients without burning roots.
✂️ Step 5: Train Vines and Maintain Through the Growing Season
Guide the main stems up the trellis in a spiral pattern, securing with soft twine every 12-18 inches. This creates an even canopy and prevents wind damage. By mid-summer, you’ll see side shoots emerging—these are your secondary stems. Pinch back the tips of these shoots after 4-6 leaves appear to encourage bushier growth and more blooms.
Deadhead spent blooms regularly to redirect the plant’s energy into new flowers. I also monitor for aphids or spider mites on the undersides of leaves—these pests drain sap and weaken stems. Treat early infestations with a neem oil spray applied in the evening when bees aren’t active. In fall, cut back any dead or diseased stems and reduce watering as temperatures drop below 50°F.
Tips & tricks for perfect clematis large flower cultivation
Here's what I've learned after years of growing these dramatic vines—tricks that make all the difference between modest blooms and showstopping displays.
Soil Preparation Secret: The natural soil barrier technique in Step 1 is brilliant, but here's the thing—if your native soil is sandy, you don't need the perlite. Sandy soils already drain perfectly. The key is to test your soil's moisture retention: press a handful—if it crumbles immediately, you're good without amendments. If it stays clumped, add that 20% perlite to prevent waterlogging. I've seen clematis roots rot in poorly drained soil even with the perfect planting depth.
Staking Strategy: Those 6-foot stakes in Step 2 aren't just for show—they create a windbreak that prevents stem breakage during storms. Pro tip: bury the stakes at a 5-degree angle toward the trellis. This creates a natural tension system that guides the vine upward without restricting growth. I've had vines reach 12 feet using this method, with stems thick enough to support their own weight.
Pruning Precision: When cutting back to 3-6 buds in Step 3, focus on buds that face outward from the trellis. These will grow toward the light and produce the most dramatic blooms. I always make cuts at a 45-degree angle just above a bud—this prevents water from pooling on the cut surface, which can cause rot. The first few years, I mark my pruning spots with small flags to avoid accidentally cutting too much.
Watering Wisdom: That 4-inch soil moisture check in Step 4 is critical, but here's what nobody tells you: the best time to water is in the early morning. This gives foliage all day to dry, preventing fungal diseases. I use a rain gauge to track weekly rainfall—if we get 1.5 inches, I skip my scheduled watering. Clematis are surprisingly drought-tolerant once established, but they hate soggy feet in winter.
Pro Tips for Clematis Large Flower
- Here's what I've learned after years of growing these dramatic vines—tricks that make all the difference between mode...
- Soil Preparation Secret: The natural soil barrier technique in Step 1 is brilliant, but here's the thing—if your nati...
- Staking Strategy: Those 6-foot stakes in Step 2 aren't just for show—they create a windbreak that prevents stem break...
Frequently asked questions
Got questions about growing clematis with large, showstopping blooms? You’re not alone—these vines are stunning but can be tricky! Here are answers to the most common queries to help you cultivate clematis like a pro.
When is the best time to plant clematis for maximum blooms?
Plant your large-flowered clematis in early spring or early fall when soil is workable but not frozen. Avoid summer heat, which stresses roots. For container-grown plants, aim for spring planting—they establish faster in cooler weather. Pro tip: Soak roots in water for 1–2 hours before planting to reduce transplant shock!
How long does it take for clematis to bloom after planting?
Patience is key! Most large-flowered clematis varieties take 1–2 years to mature and bloom. Early bloomers (like Clematis ‘Jackmanii’) may surprise you with flowers in the first year, but expect full vigor by year two. Pruning correctly (e.g., cutting back dead stems in late winter) encourages faster blooming.
Why aren’t my clematis flowers opening? Troubleshooting tips!
If buds form but refuse to open, check these fixes:
- Too much shade: Large-flowered clematis need 6+ hours of sunlight—move to a sunnier spot.
- Overwatering: soggy roots = bud rot. Ensure well-draining soil and water at the base (not leaves).
- Nutrient deficiency: Feed with a balanced fertilizer (10-10-10) in early spring and after blooming.
- Pruning mistakes: Late-blooming varieties (like ‘Nelly Moser’) need minimal pruning—cut only dead wood in late winter.
Can I grow large-flowered clematis in containers? What’s the best setup?
Choose a container at least 15–20 gallons with drainage holes. Use a lightweight potting mix (like 60% compost, 30% perlite, 10% sand) and a support trellis or obelisk for climbing. Container clematis need regular watering (keep soil moist but not soggy) and winter protection (move to a sheltered spot or wrap in burlap).
Are large-flowered clematis prone to pests? How do I prevent them?
Yes, but don’t stress—most issues are manageable! Common pests include:
- Aphids: Spray with soapy water or introduce ladybugs.
- Clematis wilt (fungus): Remove infected stems immediately and avoid overhead watering.
- Slugs/snails: Set up beer traps or use copper barriers around the base.
Wrapping up and next steps
Growing clematis with large, show-stopping blooms is a rewarding journey that brings vibrant color to your garden from spring until frost! 🌸 With the right support, sunlight, and care, these bold vines will thrive and reward you with stunning flowers year after year.
Whether you're a beginner or a seasoned gardener, the key is patience—watch as your clematis climbs, blooms, and becomes the star of your outdoor space.
Ready to take the next step? Start by choosing your favorite variety—from classic 'Jackmanii' to delicate 'Nelly Moser'—and give your clematis the love it deserves. Happy gardening! 🌿✨