
Landscaping
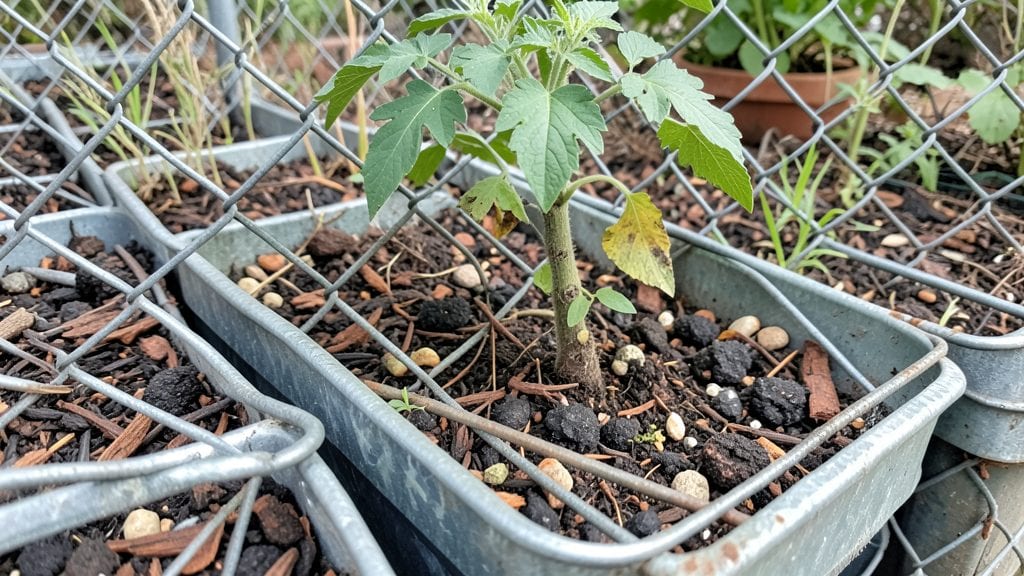
Transforming that plain chain link fence into a vertical garden oasis turns your yard into a living canvas. 🌿 I’ve seen dull metal fences become vibrant, year-round displays with just a few sturdy flower boxes and the right plant choices—it’s like giving your property a second facade without breaking the bank.
The key starts with durable materials—galvanized steel or heavy-duty plastic boxes that won’t warp or rust. You’ll need basic tools like screws, brackets, and a level to ensure they stay secure, even in wind or rain.
For small spaces, tiered designs create depth, while larger fences can handle cascading arrangements that spill color over the top.
Picture petunias spilling over in summer, then swapping to pansies and heather for winter’s crisp air. The right plants—drought-tolerant succulents, trailing ferns, or fragrant lavender—keep maintenance simple while packing in bold color and texture. A little planning now means low-effort beauty all year.
Budget-friendly options abound: reuse old wooden crates, paint boxes to match your home, or group mismatched containers for an eclectic look. The only rule? Secure everything tightly—safety first, especially if kids or pets are around. Let’s turn that fence into your garden’s star feature!
📚 In This Guide
- What you need
- Instructions
- Tips and common mistakes
- Wrapping up and next steps
What you need
- ● Chain link fence flower boxes: 1–4 boxes (depending on fence length; standard sizes: 12"–24" wide x 12"–18" deep x 6"–12" tall).
- ● Pro tip: Choose pre-drilled or heavy-duty boxes with rust-resistant coatings for longevity! 💡
- ● Screws or brackets: Galvanized or stainless steel (#10–#12, 1"–1.5" long, 4–6 per box).
- ● Drill/driver: Cordless or electric with masonry bit (for concrete fences) or screw bit.
- ● Level: 12"–24" bubble level to ensure boxes are straight.
- ● Measuring tape: For precise box placement.
- ● Potting soil: 1–2 bags (2–3 cubic feet per box; opt for well-draining, moisture-retentive mix like African violet or cactus blend).
- ○ Drainage material (optional but recommended): 1–2" layer of gravel or perlite per box to prevent root rot.
- ● Plants: Choose spiller-thriller-filler combos for texture: Spillers: Trailing plants (e.g., Sweet Potato Vine, Petunias, or Lobelia).
- ● Thrillers: Tall varieties (e.g., Snapdragons, Dusty Miller, or Coleus).
- ● Fillers: Bushy plants (e.g., Impatiens, Bacopa, or Calibrachoa).
- ● Fertilizer: Slow-release granules (e.g., 14-14-14 NPK) or liquid feed (every 2–4 weeks).
- ○ Mulch (optional): 1/4" layer of orchid bark or cocoa hulls to retain moisture.
- ● Watering can or hose with nozzle: Drip irrigation or self-watering boxes save time! 💧
- ● Fence anchors (if needed): Heavy-duty L-brackets for windy areas.
- ● Paint or fabric: Decorative fence paint or landscape fabric to hide chain link (if desired).
- ● Seasonal swaps: Pre-planned plant varieties for each season (e.g., Pansies in winter, Geraniums in summer).
Step-by-Step instructions for building chain link fence flower boxes
Transform that plain chain link fence into a lush vertical garden with these precise, foolproof steps.
🪴 Step 1: Measure and Cut Fence Wire for Box Frames
Start by measuring your fence vertically in 4-foot sections—this creates manageable flower box units. Use wire cutters to snip the chain link fence wire at the top and bottom of each section, creating a clean horizontal cut. I like to work in pairs: one person stabilizes the fence while the other cuts to prevent shifting.
Leave the bottom cut slightly jagged—this gives you natural grip points when attaching your hardware cloth backing later. Mark each cut with a small piece of masking tape and a pencil to track progress. Real talk: if you cut too cleanly, the wire may slip when you try to bend it later.
🌱 Step 2: Bend and Secure the Wire into Box Shapes
Use heavy-duty wire cutters to trim two 18-inch horizontal pieces from each vertical section. Bend these horizontally to create the top and bottom edges of your flower box using pliers. The top edge should sit 6 inches below the fence's top wire to allow for water drainage and easy access.
Attach the horizontal wires to the vertical sections using galvanized fence staples, placing them every 12 inches along the length. I start at the corners first to create a stable rectangle before filling in the middle. This prevents the wire from warping as you work. Test the box's stability by gently pressing down—it should hold shape without flexing.
💧 Step 3: Install Hardware Cloth Backing for Root Support
Cut a piece of ½-inch hardware cloth to match the interior dimensions of your wire box, leaving a 1-inch border around all edges. This backing prevents roots from escaping through the chain link gaps while allowing water to drain. Staple the hardware cloth to the back of the wire box using galvanized staples, pulling it taut to eliminate wrinkles.
Here's the thing—if you skip this step, your soil will sift through the fence over time, creating messy gaps. I like to fold the excess hardware cloth edges inward slightly before stapling to create a clean finish. This also adds a little extra depth to hold more soil.
✂️ Step 4: Add Drainage Layer and Soil Mix
Line the bottom of each box with 2 inches of gravel or broken pottery shards for drainage. This prevents waterlogging, which is deadly for most flowering plants. Next, fill the remaining space with a lightweight potting mix blended with 20% perlite—this ensures excellent drainage while retaining moisture for roots.
Leave a 1-inch gap between the soil surface and the top wire edge. This prevents spillage when watering and gives plants room to grow upward without crowding. Press the soil down gently but don't compact it—you want it fluffy enough for roots to penetrate easily.
☀️ Step 5: Plant and Maintain for Year-Round Color
Choose plants with complementary growth habits: place trailing varieties like sweet potato vine at the back and upright flowers like petunias at the front. Space plants 6-8 inches apart to allow airflow and prevent disease. Water thoroughly after planting, then maintain with 1 inch of water weekly, adjusting for rainfall.
Here's where it gets fun—rotate your boxes every 2-3 months to expose all sides to sunlight evenly. This creates that lush, balanced look and prevents leggy growth. I also fertilize with a slow-release granular fertilizer every 6 weeks during the growing season to keep blooms vibrant.
Tips & tricks for perfect chain link fence flower boxes
Transforming your fence into a vertical garden takes precision—these insider tricks will help you avoid common pitfalls and create a showstopping display.
Wire Prep Secret: When cutting your 4-foot sections in Step 1, use a level to ensure they're perfectly straight before making your cuts. Uneven sections will make bending and attaching the horizontal pieces in Step 2 much more difficult. I mark each section with a bright paint pen before cutting to track progress—this prevents overlapping or skipping sections when you're working vertically.
Staple Placement Technique: In Step 2, when attaching the 18-inch horizontal pieces with galvanized fence staples, place the first staple at each corner before filling in the middle. This creates a stable rectangle that won't warp as you work. I find using a staple gun with a magnetic tip makes this step faster—just be sure to pull the staples tight against the wire to prevent rusting over time.
Hardware Cloth Hack: For Step 3, cut your ½-inch hardware cloth with tin snips rather than scissors to get clean, precise edges. Before stapling, fold the excess 1-inch border inward at all edges—this creates a built-in lip that holds more soil and prevents the hardware cloth from peeking through. This simple fold adds about ½ inch of extra depth to each box.
Soil Mix Pro Tip: When blending your potting mix with 20% perlite in Step 4, add a handful of worm castings to the mix for extra nutrients. The 1-inch gap you leave between soil and wire edge is crucial—it prevents spillage during watering and gives plants room to grow upward. I like to use a straightedge tool to create an even soil surface before planting.
Pro Tips for Chain Link Fence Flower Boxes
- Transforming your fence into a vertical garden takes precision—these insider tricks will help you avoid common pitfalls and create a showstopping display.
- Wire Prep Secret: When cutting your 4-foot sections in Step 1, use a level to ensure they're perfectly straight before making your cuts.
- Staple Placement Technique: In Step 2, when attaching the 18-inch horizontal pieces with galvanized fence staples, place the first staple at each corner before filling in the middle.
Frequently asked questions
Got questions about transforming your chain link fence into a stunning vertical garden? Here are some common queries—and their answers—to help you get started with confidence!
What’s the best way to attach flower boxes to a chain link fence?
Use heavy-duty L-brackets or fence clips designed for chain link. Secure them with stainless steel screws (to prevent rust) and ensure they’re spaced evenly—about 12-18 inches apart—for stability. For extra support, add a horizontal support beam at the top and bottom of each section.
When is the ideal time to plant flowers in chain link fence boxes?
Plant in early spring (after the last frost) or early fall for best results. Avoid extreme heat, as young plants may struggle. If you’re in a mild climate, you can plant year-round, but always check your USDA hardiness zone for specific timing tips.
Are there budget-friendly alternatives to pre-made flower boxes?
Use cedar or redwood planks (naturally rot-resistant) to build custom boxes, or repurpose old wooden crates or pallets. For a lightweight option, try plastic or metal troughs with built-in drainage. Just ensure they’re securely fastened to the fence.
How do I keep my chain link fence flower boxes from drying out or getting waterlogged?
Ensure each box has drainage holes at the bottom. Use a mix of potting soil and perlite (or coconut coir) to improve drainage. Water deeply 2-3 times per week (adjust for your climate) and consider adding mulch to retain moisture. Avoid overwatering—chain link boxes dry out faster than ground-level planters!
How can I deter pests (like aphids or squirrels) from my fence flower boxes?
Start with pest-resistant plants like marigolds, lavender, or snapdragons. Use neem oil or insecticidal soap for aphids. To keep squirrels away, add spiky plants like thorny roses or install bird feeders nearby (they’ll distract the critters!). Avoid over-fertilizing, as it can attract pests too.
Wrapping up and next steps
Transforming your chain link fence into a vibrant vertical garden is easier—and more rewarding—than you think! With the right flower boxes, you can create a stunning, low-maintenance oasis that blooms year-round. Whether you're a seasoned gardener or a beginner, these ideas offer endless creativity and curb appeal.
Ready to get started? Pick your favorite design, gather your supplies, and let your fence become the talk of the neighborhood! 🌸 Next, sketch your layout, measure carefully, and watch your vision take root—one beautiful bloom at a time.