
Flowers
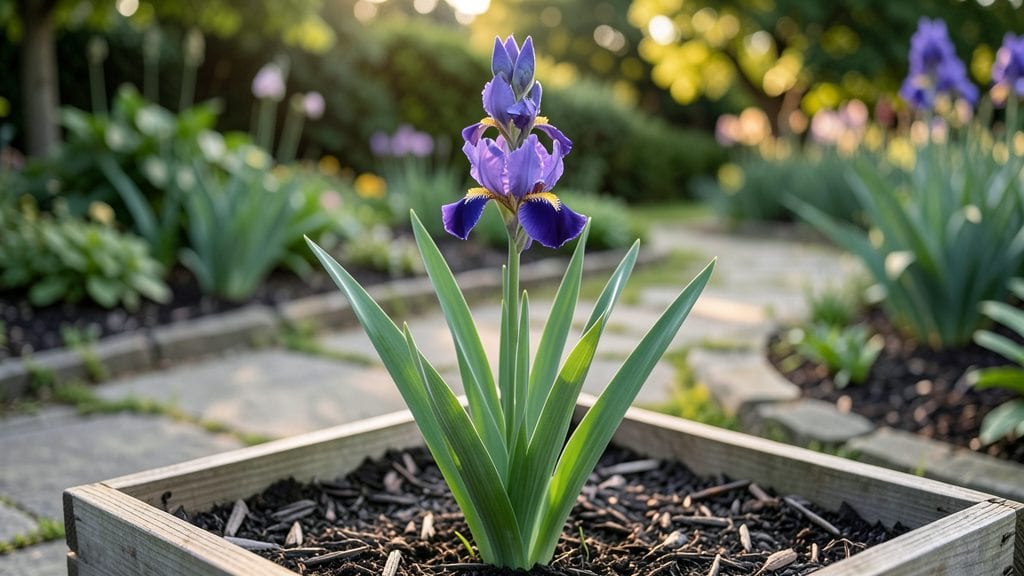
The butterfly iris flower transforms any garden corner with its swirling purple blooms that seem to flutter in the breeze. 🌸 I’ve grown these tough beauties for years, and they’ve never failed to bring color to my sunny spots—even through droughts and heatwaves.
Their secret? They’re low-maintenance yet dramatic, perfect for gardeners who want impact without fuss.
These irises thrive in well-draining soil and full sun, though they’ll tolerate partial shade in hotter climates. Water them when the top inch of soil feels dry, but avoid soggy roots—they hate wet feet.
After blooming, trim back the faded stalks to keep the plant tidy, and it’ll reward you with another flush of flowers later in the season.
You’ll love how these plants multiply over time, sending up new shoots that spread gently across borders. The blooms attract butterflies too, so you’ll get double the magic in your garden.
Just watch for yellowing leaves (a sign of overwatering) or sparse flowers (often from too much shade), and adjust accordingly.
Whether you’re planting in pots or borders, butterfly irises adapt easily. Start with one, and soon you’ll have a swirling sea of purple that dances through your garden all summer long.
📚 In This Guide
- What you need
- Instructions
- Tips and common mistakes
- Wrapping up and next steps
What you need
- ● Butterfly iris bulbs (or rhizomes): 3–5 per planting spot (choose Iris xiphium or Iris histrioides for true butterfly irises).
- ● Well-draining potting mix or garden soil: Amend with compost (20–30% by volume) for nutrients.
- ● Gravel or perlite: 1–2 inches (for drainage, especially in containers).
- ● Organic fertilizer: Balanced 10-10-10 or bone meal (1 tbsp per plant at planting time).
- ● Garden trowel or transplanting spade: For digging and spacing.
- ● Watering can or hose with a gentle spray nozzle: Avoid overwatering!
- ○ Mulch (optional): Pine bark or straw (1–2 inches) to retain moisture.
- ● Slow-release fertilizer pellets: For low-maintenance nutrition.
- ● Peat pots or biodegradable containers: For seed-starting (if growing from seed).
- ● Pruners: For trimming spent blooms to encourage reblooming.
- ● Stakes or rings: To support tall stems in windy areas.
- ● Pest control (neem oil or insecticidal soap): Preemptive measure against aphids or iris borers.
How to grow stunning butterfly iris flowers in your garden
These dramatic blooms thrive with the right balance of sun, soil, and patience—here's how to grow them like a pro.
🌱 Step 1: Choose the Perfect Planting Site
Butterfly iris (Iris xiphium) loves full sun—at least 6 hours daily—and well-draining soil. I dig a hole twice as wide as the root ball but only as deep as the rhizomes (the thick, fleshy stems). Too deep, and they rot; too shallow, and they won’t anchor properly.
If your soil drains poorly, mix in 2-3 inches of coarse sand or perlite at the bottom of the hole. These irises hate soggy roots, and even a few days of waterlogged soil can kill them. Test your spot by digging a 6-inch hole—if water pools after 10 minutes, amend the soil first.
☀️ Step 2: Plant Rhizomes at the Right Depth and Spacing
Position the rhizomes so the tops are just ½ inch above soil level. Burying them too deep smothers the plant, while leaving them exposed dries them out. Space them 6-8 inches apart in rows 12 inches apart for a full, natural look.
Gently spread the roots outward in the hole—don’t fold them, or they’ll grow crooked. Press the soil lightly around the rhizomes but avoid compacting it. Water deeply right after planting to settle the soil and remove any air pockets around the roots.
💧 Step 3: Water and Mulch for Healthy Growth
Keep the soil evenly moist for the first 2-3 weeks after planting, but avoid soggy conditions. Once established, these irises are drought-tolerant, so water only when the top 2 inches of soil feel dry. Overwatering is the #1 killer of butterfly iris—too much moisture causes rhizome rot.
Apply a 2-inch layer of mulch around the plants, keeping it 3 inches away from the rhizomes to prevent rot. I use shredded bark or pine straw—it keeps weeds down and retains moisture without smothering the plants. Replenish mulch in late winter to protect rhizomes from temperature swings.
✂️ Step 4: Deadhead and Divide for Long-Term Success
After the blooms fade, snip off the spent flower stalks but leave the leaves until they yellow naturally. This ensures the plant stores energy for next year’s growth. I pull off old foliage in early summer—it looks messy, but it signals the plant to focus on new rhizomes and next season’s blooms.
Every 3-4 years, divide the clumps in early spring. Dig up the rhizomes, separate them with a clean knife, and replant the healthiest sections. Discard any that look mushy or shriveled. This keeps the plants vigorous and prevents overcrowding, which leads to fewer blooms.
🌿 Step 5: Enjoy Year-Round Care Tips
In spring, add a low-nitrogen fertilizer (like 5-10-10) when new growth appears. Too much nitrogen makes leaves lush but blooms sparse. In fall, cut back dead foliage but leave the rhizomes in the ground—they’re hardy down to 20°F.
Watch for iris borers—tiny moths that lay eggs in the leaves. If you see chewed holes or sawdust-like frass, handpick the larvae or treat with neem oil. With proper care, your butterfly irises will multiply and naturalize, creating a stunning, low-maintenance display for years.
Tips & tricks for growing butterfly iris flowers
Real talk: These dramatic blooms reward patience with jaw-dropping purple swirls—but only if you nail the details. Here's what nobody tells you about growing butterfly iris like a pro.
The Planting Depth Secret: In Step 2, that ½-inch above soil level is non-negotiable. I learned this the hard way after burying mine too deep—rhizomes need to breathe! Use a ruler to verify depth, and if your soil settles after watering, add a tiny bit more to maintain that perfect position. Too shallow? The rhizomes will dry out and shrivel.
Soil Test Hack: Before planting, dig that 6-inch hole and fill it with water. If it drains completely within 10 minutes, you're golden. If water lingers, mix in 2-3 inches of coarse sand or perlite at the bottom of your planting hole. I've seen butterfly iris drown in just 48 hours of soggy conditions—don't let this happen to yours!
Mulching Strategy: That 2-inch mulch layer in Step 3 works wonders, but placement matters. Keep it 3 inches away from the rhizomes to prevent rot. I use pine straw because it breaks down slowly and won't smother the plants. Replenish it every late winter—this simple step protects your rhizomes from those dangerous 20°F winter dips.
Dividing Timing: The 3-4 year division schedule in Step 4 is perfect, but timing matters. Do this in early spring when new growth appears—never in fall. I've seen gardeners divide in autumn and watch their plants struggle through winter. Spring division gives rhizomes time to establish roots before summer heat arrives.
Pro Tips for Butterfly Iris Flower
- Real talk: These dramatic blooms reward patience with jaw-dropping purple swirls—but only if you nail the details.
- The Planting Depth Secret: In Step 2, that ½-inch above soil level is non-negotiable.
- Soil Test Hack: Before planting, dig that 6-inch hole and fill it with water.
Frequently asked questions
Got questions about the stunning butterfly iris? You’re not alone! Here are answers to the most common inquiries about growing, caring for, and enjoying these mesmerizing blooms.
How do I tell if my butterfly iris is healthy?
A thriving butterfly iris has vibrant purple blooms with no brown edges, straight, sturdy stems, and lush, sword-like foliage. Yellowing leaves or floppy stems signal overwatering or root rot. If blooms appear sparse, it may need more sunlight or fertilizer.
When is the best time to plant butterfly iris?
Plant them in early spring or fall when soil temps are mild (50–60°F). Avoid summer heat, which stresses roots. For container growing, use well-draining soil and replant every 2–3 years to refresh nutrients.
Can butterfly iris grow in containers?
Choose a wide, shallow pot (at least 12 inches across) with drainage holes. Use a mix of potting soil and perlite to prevent soggy roots. Place in full sun and water when the top inch of soil dries out.
Why aren’t my butterfly irises blooming?
Common culprits: too much shade, overcrowded roots, or lack of nutrients. Try dividing clumps every 3–4 years, ensuring they get 6+ hours of sunlight, and feed with a balanced fertilizer in early spring.
Are butterfly irises toxic to pets or kids?
Yes! All iris varieties contain iridin, a mild toxin that can cause mouth irritation or stomach upset if ingested. Keep them out of reach of curious pets or children, and wash hands after handling.
Wrapping up and next steps
The butterfly iris isn’t just a stunner—it’s a symbol of grace, resilience, and natural beauty that can transform any garden into a vibrant sanctuary. 🌸 Whether you’re drawn to its striking purple hues, its low-maintenance charm, or its ability to attract pollinators, this flower offers something magical for every green thumb.
Now that you’re armed with the know-how to nurture it, why not take the next step?
🌱 Your Next Move:
- Plant one today! Start small with a single butterfly iris and watch your garden come alive.
- Share the joy. Gift a bulb or a cutting to a fellow plant lover—spread the beauty!
- Experiment! Try pairing it with complementary flowers or experiment with container gardening.
Your garden (and the butterflies!) will thank you. Happy planting! 🌿✨