
Landscaping
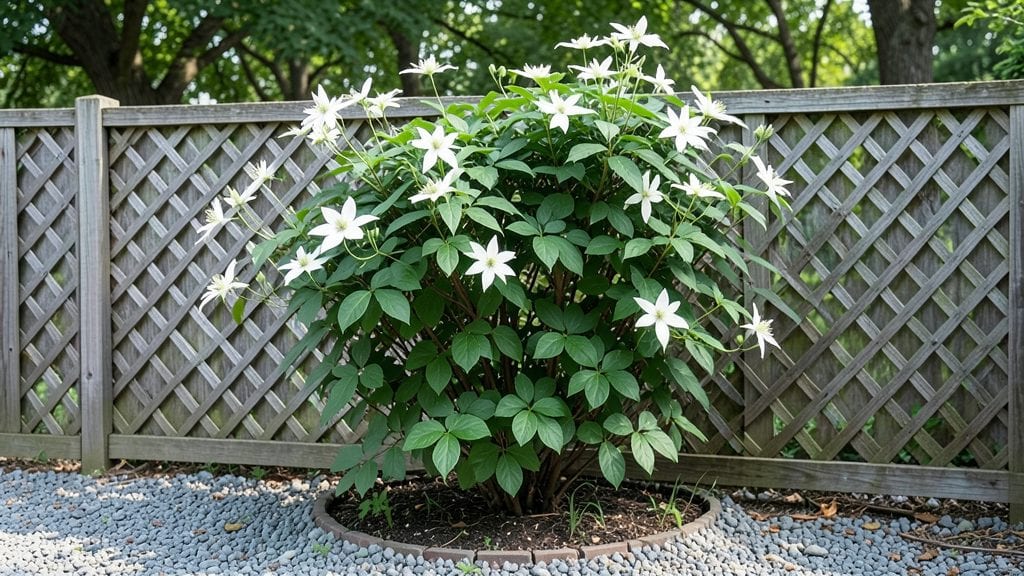
Those privacy fence flowers I planted turned my chain-link fence into a vibrant, year-round masterpiece—now it’s the backyard’s star attraction. 🌿 that grow fast and pack serious color. The best part? No more peeking neighbors or boring wooden panels.
Start with fast-growing climbers like clematis or roses for height, then layer in hydrangeas or abelia for mid-level blooms. For instant privacy, bamboo or willow trees grow tall enough to block views within a season.
The key is mixing textures—think glossy leaves, feathery fronds, and velvety petals—to create depth that feels natural, not forced.
By summer, you’ll have a fence that’s bursting with blooms—vibrant pinks, deep purples, and creamy whites—that change with the seasons. Even in winter, evergreens like holly or boxwood keep things green.
Plus, you’ll save money on traditional fencing while adding curb appeal that makes your yard the envy of the block.
Works for any yard size, from narrow alleys to wide backyards. The only rule? Start with what thrives in your climate. Let’s turn that fence into your garden’s star feature!
📚 In This Guide
- What you need
- Instructions
- Tips and common mistakes
- Wrapping up and next steps
What you need
- ● Flowering plants: Choose from climbers (e.g., Clematis, Jasmine, Wisteria) or trailing plants (e.g., Petunias, Nasturtiums, Ivy). Aim for 3–5 plants per 6-foot section of fence for full coverage.
- ● Potting soil: 10–20 lbs (depending on container size), well-draining and enriched with compost.
- ● Containers or planters: Wall-mounted planters: 6–12 inches deep, with drainage holes (e.g., 3–5 per 6-foot fence section).
- ● Hanging baskets: 10–14 inches in diameter, with self-watering options for convenience.
- ● Trellis or lattice panels: 4–6 feet tall, secured to the fence with stainless steel screws (if adding structure).
- ● Mulch: 2–3 inches of organic mulch (e.g., bark or shredded leaves) to retain moisture.
- ● Garden gloves (to protect your hands from thorns or soil).
- ● Trowel or hand shovel (for planting and soil prep).
- ● Drill & screws (if attaching trellises or planters to the fence).
- ● Measuring tape (to ensure even spacing between plants).
- ● Watering can or hose with a gentle spray nozzle (for delicate flowers).
- ● Fertilizer (slow-release granular or liquid, balanced 10-10-10 for blooms).
- ● Self-watering planters (to reduce maintenance).
- ● LED solar lights (for evening ambiance).
- ● Drip irrigation kit (for large installations).
- ● Decorative fence covers (e.g., burlap or lattice wraps for a rustic look).
Step-by-Step instructions for creating a lush privacy fence flower garden
Transform your fence into a vibrant, living screen that blooms season after season.
🌱 Step 1: Select the Right Climbing Plants for Year-Round Interest
Choose a mix of fast-growing vines and seasonal bloomers to ensure continuous coverage. For spring color, plant clematis or wisteria—their fragrant blossoms appear early and attract pollinators. Summer bloomers like morning glory or passionflower provide lush foliage and vibrant flowers, while fall interest comes from campsis (trumpet vine) or cynanchum (honey vine) with their fiery foliage and late-season blooms.
For winter structure, include evergreen climbers like ivy or star jasmine, which retain their leaves and add texture. I always pair one deciduous climber (like roses or jasmine) with one evergreen to ensure year-round coverage. Check each plant’s sunlight needs—some thrive in full sun, while others prefer partial shade—and match them to your fence’s exposure.
🪴 Step 2: Install Support Structures Along the Fence
Most climbing plants need physical support to reach their full height. For lightweight vines like morning glory or clematis, install twine or trellis netting (stapled every 12 inches) along the fence. For heavier climbers like wisteria or trumpet vine, add wooden lattice panels or metal trellises for stability. Space supports every 3-4 feet to prevent sagging.
If your fence is smooth or non-porous, drill small holes and insert plastic anchors to secure trellises. For chain-link fences, wrap horizontal wires (gauge 12 or 14) every 18 inches to give vines something to grip. Avoid metal spikes—they can damage plant roots over time. Test the stability of your supports before planting; a wobbly trellis will collapse under a heavy bloom.
☀️ Step 3: Plant for Maximum Coverage and Growth Speed
Dig holes twice as wide as the root ball but only as deep as the container’s base. Place each plant 12-18 inches from the fence (closer for sprawlers like ivy, farther for vigorous climbers like wisteria). Mix 1 cup of compost into the backfill soil to encourage root establishment. Water deeply before backfilling to eliminate air pockets.
For fastest coverage, plant pre-established vines (1-2 years old) instead of seeds. Space them 3-5 feet apart, depending on their mature width. If using seed-grown plants, give them an extra year to establish before expecting full coverage. Mulch with 2-3 inches of shredded bark to retain moisture and suppress weeds—just keep it 6 inches away from stems to prevent rot.
💧 Step 4: Water and Train for Optimal Growth
Water deeply every 2-3 days for the first 4-6 weeks until roots establish. You’ll know it’s enough when soil 1 inch down feels damp but not soggy. After that, water 2-3 times per week during dry spells, aiming for 1-2 gallons per plant. Drip irrigation works best—it delivers water slowly at the root zone without wetting foliage (which invites fungal diseases).
Train vines by gently weaving new growth through trellis supports or tying them with soft plant ties. Avoid metal or wire—it can cut into stems as they thicken. For self-clinging vines like ivy, no support is needed, but prune aggressively in late winter to encourage bushier growth. For twining vines like morning glory, guide them upward daily until they reach the top of the trellis.
✂️ Step 5: Prune and Maintain for Long-Term Beauty
Prune early spring (before new growth) to shape plants and remove dead wood. For woody climbers like clematis, cut back 1/3 of the oldest stems to encourage new, vigorous growth. For semi-woody vines like jasmine, trim just above a leaf node to stimulate branching. Deadhead spent blooms regularly to redirect energy into new flowers instead of seed production.
Fertilize twice a year: once in early spring with a balanced 10-10-10 and again in mid-summer with a low-nitrogen, high-phosphorus (5-10-10) to boost flowering. Watch for pests like aphids or spider mites—a strong spray of water usually clears them, but severe infestations may need neem oil treatment. With consistent care, your fence will transform into a living privacy screen within 2-3 seasons.
Tips & tricks for perfect privacy fence flower gardens
Creating a living privacy screen takes thoughtful planning—here are the game-changing details that'll make your vertical garden thrive from season to season.
Sunlight Matching: This is where most gardeners go wrong. I've learned the hard way that wisteria and clematis demand full sun (at least 6 hours daily), while passionflower and star jasmine tolerate partial shade. Check your fence's sunlight patterns throughout the day—morning sun is gentler than afternoon heat, which can scorch delicate blooms. Place sun-loving vines on the south or west side of your fence, and shade-tolerant varieties on the north or east side.
Support Stability: The 12-inch spacing for trellis netting in Step 2 isn't arbitrary—it's the sweet spot for lightweight vines to grip without overcrowding. For heavier climbers like trumpet vine, I recommend adding diagonal supports every 4 feet to prevent sagging under heavy blooms. Test your trellis system before planting by hanging a 5-pound weight—if it sags more than 2 inches, reinforce it. A wobbly structure will collapse when vines reach maturity.
Plant Pairing Strategy: The key to year-round coverage lies in strategic pairing. I always combine one vigorous climber (like wisteria) with a slower-growing evergreen (like ivy). The wisteria will quickly fill vertical space while the ivy provides winter structure. For maximum impact, plant your fastest grower in the center of your design—it will create an instant focal point while slower varieties catch up. This layered approach prevents bare spots during the critical first growing season.
Watering Wisdom: Those first 4-6 weeks are critical for root establishment, but don't rely solely on the 2-3 day watering schedule. I've found that morning watering (before 9am) minimizes evaporation and fungal risks. For chain-link fences, consider installing a soaker hose along the base—it delivers water directly to roots without wetting foliage, which is especially important during humid summers. The 1-2 gallon target per plant might seem generous, but it ensures moisture reaches the full root zone, not just the surface.
Pro Tips for Privacy Fence Flowers
- Creating a living privacy screen takes thoughtful planning—here are the game-changing details that'll make your vertical garden thrive from season to season.
- Sunlight Matching: This is where most gardeners go wrong.
- Support Stability: The 12-inch spacing for trellis netting in Step 2 isn't arbitrary—it's the sweet spot for lightweight vines to grip without overcrowding.
Frequently asked questions
Got questions about privacy fence flowers?
You’re not alone! Here are answers to the most common concerns—whether you’re planning a lush vertical garden or troubleshooting your current setup.
What are the best low-maintenance flowers for privacy fences?
Opt for climbing roses, clematis, or honeysuckle—they’re hardy and bloom prolifically. For minimal upkeep, try bougainvillea or jasmine, which thrive with sunlight and occasional pruning. Succulents like sedum also work well for drought-prone areas!
How long does it take for flowers to create a full privacy screen?
Most flowering vines take 1–3 years to fully cover a fence, depending on the plant. Fast growers like morning glories or ivy can reach 10+ feet in a single season, while roses or wisteria may need 2–3 years. Pro tip: Start with trellis supports to speed up growth!
Are privacy fence flowers more expensive than wood or vinyl?
Initial costs vary—climbing plants ($10–$50 each) are cheaper upfront than wood fences ($15–$30/sq ft), but long-term savings win! Flowers reduce noise, block wind, and add curb appeal. Budget hack: Use native plants (cheaper, low-maintenance) or divide existing vines.
Can I grow flowers on a chain-link fence? Yes—but with adjustments!
Chain-link needs extra support! Use heavy-duty trellis netting or horizontal slats to anchor vines like passionflower or black-eyed Susans. Avoid aggressive climbers (e.g., kudzu) that can damage the fence. Warning: Prune regularly to prevent tangles!
Will privacy fence flowers attract pests like bees or deer?
Most flowering vines do attract pollinators (bees, butterflies)—great for gardens! To deter deer, choose toxic plants like oleander or lantana, or add deer-resistant shrubs (e.g., boxwood) as a buffer. Pro tip: Plant pest-repelling herbs (e.g., lavender) nearby for balance!
What if my flowers stop blooming or turn yellow?
Yellow leaves often mean overwatering or nutrient deficiency. Prune dead blooms regularly to encourage new growth, and fertilize in spring with balanced 10-10-10. No blooms? Check sunlight—most vines need 6+ hours/day. Adjust care based on your plant’s needs!
Wrapping up and next steps
Transforming your privacy fence into a vibrant, year-round garden isn’t just possible—it’s easy and rewarding! 🌸 From climbing roses to evergreen vines, the right plants add beauty, seclusion, and even value to your home.
Whether you’re tackling a sunny wall or a shady corner, the key is choosing low-maintenance, fast-growing varieties that thrive in your climate.
Ready to get started? Pick one plant to begin this weekend—your future self (and neighbors!) will thank you. Need a little extra inspiration? Sketch a quick design or snap photos of your fence for a personalized plant-placement guide. Happy gardening! 🌿