
Tools
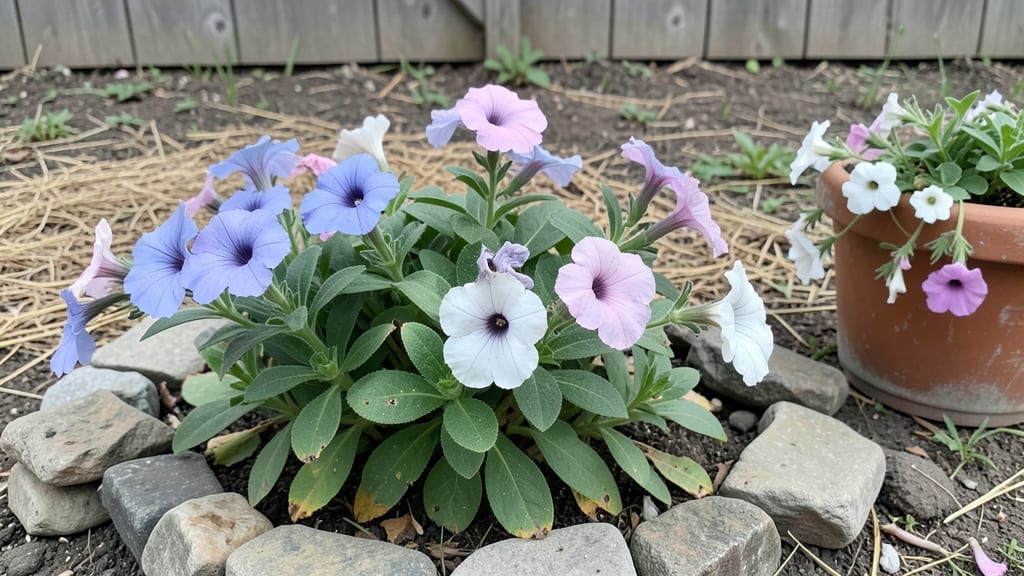
Creating a mini flower garden in containers lets you bring vibrant blooms to patios, balconies, or even windowsills without sacrificing space. 🌸 I designed my first one after watching bees struggle to find flowers in my concrete-heavy neighborhood—now my tiny pots are a pollinator hotspot.
The key is choosing plants that thrive in small spaces, like dwarf petunias, sweet alyssum, or compact lavender, all of which attract butterflies and hummingbirds.
You don’t need much to start: just a few 5-7 gallon containers, well-draining potting mix, and plants that love similar conditions. I use a mix of hanging baskets for trailing flowers and shallow pots for pollinator favorites.
The layout should prioritize height variation—tall plants in the back, mounding varieties in the middle, and spillers like nasturtiums at the edges. This creates a lush, layered look that feels bigger than it is.
By mid-summer, your mini garden will burst with color and movement, drawing bees and butterflies to your doorstep. The maintenance is light—just water when the top inch of soil feels dry and deadhead spent blooms to encourage more flowers.
Even in small spaces, you’ll create a garden that feels alive, intentional, and full of life.
This approach works for urban balconies, rural patios, or even indoor sunrooms. The beauty of a mini flower garden is its flexibility—you can move it to follow the sun, swap out seasonal blooms, or expand as your green thumb grows. Let’s get those containers planted!
📚 In This Guide
- What you need
- Instructions
- Tips and common mistakes
- Wrapping up and next steps
What you need
- ● Container(s): 1-3 small pots (5-10 inches in diameter) or a shallow tray (12x12 inches). Use terracotta, plastic, or fabric grow bags with drainage holes.
- ● Potting Soil: 2-3 gallons of well-draining, organic potting mix (avoid garden soil—it compacts!). Look for blends labeled for flowers or herbs.
- ● Seeds or Seedlings: Pollinator-friendly flowers: 3-5 marigolds, sunflowers, cosmos, or lavender (fast-growing and bee-loved!).
- ○ Herbs (optional): 1-2 basil, thyme, or mint (adds fragrance and attracts pollinators).
- ● Drainage: 1 layer of small pebbles, perlite, or broken pottery (1 inch deep) at the bottom of each container.
- ● Basic Tools: 1 small trowel or spoon for planting.
- ● 1 spray bottle (for watering seedlings).
- ○ 1 pair of gardening gloves (optional but handy!).
- ○ Optional Upgrades: 1 self-watering tray (keeps soil moist without overwatering).
- ● 1 mini trellis or stakes (for vining plants like morning glories).
- ● Decorative pebbles, moss, or a small solar light (for a cute, finished look!).
- ● Sunlight: A spot with 4-6+ hours of direct sunlight daily (south-facing windowsills or balconies work great!).
- ● Water Access: A sink or watering can nearby.
- ● Patience: Seedlings may take 2-4 weeks to sprout (depending on the plant)!
Step-by-Step instructions for creating your mini flower garden
Turn any small space into a buzzing haven with this portable pollinator paradise.
🪴 Step 1: Select and Prepare Your Containers
Choose containers with drainage holes—terracotta pots work beautifully, but any durable material will do. I like to use a mix of sizes: one 12-inch pot as a focal point and three 6-inch pots for companion plants. Clean containers thoroughly with warm, soapy water to remove any residue that might inhibit growth.
Line the bottom of each pot with a 2-inch layer of gravel or broken pottery to create a drainage reservoir. This prevents soggy roots while allowing excess water to escape. Place your containers where they’ll receive at least 6 hours of sunlight daily—most pollinator-friendly flowers thrive in full sun.
🌱 Step 2: Layer Soil and Plant Your Flowers
Fill each pot with 2 gallons of well-draining potting mix (avoid garden soil—it compacts too easily in containers). For the 12-inch pot, add a handful of slow-release fertilizer mixed into the top 2 inches of soil to give your plants a nutrient boost. Press the mix lightly to remove air pockets but keep it loose enough for roots to spread.
Plant your flowers according to their mature size. Place taller varieties like coneflowers or black-eyed Susans in the center of the 12-inch pot, while shorter blooms like salvia or alyssum can go around the edges. Space plants 6-12 inches apart, depending on their growth habit. Water gently after planting to settle the soil.
💧 Step 3: Water and Mulch for Retention
Water each pot deeply until water drains freely from the bottom. Let the excess drain completely—soggy soil is a fast track to root rot. After watering, sprinkle a ½-inch layer of mulch (like shredded bark or straw) over the soil surface. This helps retain moisture and keeps roots cool in hot weather.
I like to water my mini garden in the morning so the soil has time to dry slightly before evening. Check the top inch of soil daily—if it feels dry, it’s time to water. Avoid wetting the leaves, especially for flowers like lavender, which can develop fungal issues from excess moisture on their foliage.
☀️ Step 4: Maintain Light and Fertilize Regularly
Rotate your containers a quarter turn every few days to ensure even sunlight exposure. This prevents leggy growth and keeps your plants compact and bushy. If your garden is indoors or in partial shade, supplement with a grow light placed 4-6 inches above the plants for 12-14 hours daily.
Every 4-6 weeks, add a ½ teaspoon of balanced liquid fertilizer (10-10-10) to each pot. Mix it into the top 1 inch of soil and water deeply to distribute nutrients. Stop fertilizing in late summer to encourage blooming rather than leafy growth. Deadhead spent flowers regularly to promote continuous blooms throughout the season.
✂️ Step 5: Encourage Pollinators and Prune Thoughtfully
Once flowers begin to open, watch for bees, butterflies, and hummingbirds visiting your garden. To attract more pollinators, plant neighboring pots with nectar-rich flowers like bee balm or cosmos. Avoid pesticides entirely—even "organic" sprays can harm beneficial insects.
Prune leggy stems or overgrown foliage in early spring or after flowering to maintain shape. Cut back ⅓ of the plant’s height to encourage bushier growth. In late fall, trim back dead or damaged stems but leave some foliage to protect the crown over winter. Move containers to a sheltered spot if frost is expected.
Tips & tricks for perfect mini flower gardens
Creating a thriving mini flower garden in containers takes more than just planting—it's about understanding the subtle details that make all the difference. Here's what I've learned after watching dozens of container gardens succeed (and a few that didn't make it).
Drainage is Everything: That 2-inch gravel layer in Step 1 isn't just about drainage—it's your first line of defense against root rot. I've seen containers with "perfect" drainage holes still fail because the soil stayed soggy. If you're using lightweight containers like plastic, double the gravel layer to 3-4 inches. For terracotta, stick with the 2-inch recommendation, but add a layer of landscape fabric between the gravel and soil to prevent fine particles from clogging the drainage.
Soil Science Matters: The 2 gallons of well-draining potting mix in Step 2 is non-negotiable, but here's the secret: mix in 10% perlite or vermiculite to improve aeration. I've found that container plants actually benefit from a slightly sandier texture than in-ground gardens. For the 12-inch pot, add your slow-release fertilizer to the top 2 inches of soil, but mix it thoroughly—uneven distribution leads to lopsided growth. A quick tip: tap the pot gently on the counter after filling to settle the soil without compacting it.
Light Rotation Strategy: That quarter-turn rotation in Step 4 isn't just about even growth—it's a growth hack. I rotate my containers clockwise every morning before watering. This creates a natural spiral pattern in the soil that actually improves root development over time. For indoor gardens using grow lights, position the light so it covers the entire surface area of your containers. Most grow lights have a sweet spot—usually 4-6 inches above the plants—but this varies by brand, so test it with a simple ruler and your own eyes.
Watering Wisdom: The "top inch of soil" check in Step 3 is your best friend, but here's what nobody tells you: use your finger to check moisture at two different spots in each pot. Containers dry out unevenly, especially larger ones. For the 12-inch pot, I've found that checking near the center and one edge gives me the most accurate reading. And here's a pro move: water until you see moisture emerge from the drainage holes, then let it drain for 5 minutes before returning excess to the saucer. This prevents salt buildup that can harm roots over time.
Pro Tips for Mini Flower Garden
- Creating a thriving mini flower garden in containers takes more than just planting—it's about understanding the subtle details that make all the difference.
- Drainage is Everything: That 2-inch gravel layer in Step 1 isn't just about drainage—it's your first line of defense against root rot.
- Soil Science Matters: The 2 gallons of well-draining potting mix in Step 2 is non-negotiable, but here's the secret: mix in 10% perlite or vermiculite to improve aeration.
Frequently asked questions
Got questions about creating your own mini flower garden? You’re not alone! Here are some of the most common concerns—and their simple solutions—to help you get started with confidence.
What’s the best container size for a mini flower garden?
A container with a depth of 6–12 inches and a width of at least 12 inches works best for most flowers. Smaller containers (like 6-inch pots) are great for succulents or herbs, while larger ones (18+ inches) support deeper-rooted plants like lavender or cosmos. Just ensure it has drainage holes to prevent root rot!
How often should I water my mini flower garden?
Watering depends on your climate and container size, but a general rule is to check soil moisture daily in hot weather and every 2–3 days in cooler conditions. Stick your finger 1 inch into the soil—if it’s dry, it’s time to water. Containers dry out faster than ground soil, so consistency is key!
Which flowers attract the most pollinators to a small space?
Opt for pollinator magnets like bee balm, cosmos, marigolds, or lavender. These flowers are compact, colorful, and packed with nectar. Plant them in clusters (3–5 together) to create a visible landing strip for bees and butterflies. Avoid double-blooming varieties—they often lack pollen!
Can I reuse soil from last year’s garden in my containers?
It’s not recommended unless you’ve sterilized it (bake at 200°F for 30 minutes or use solarization). Old soil may harbor diseases or pests. Instead, mix fresh potting soil with compost (3:1 ratio) for nutrient-rich, well-draining soil. Pro tip: Add a handful of perlite or vermiculite to improve aeration!
What do I do if my mini garden looks wilted or unhealthy?
First, check for underwatering or overwatering—yellow leaves often mean too much water, while crispy edges signal thirst. Inspect for pests (like aphids) and remove them gently. If soil is compacted, loosen it with a fork. If issues persist, repot with fresh soil and adjust sunlight (most flowers need 6+ hours of sun).
Can I keep a mini flower garden indoors?
Yes! Choose low-light-tolerant flowers like African violets, peperomia, or bromeliads for indoor containers. Place them near a bright window (south or west-facing is ideal) and supplement with a grow light if needed. Avoid drafts and keep humidity moderate—mist leaves occasionally or use a pebble tray!
Wrapping up and next steps
Creating a mini flower garden in containers is a joyful way to bring nature’s beauty to any space—whether you’re a seasoned gardener or just starting out! 🌸 With the right plants, soil, and a little creativity, you’ve got everything you need to nurture a thriving pollinator paradise.
Remember, even small efforts make a big difference for bees, butterflies, and other tiny visitors.
Now that you’re inspired, why not take the next step? Start with one container today—pick your favorite blooms, grab your tools, and let your green thumb shine! 🌱 Happy gardening!