
Blooming
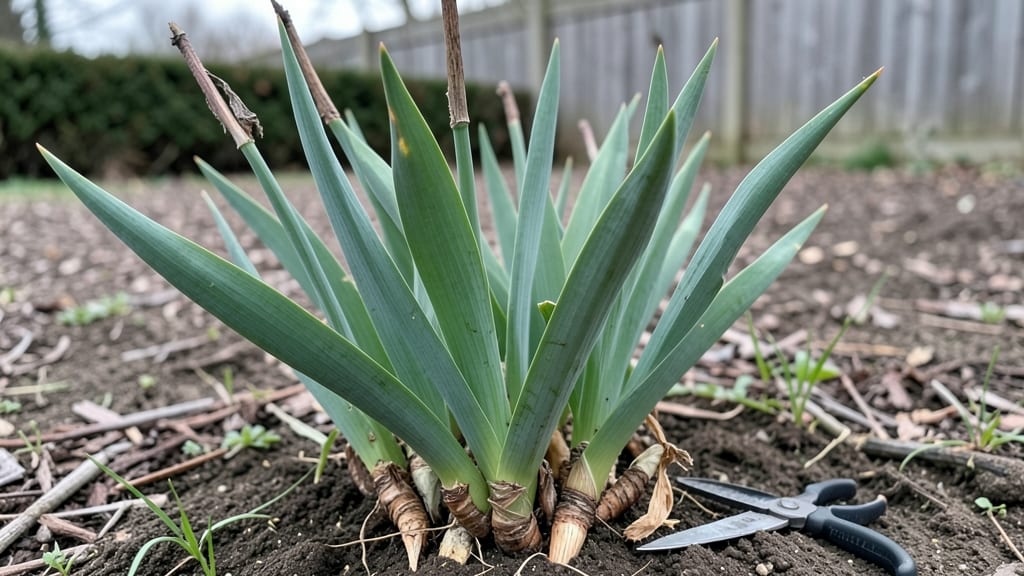
The not flowering in your irises despite their lush green leaves? Overwatering is often the sneaky culprit—until you learn the fix. 🌱 I’ve watched my own irises go from vibrant blooms to stubborn leaf stalks after years of well-meaning (but overzealous) watering. hard truth: irises hate soggy feet.
The fix isn’t complicated, but it does require a shift in how you think about moisture.
Irises store energy in their thick rhizomes, and too much water drowns their roots while starving the buds. Most gardeners overdo it because the leaves look healthy, but those leaves are actually masking the real problem: a lack of dormancy.
Cut back on watering in late summer, let the soil dry between drinks, and you’ll see flower spikes emerge by next spring.
You’ll notice the first signs of revival within weeks: stronger rhizomes, fewer yellowing leaves, and—most exciting—the first tight buds forming by early spring. The key is patience; irises reward consistency over quick fixes. With the right balance, your garden will burst with those signature sword-like blooms year after year.
This method works for both bearded and Siberian irises, whether you’re dealing with a mature border or a new planting. The secret? Treat them like the drought-tolerant survivors they are. Let’s get those blooms back!
Root Causes Behind Stubborn Irises
If your irises are putting on a no-show when it comes to blooms, don’t panic—there’s almost always a fixable reason behind it. Irises are hardy plants, but they’re also particular about their growing conditions.
Let’s dig into the most common culprits and why they might be keeping your irises from sending up those iconic, velvety petals.
Irises are sun-worshippers—they thrive in full sun (6–8 hours daily). When they don’t get enough light, they divert all their energy into growing leaves instead of flowering. This is especially true for bearded irises, which need bright, direct sunlight to trigger blooming.
- 🔍 Signs: Long, leggy stems with sparse or no buds, or flowers that appear small and weak.
- 💡 Fix: Move your irises to a sunnier spot. If shade is unavoidable (e.g., from trees), prune nearby branches or plant them in a location where they’ll get morning sun at minimum.
- ⚠️ Pro Tip: Avoid late-afternoon sun in hot climates—it can scorch leaves. A balance of morning sun and afternoon shade often works best.
Irises are drought-tolerant and actually prefer dry conditions once established. Overwatering—especially in winter—can suffocate roots, leading to rot and stunted growth. Waterlogged soil also prevents the rhizomes (thick, fleshy roots) from getting the oxygen they need to produce flowers.
- 🔍 Signs: Yellowing or mushy rhizomes, moldy soil, or plants that look limp and unhealthy.
- 💡 Fix:
- Water deeply but infrequently—about 1 inch per week (less in winter).
- Ensure your garden has well-draining soil. Amend clay soil with sand or gravel.
- If your irises are in containers, use pots with drainage holes and avoid saucers that trap water.
- ✨ Bonus: Let the soil dry out completely between waterings. Stick your finger 2 inches into the soil—if it’s damp, wait!
Irises aren’t fussy about soil pH (they tolerate 6.0–7.0), but they do need fertile, well-draining soil rich in organic matter. Compacted or nutrient-poor soil can starve rhizomes, leaving them too weak to produce flowers.
Over-fertilizing with high-nitrogen feeds (like lawn fertilizer) also encourages leafy growth at the expense of blooms.
- 🔍 Signs: Small, pale flowers or no blooms at all, despite healthy-looking foliage. Soil may feel hard or clay-like.
- 💡 Fix:
- Test your soil’s pH and amend if needed. Lime raises pH, while sulfur lowers it.
- Mix in compost or aged manure in early spring to boost organic matter.
- Use a balanced, low-nitrogen fertilizer (like 5-10-10) in early spring to encourage blooming without excess leaf growth.
- 🎯 Pro Tip: Irises hate fresh manure—it can burn rhizomes. Always use well-composted material.
Irises have a 3–5 year lifespan before their rhizomes (those thick, horizontal roots) become overcrowded and exhausted. Older rhizomes produce fewer—and sometimes no—flowers because they’ve maxed out their energy reserves. Without division, they also struggle to get enough nutrients and sunlight.
- 🔍 Signs: Clumps with no new growth in the center, or flowers that appear smaller and fewer each year.
- 💡 Fix: Divide and replant your irises every 3–4 years in late summer or early fall.
- Dig up the rhizomes, separate the fans (leaf clusters), and discard the old, woody centers.
- Trim leaves to 6 inches and cut off the flower stalks.
- Replant the healthiest rhizomes in fresh soil, ensuring the top 1/3 is exposed (they need sunlight to dry out and prevent rot).
- ⏰ Timing Matters: Dividing in late summer gives new rhizomes time to establish roots before winter.
Pests like iris borers (larvae that tunnel into rhizomes) or diseases like bacterial soft rot can weaken irises to the point where they skip flowering entirely. Even fungal infections (like Erysiphe, a powdery mildew) can stress plants, diverting energy away from blooms.
- 🔍 Signs:
- Holes or sawdust-like frass in rhizomes (borers).
- Yellowing leaves with black spots or mold.
- Rhizomes that smell rotten or feel mushy.
- 💡 Fix:
- Borers: Handpick larvae in spring or treat with neem oil or Bt (Bacillus thuringiensis).
- Fungal issues: Apply copper fungicide or baking soda spray (1 tsp baking soda + 1 quart water + a drop of dish soap).
- Rot: Remove infected rhizomes immediately and replant in sterilized soil.
- 🛡️ Prevention: Space plants for air circulation, avoid overhead watering, and clean up debris where pests hide.
Most of these issues are easy to diagnose and fix—and once you address them, your irises should bounce back with a spectacular display of color. Start with the most likely culprit (like sunlight or watering) and work your way down the list. Happy digging! 🌸🔨
Quick Fixes for Stubborn Irises
Reviving your irises and encouraging them to bloom again is totally doable—you just need to address the root causes with targeted care. Below, we’ll break down practical, step-by-step solutions for each common issue, plus tips to keep your irises thriving long-term. Let’s get those blooms back in action! 🌸💦
Fix: Adjust watering habits and improve soil flow.
Step 1: Check the Soil Moisture 👨🍳 Stick your finger 1–2 inches deep into the soil. If it feels soggy or waterlogged, your irises are getting too much moisture. Irises hate wet feet—they thrive in well-draining soil and only need water when the top inch is dry.
Step 2: Space Watering Sessions ⏰ Instead of daily light watering, give your irises a deep soak 1–2 times per week (adjust based on rain). Early morning is best—this prevents fungal issues and lets foliage dry quickly.
Step 3: Amend the Soil 🔪 If your garden soil is heavy clay or compacted:
- Mix in coarse sand, perlite, or gravel (1 part amendment to 3 parts soil).
- For containers, use a ch chunky potting mix designed for bulbs or perennials.
- Pro Tip: 💡 Elevate iris rhizomes slightly above soil level to prevent rot.
Prevention:
- Plant irises in raised beds or slopes if your yard floods easily.
- Avoid mulching too heavily around the crown—keep it 2–3 inches away to allow airflow.
Fix: Move irises to sunnier spots and prune wisely.
Step 1: Assess Sunlight Needs 📊 Irises need 6+ hours of direct sun daily to bloom. If they’re in shade:
- Gradually acclimate them to more sun (move pots or thin nearby trees over weeks).
- Prune overgrown foliage to reduce competition for light—cut back yellowed or floppy leaves in early spring.
Step 2: Thin Out Crowded Clumps ✂️ Overcrowded irises steal nutrients from each other. Dig up rhizomes and:
- Separate fan-like clusters, discarding small or weak ones.
- Replant 3–4 inches deep, spacing them 12–24 inches apart.
- Pro Tip: 🌡️ Plant in late summer/early fall for best root establishment before winter.
Prevention:
- Choose sun-loving companion plants (lavender, catmint, or ornamental grasses) to keep the area bright.
- Avoid planting irises under fast-growing trees (like willows) that block light over time.
Fix: Feed irises the right way at the right time.
Step 1: Test Your Soil 📊 Use a DIY soil test kit (available at garden centers) to check pH and nutrients. Irises prefer:
- Slightly acidic to neutral soil (pH 6.0–7.0).
- Low nitrogen (too much = leafy growth, no blooms).
Step 2: Fertilize Strategically 💪
- Spring (after blooming): Apply a low-nitrogen, high-phosphorus fertilizer (like 5-10-10) to encourage flowers.
- Fall (late summer): Use a balanced bulb fertilizer (e.g., 10-10-10) to build roots for next year.
- Avoid high-nitrogen fertilizers (like lawn food)—they promote foliage but kill blooms.
Step 3: Organic Boosts 🥗
- Compost or well-rotted manure (sprinkle lightly around the base in spring).
- Bone meal (for phosphorus) or kelp meal (for micronutrients) can help lazy bloomers.
Prevention:
- Don’t over-fertilize—irises are low-maintenance and can burn with too many nutrients.
- Water deeply after fertilizing to help nutrients absorb into the soil.
Fix: Identify the culprit and treat gently.
Step 1: Spot the Problem 🦋
- Iris borers (sawfly larvae): Look for chewed leaves or sawdust-like frass in stems.
- Fungal issues (like leaf spot): Brown/yellow spots on leaves, often in humid weather.
- Slugs/snails: Ragged holes in petals or leaves.
Step 2: Act Fast
- For borers: Prune infested leaves and handpick larvae (drop them in soapy water). Apply neem oil or Bt (Bacillus thuringiensis) as a natural pesticide.
- For fungi: Remove affected foliage and spray with copper fungicide or baking soda mix (1 tsp baking soda + 1 quart water + a drop of dish soap).
- For slugs: Set up beer traps or use iron phosphate pellets (pet-safe).
Prevention:
- Clean up debris in fall to reduce overwintering pests.
- Space plants properly for airflow (prevents fungal spread).
- Rotate pesticides if using chemicals to avoid resistance.
Fix: Rejuvenate old rhizomes or adjust care for seasonal needs.
Step 1: Divide and Revive 🔄 If your irises are 5+ years old, they may have outgrown their energy. Dig up clumps and:
- Discard old, woody rhizomes (they won’t rebloom).
- Repot or replant healthy sections in fresh soil.
- Pro Tip: 🌱 Plant divisions in late summer for a strong spring comeback.
Step 2: Encourage Dormancy (For Late Bloomers) 🌡️ Some irises need a rest period to bloom. In late summer:
- Stop watering once leaves turn yellow (signs of dormancy).
- Cut back foliage to 3–4 inches tall (but leave some leaves for photosynthesis).
- Resume watering in early spring as new growth appears.
Prevention:
- Label new plantings with the year to track age.
- Avoid fertilizing in late summer—it can delay dormancy.
- Deadhead spent blooms (but leave seed pods if you want more plants!).
- Avoid pruning healthy leaves until they naturally yellow in summer.
- Mulch lightly (1 inch) in winter to protect roots, but remove it in spring to prevent rot.
With these fixes, your irises should bounce back stronger and reward you with vibrant blooms next season. Happy gardening! 🌺✨
Frequently asked questions
Why do my irises have leaves but no blooms?
Irises prioritize leaf growth when stressed—common triggers include too much nitrogen fertilizer, overcrowded rhizomes, or insufficient sunlight. Focus first on sunlight (6+ hours daily) and reduce high-nitrogen feeds. Most blooming issues stem from these two factors.
How often should I divide my irises to encourage flowers?
Divide every 3-4 years in late summer for best results. Older clumps become congested, stealing energy from blooms. Simply separate the rhizomes, discard the woody centers, and replant healthy sections with the tops exposed to sunlight.
Can I force irises to bloom out of season?
No—irises bloom based on natural light cycles. However, you can encourage earlier spring blooms by providing bright light and reducing winter watering. For fall blooms, plant varieties like 'Autumn Harvest' which naturally flower later.
What's the best fertilizer for blooming irises?
Use a low-nitrogen, high-phosphorus fertilizer (like 5-10-10) in early spring after blooming. Avoid lawn fertilizers—they promote leafy growth at the expense of flowers. Organic options like bone meal also work well for phosphorus boosts.
Why do my container-grown irises refuse to flower?
Containers often trap excess moisture—irises need well-draining soil and dry periods between waterings. Use chunky potting mix with perlite, and ensure pots have drainage holes. Elevate rhizomes slightly above soil level to prevent rot.