
Propagation
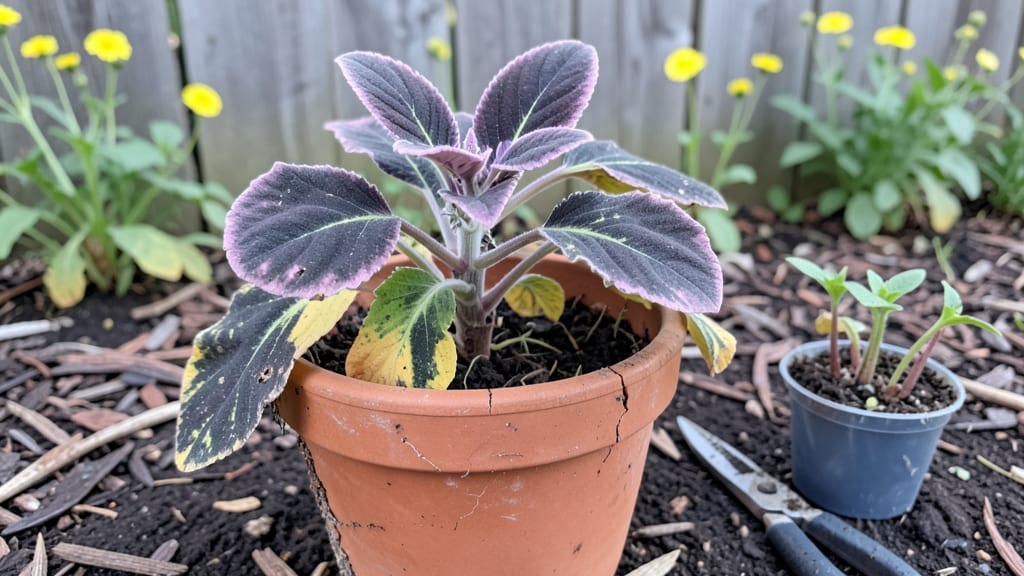
Propagating flowers doubles your garden for free—whether you root cuttings in water or soil, the right technique turns a single plant into dozens. 🌿 I’ve multiplied my coleus, pothos, and even roses this way, and the best part?
Most flowers thrive with just a pair of clean scissors and a little patience. The key is choosing the right method for your plant: water rooting speeds up growth for tropicals, while soil works better for tough perennials like lavender or daylilies.
You’ll need basic tools—a sharp knife or pruners, rooting hormone (optional but helpful), and containers with drainage. Timing matters too: propagate in spring or early summer when plants are actively growing.
My first attempt with a hydrangea cutting failed because I waited until fall—now I mark my calendar for late May. The process takes anywhere from 2-8 weeks, depending on the plant, but the payoff is worth it when you see those first roots or leaves.
By the end, you’ll have lush, thriving new plants ready to fill gaps in your garden or share with neighbors. The soil method keeps plants stronger from the start, while water rooting lets you watch roots grow like a science experiment.
Either way, you’ll save money and get flowers you love without buying a single new plant. Let’s get those cuttings growing!
Works for everything from easy-care succulents to finicky roses—just adjust timing and tools for your climate. Whether you’re a beginner or a seasoned gardener, this method scales to any space. Ready to turn one plant into many?
📚 In This Guide
- What you need
- Instructions
- Tips and common mistakes
- Wrapping up and next steps
What you need
- ● Healthy parent plant: Choose a mature, disease-free flower with strong stems or leaves (e.g., spider plant, pothos, or coleus).
- ● Sharp scissors or pruning shears: Sterilized to avoid contamination (1 pair).
- ● Clean water (for water propagation): Room-temperature, filtered if possible (1–2 cups per cutting).
- ○ Rooting hormone (optional but helpful): Powder or gel (1 small bottle).
- ● Small containers: Water propagation: Clear glass or jar (8–12 oz, 1–2 per cutting).
- ● Soil propagation: 4–6 inch pots with drainage holes (1–2 per cutting).
- ● Well-draining potting mix: Lightweight blend (e.g., perlite + peat or cactus mix, 1 small bag).
- ● Plastic wrap or humidity dome: To retain moisture (1 sheet or 1 dome).
- ● Grow lights: LED or fluorescent (1–2 bulbs) for low-light setups.
- ● Heat mat: For tropical plants (1 small mat).
- ● Fertilizer (diluted): Liquid seaweed or rooting fertilizer (1 small bottle).
- ● Label markers: To track plant varieties (1 pack).
- ● Spray bottle: For gentle watering (1 bottle).
Step-by-Step guide to propagating flowers from cuttings
Here’s how to grow new plants from existing flowers—no fancy tools required.
🌱 Step 1: Choose Healthy Stems and Prepare Your Cuttings
Select stems that are 4-6 inches long with at least 2-3 sets of leaves—young, flexible growth works best. Use clean, sharp scissors or pruners to make a diagonal cut just below a leaf node (that little bump where leaves grow). This angle increases surface area for root growth.
Remove the lower leaves, leaving only 2-3 leaves at the top. Too many leaves mean the cutting will lose too much moisture before roots form. Strip the lower leaves to expose the stem—this is where roots will emerge. If the stem has flowers or buds, snip them off. You want all the plant’s energy focused on growing roots, not blooms.
💧 Step 2: Root in Water or Soil—Your Choice
For water propagation, fill a clean glass with room-temperature water (cold water shocks roots) and place the cut end in the water until the lower 1-2 inches are submerged. Change the water every 3-4 days to prevent bacteria or algae. You’ll see tiny white roots in 2-4 weeks—that’s your signal it’s ready for soil.
For soil propagation, dip the cut end in rooting hormone (optional but speeds things up) and plant the cutting in moist potting mix. Press gently but firmly to keep the soil snug around the stem. Cover the pot with a clear plastic bag to trap humidity—this mimics a greenhouse. Place it in bright, indirect light (no harsh sun yet).
☀️ Step 3: Encourage Root Growth and Transition to Light
If rooting in water, keep the glass in bright, indirect light—no direct sun yet. Roots need warmth (around 65-75°F) to grow. You’ll know it’s working when roots reach 1-2 inches long. Now, plant it in soil: dip the rooted cutting in water, then gently place it in a small pot with well-draining potting mix. Water lightly and place it in shade for a week to recover.
If rooting in soil, keep the humidity high by misting daily or removing the plastic bag for 10 minutes every few days to prevent mold. After 4-6 weeks, check for roots by gently tugging the stem—if it resists, roots have formed. Gradually introduce morning sun over a week to harden off the new plant.
🌿 Step 4: Care for Your New Propagated Flowers
Once rooted, water when the top inch of soil feels dry. Overwatering is the biggest mistake—new roots are fragile. Fertilize lightly with a balanced, diluted fertilizer (half-strength) after 4-6 weeks to encourage leafy growth. Avoid heavy feeding too soon—you want roots to establish before pushing foliage.
Watch for yellowing leaves—this usually means too much water or not enough light. If leaves droop in the heat, move the plant to a shadier spot. Propagated plants are tough but need patience. In 8-12 weeks, your cutting will be a sturdy young plant ready to bloom or be transplanted outdoors.
Tips & tricks for propagating flowers successfully
These simple tricks will help you avoid common mistakes and maximize your success rate when growing new plants from cuttings.
Selection Matters: In Step 1, focus on stems that are 4-6 inches long with 2-3 sets of healthy leaves. Avoid stems that are woody or overly thick—they take much longer to root. I always look for new growth at the tips of branches, as these contain the most hormones needed for root development. The diagonal cut just below a leaf node is crucial—it increases surface area for root formation and prevents the stem from sitting flat against the container.
Water Temperature Tip: When rooting in water during Step 2, use room-temperature water—never cold straight from the tap. Cold water can shock the delicate stem and stunt root growth. I keep my water glass on the counter near my plants so it stays at the ideal 75°F range. Changing the water every 3-4 days prevents bacterial growth, which can turn the water cloudy and inhibit root formation.
Humidity Control: For soil propagation in Step 2, maintaining humidity is key. After covering your cutting with a plastic bag, remove it for just 10 minutes every few days to prevent mold. I place a small pebble in the bottom of the bag to create airflow—this tiny detail makes a big difference. The goal is to mimic a greenhouse environment without creating a damp, moldy situation.
Root Check Technique: In Step 3, when checking for roots after 4-6 weeks, use the gentle tug test. If the cutting resists when you pull it, roots have formed! I've found that some plants like coleus root in just 2-3 weeks, while others like roses may take closer to 8 weeks. Patience is key—don't be tempted to pull too early, as you might damage the delicate new roots.
Pro Tips for Propagate A Flower
- These simple tricks will help you avoid common mistakes and maximize your success rate when growing new plants from cuttings.
- Selection Matters: In Step 1, focus on stems that are 4-6 inches long with 2-3 sets of healthy leaves.
- Water Temperature Tip: When rooting in water during Step 2, use room-temperature water—never cold straight from the tap.
Frequently asked questions
Got questions about propagating your favorite flowers? You’re not alone! Here are some of the most common concerns—plus quick, actionable answers to help you grow with confidence.
Can I propagate any flower in water?
Not all flowers thrive in water propagation. While easy-to-root varieties like pothos, coleus, or African violets do well, others (like succulents or orchids) prefer soil. Always check your plant’s needs—some may rot if left too long in water.
How long does it take for roots to grow in water?
Roots typically appear in 2–6 weeks, depending on the plant, light, and water temperature. Keep the cutting in indirect sunlight and change the water every 3–5 days to avoid bacteria. Patience pays off—some stubborn stems take longer!
Is soil propagation better than water for flowers?
Soil propagation often yields stronger, faster-growing roots because it mimics natural conditions. However, water lets you monitor root growth easily. For delicate flowers (like roses or hydrangeas), soil is ideal—just use a moist, well-draining mix and keep humidity high.
Why is my cutting rotting in water?
Rot usually means too much water or bacteria buildup. Trim any mushy spots, switch to fresh water, and add a drop of hydrogen peroxide (3%) to sterilize. If the stem turns black, it’s time to start over—don’t give up!
Can I propagate flowers from a grocery store bouquet?
Many bouquet flowers (like gerberas, alstroemeria, or snapdragons) can root in water. Just snip the stems at an angle, remove lower leaves, and place them in water. Avoid heavily sprayed or treated blooms—they may not survive.
Wrapping up and next steps
Propagating flowers is a rewarding journey that lets you multiply your favorite blooms with ease—whether through water or soil! Whether you’re a beginner or a seasoned gardener, the key is patience, the right tools, and a little love for your plants. 🌱
Now that you’re armed with the know-how, why not start with just one cutting or division today? Pick a healthy plant, follow the steps, and watch your garden grow—literally! Share your progress with fellow plant lovers or even gift your new propagations to friends. Happy growing! 🌸