
Vegetables
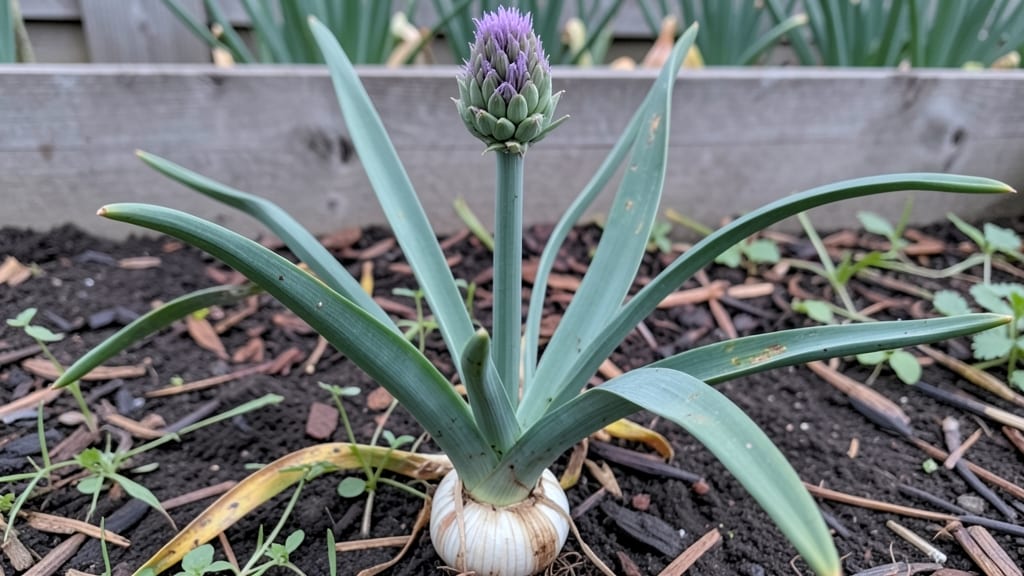
Growing garlic flower seeds lets you harvest both fragrant blooms and tender greens from the same plant—something I never thought possible until I tried it myself. 🌱 The key difference from regular garlic is starting with seed rather than cloves, which opens up a whole new world of varieties with delicate flowers and milder flavors.
You’ll need well-draining soil, a sunny spot with at least 6 hours of light daily, and patience—these plants take longer to mature than bulb garlic. I started mine in late winter indoors, then transplanted them after the last frost.
The secret to blooms? Avoid harvesting the bulbs, as that stops flowering. Instead, let the plants grow tall and sturdy.
By midsummer, you’ll be snipping edible flowers for garnishes and young greens for salads, all while watching the stems reach toward the sky. The blooms attract pollinators, and the greens pack a milder garlic punch than traditional varieties. This is gardening that doubles your harvest with minimal extra effort.
Works beautifully in raised beds, containers, or in-ground gardens—just give them room to spread. The biggest challenge? Resisting the urge to pull those tasty greens too early. Let me show you how to balance harvests without sacrificing blooms.
📚 In This Guide
- What you need
- Instructions
- Tips and common mistakes
- Wrapping up and next steps
What you need
- ● Garlic flower seeds (or cloves from a bulb) – Start with hardneck garlic varieties (e.g., 'Music', 'German White', or 'Silverskin'), as they produce edible flowers and greens. Aim for 10–20 seeds/cloves per planting.
- ● Well-draining potting mix or garden soil – A blend of 50% compost, 30% coconut coir, and 20% perlite/sand works best for containers. For in-ground planting, amend soil with aged compost (2–3 inches mixed in).
- ○ Containers (optional but helpful) – If starting indoors, use 4–6 inch pots with drainage holes. For direct sowing, a 6-inch-deep trench or raised bed is ideal.
- ● Watering can or spray bottle – Keep soil moist but not soggy (garlic hates "wet feet").
- ● Fertilizer (low-nitrogen, high-potassium) – A balanced organic fertilizer (5-5-5 or 3-4-6) or compost tea applied every 4–6 weeks.
- ● Mulch (straw or shredded leaves) – 2–3 inches to retain moisture and regulate soil temperature.
- ○ Garden twine or stakes (optional) – Helps support tall stems if growing in windy areas.
- ● Grow lights (for indoor starts) – Provides 12–14 hours of light/day if natural light is limited.
- ● Soil moisture meter – Ensures you’re watering at the right depth (garlic roots prefer consistent moisture).
- ● Row covers or netting – Protects flowers from pests like aphids or bees (if you prefer to save seeds for next year).
- ● Food-safe spray bottle – For misting seedlings gently to prevent fungal issues.
- ● Journal or app (e.g., Gardenate) – Track planting dates, watering schedules, and bloom times!
Step-by-step instructions for growing garlic flower seeds
Here's how to coax vibrant blooms and tender greens from garlic flower seeds—no green thumb required.
🌱 Step 1: Start Seeds Indoors for Early Growth
Fill a small seed tray with the 2 gallons of seed-starting mix and moisten it until damp but not soggy. Press the soil down lightly with your fingers to create a firm surface for seeds. Garlic flower seeds are tiny, so I like to sprinkle them directly onto the soil surface—no need to bury them. Just press them gently so they make contact with the soil.
Cover the tray with a clear plastic dome or wrap it in plastic wrap to retain moisture and warmth. Place it in a warm spot, ideally around 70-75°F, until germination. You’ll see tiny sprouts in about 10-14 days. Keep the soil consistently moist but never waterlogged—this is where most seedlings fail. If the soil dries out, the seeds won’t sprout.
☀️ Step 2: Provide Bright Light for Strong Seedlings
Once the seedlings emerge, remove the plastic cover immediately to prevent mold. Move them to a sunny windowsill or under grow lights for 14-16 hours of light daily. Garlic flower seedlings grow quickly, so you’ll notice them stretching toward the light. If they start looking leggy—long stems with small leaves—your light source isn’t strong enough.
I place my seedlings under a full-spectrum LED grow light just 2-3 inches above them and raise it as they grow. Strong seedlings will have thick stems and deep green leaves. If they’re pale or weak, they need more light. This step ensures your plants will be robust enough to handle transplanting outdoors.
🪴 Step 3: Transplant Seedlings Outdoors After Frost
Wait until the soil is warm and all danger of frost has passed—usually 2-3 weeks after your last frost date. Choose a spot with full sun (at least 6-8 hours daily). Use the 4 individual pots (6-inch diameter) to give each seedling its own space. Fill each pot with 1 gallon of potting mix mixed with a handful of compost for nutrients.
Dig a hole in each pot slightly deeper than the seedling’s root ball and place it in carefully. Firm the soil around the base to secure it. Water deeply right after transplanting to help the roots settle. Space the pots 12 inches apart if planting in the ground, but since we’re using containers, this spacing ensures good airflow and prevents disease.
💧 Step 4: Water and Fertilize for Blooms and Greens
Water the seedlings deeply once a week, ensuring the top 2 inches of soil feel moist before watering again. Garlic flowers are drought-tolerant once established, but young plants need consistent moisture. I like to water in the morning so the foliage dries quickly, reducing the risk of fungal issues.
After 4-6 weeks, when the plants are about 6 inches tall, apply the ½ cup of balanced fertilizer (10-10-10) diluted in water. This encourages strong growth and prepares the plants for flowering. You’ll start seeing tender green shoots and, eventually, the delicate edible blooms that garlic flowers are known for. Harvest the greens anytime they reach 4-6 inches tall for a mild garlic flavor.
✂️ Step 5: Encourage Blooms and Harvest Edible Flowers
The real magic happens when the plants bolt—those long stems with purple or white flowers emerge. To encourage more blooms, pinch off any spent flowers as they fade. The flowers are edible and add a mild garlic flavor to salads, garnishes, or even infused oils.
Harvest the flowers in the morning when they’re fully open but still fresh. You can also harvest the greens by cutting them back to 2 inches above the soil—they’ll regrow and give you multiple harvests. If you let some plants flower fully, they’ll produce seeds for next season. Just let the seed pods dry on the plant before collecting them.
Tips & tricks for growing garlic flower seeds
Here's what I've learned the hard way about growing these delicate edible blooms—trust me, these little details make all the difference!
The Heat Factor: Maintaining that 70-75°F temperature during germination is critical, but don't overlook the importance of consistent warmth. I've found that placing the seed tray on top of my refrigerator (where it's naturally warm) works perfectly. If your home tends to be cooler, consider using a seedling heat mat—it's worth the investment for those tiny seeds that need every advantage to sprout.
Lighting Strategy: The 14-16 hours of daily light in Step 2 is non-negotiable for strong seedlings. If you're using grow lights, position them just 2-3 inches above the seedlings and adjust as they grow. I've noticed that seedlings under insufficient light develop long, weak stems that struggle to support themselves—this is your plant's way of reaching for more light. Rotate the tray daily so all sides get even exposure.
Transplanting Timing: Those 2-3 weeks after your last frost date give the soil time to warm up, but don't wait too long. I've seen garlic flower seedlings get leggy and weak if transplanted too late in the season. Check soil temperature with a thermometer—it should be at least 60°F before planting. Hardened-off seedlings (acclimated to outdoor conditions) will bounce back much better from transplant shock.
Fertilizer Wisdom: The ½ cup of balanced fertilizer (10-10-10) should be diluted to half-strength for your first application. Too much fertilizer too soon can burn tender young plants. I've found that applying it in the morning gives the roots time to absorb nutrients before evening watering. After the initial application, you can reduce to every 4-6 weeks during the growing season.
Pro Tips for Garlic Flower Seeds
- Here's what I've learned the hard way about growing these delicate edible blooms—trust me, these little details make all the difference!
- The Heat Factor: Maintaining that 70-75°F temperature during germination is critical, but don't overlook the importance of consistent warmth.
- Lighting Strategy: The 14-16 hours of daily light in Step 2 is non-negotiable for strong seedlings.
Frequently asked questions
Got questions about growing garlic flower seeds?
You’re not alone! Here are some of the most common queries—plus quick, actionable answers to help you cultivate Allium sativum with confidence.
How long does it take for garlic flower seeds to sprout?
Garlic flower seeds (or hardneck garlic cloves) typically sprout within 10–14 days after planting, provided soil temps are 40–50°F (4–10°C). If sprouting takes longer, check moisture levels—keep soil consistently damp (not soggy) and ensure seeds aren’t buried too deep (max 2 inches). Patience pays off!
When is the best time to harvest garlic flower seeds?
Harvest garlic flower seeds when the seed heads turn brown and papery (usually 6–8 weeks after flowering). Wait until the pods are fully dry but haven’t scattered seeds naturally. Snip the seed stalk, hang it upside-down in a dry, shaded spot for 2–3 weeks, then gently rub to release seeds. Pro tip: Store seeds in a cool, dark place for up to 2 years!
Can I grow garlic from store-bought garlic? Or do I need seeds?
Yes! Store-bought hardneck garlic bulbs (with papery skins) can be planted directly to grow new plants. Softneck garlic (common in grocery stores) rarely produces viable seeds—focus on hardneck varieties like ‘Music,’ ‘German Red,’ or ‘Silverskin.’ For seeds, buy from reputable suppliers (e.g., Baker Creek Heirloom Seeds) or save seeds from your own blooms.
What pests or diseases should I watch for with garlic flower seeds?
Garlic is generally low-maintenance, but keep an eye out for:
- Thrips (tiny insects that damage flowers/seeds)—use neem oil or row covers.
- Fungal diseases (like white rot)—improve drainage and avoid overhead watering.
- Rust (orange spots on leaves)—remove infected plants immediately.
Do garlic flowers attract pollinators? Can I eat them?
Garlic flowers are bee magnets (great for gardens!) and edible. Use them in:
- Salads (raw petals add a mild garlic-onion flavor).
- Infused oils/vinegars (steep in olive oil for 3–5 days).
- Garnishes (sprinkle on soups or roasted veggies).
Wrapping up and next steps
Growing garlic flower seeds is a rewarding journey that brings beauty, flavor, and even edible surprises to your garden! 🌱 Whether you're a seasoned gardener or a curious beginner, these fragrant blooms and tender greens add a unique touch to your harvest.
Now that you’re equipped with the right knowledge, it’s time to roll up your sleeves and start planting—your kitchen (and garden) will thank you!
Ready to take the next step? Start small with a few seeds, experiment with varieties, and enjoy the process. Happy gardening!