
Pruning
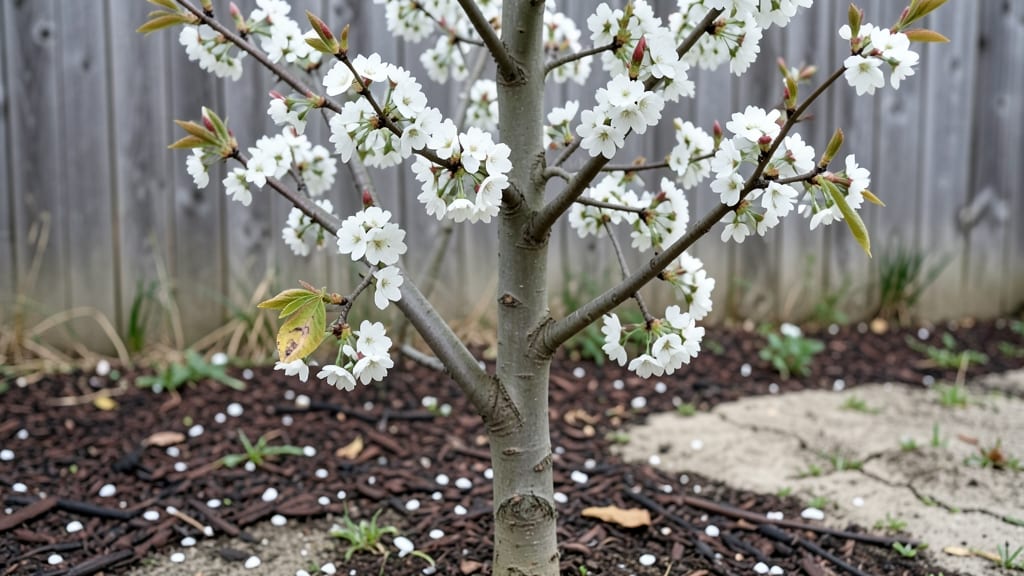
Cold-hardy flowering pear trees (Pyrus calleryana) thrive in Ontario's climate, offering stunning spring blooms and year-round interest. 🌸 I planted mine in zone 5b, and it's become the showstopper of my front yard—resistant to our harsh winters and late frosts.
The key is choosing the right variety and giving it proper care from the start, which I'll walk you through step by step.
Ontario's climate demands cold-tolerant varieties like 'Bradford' or 'Aristocrat,' which handle our winters with ease. You'll need well-draining soil and a spot with full sun, though they tolerate some shade. Planting in early spring or fall gives roots time to establish before extreme temperatures hit.
Once established, these trees need minimal care but reward you with fragrant white blooms in May and attractive exfoliating bark in winter.
Pruning in late winter or early spring keeps your tree healthy and encourages abundant flowering. Watch for fire blight, a common Ontario pest, and treat it promptly with copper sprays.
With the right care, your flowering pear will stay vibrant for decades—adding color and curb appeal to your property year after year. Let's get your tree thriving!
These trees adapt well to urban settings, making them perfect for city gardens or suburban landscapes. Just be mindful of their eventual size—some varieties grow up to 30 feet tall. With proper spacing and care, you'll enjoy their beauty without sacrificing your yard's functionality.
📚 In This Guide
- What you need
- Instructions
- Tips and common mistakes
- Wrapping up and next steps
What you need
- ● Flowering pear tree saplings: Choose Pyrus calleryana varieties like ‘Aristocrat,’ ‘Bradford,’ or ‘Chanticleer’—ensure they’re cold-hardy (Zones 4-8) and sourced from a reputable nursery.
- ● Shovel or digging spade: A 16–20-inch garden spade for planting (or a round-point shovel for tougher soil).
- ● Pruning tools: Bypass pruners (sharp, bypass-style for clean cuts)
- ● Loppers (18–24-inch for thicker branches)
- ● Pruning saw (for branches >2 inches)
- ● Gloves: Heavy-duty gardening gloves (nitrile-coated for grip and protection).
- ● Mulch: 3–4 inches of organic mulch (wood chips, shredded bark) to retain moisture and regulate soil temperature.
- ● Fertilizer: Balanced, slow-release fertilizer (e.g., 10-10-10) or compost for nutrient-rich soil.
- ● Watering can or hose: With a gentle spray nozzle for post-planting hydration.
- ● Soil amendment: Compost or peat moss to improve drainage in heavy clay soils (common in Ontario).
- ● Tree stakes & ties: For young trees in windy areas (use 3–4 stakes and soft fabric ties).
- ● Tree wound dressing: (e.g., pruning sealant) for large cuts—though many experts say it’s unnecessary for pears!
- ● Post-hole digger: If planting near a fence or sidewalk and need deeper holes.
- ● Safety gear: Safety glasses and earplugs for loud pruning tasks.
Step-by-Step guide to planting and caring for flowering pear trees in Ontario
Here’s how to grow these stunning, cold-resistant trees that bring vibrant blooms to Ontario’s harsh winters.
🌱 Step 1: Choose the Right Variety for Ontario’s Climate
Flowering pear trees thrive in Ontario’s zones 4-7, so pick varieties like Bradford, Chanticleer, or Aristocrat—all known for their hardiness and stunning spring blooms. Bradford, in particular, is a favorite because it handles Ontario’s winter winds and snow without losing its branches. Check the label to confirm the variety’s cold tolerance before buying.
I always look for 1-2 year old nursery-grown trees with a sturdy trunk and healthy root system. Avoid trees with broken branches or signs of disease—these will struggle to establish in your yard. The best time to plant is in early spring or early fall when the soil is workable but not frozen.
🪴 Step 2: Select the Planting Site and Prepare the Soil
Flowering pear trees need full sun (at least 6-8 hours daily) to produce their best blooms, so choose a spot with open sky exposure. Avoid low areas where cold air pools—this can damage the roots in winter. Test the soil by digging a 12-inch hole—if it’s heavy clay, mix in 2 inches of compost to improve drainage.
Loosen the soil around the planting area to encourage root growth. I like to spread 3-4 inches of mulch (like wood chips) around the base, keeping it 3 inches away from the trunk to prevent rot. This helps retain moisture and regulates soil temperature, which is especially helpful in Ontario’s fluctuating seasons.
☀️ Step 3: Plant the Tree Properly for Stability and Growth
Dig a hole twice as wide as the root ball but no deeper—this prevents the tree from sinking or sitting too high in the soil. Gently remove the tree from its container and place it in the hole, ensuring the top of the root ball is level with the ground. Fill the hole with soil, tamping it down lightly to remove air pockets.
Water deeply right after planting to settle the soil and eliminate air gaps. You’ll know it’s done right when the water drains evenly without pooling. Stake the tree only if necessary—young trees in windy Ontario yards may need support, but avoid tying the trunk too tightly. Mulch again after watering to lock in moisture.
💧 Step 4: Water and Fertilize for Strong Establishment
Water the tree once a week for the first 2 months, providing 10-15 gallons of water per session. After that, water every 2-3 weeks unless there’s a drought, checking that the soil is 2-3 inches dry before watering again. Overwatering can suffocate roots, so always let the topsoil dry slightly between waterings.
Apply a balanced, slow-release fertilizer (like 10-10-10) in early spring to encourage new growth. I avoid fertilizing in fall—it can stimulate tender shoots that won’t survive Ontario’s winters. Prune any dead or crossing branches in late winter or early spring before buds swell, using clean, sharp pruners to make cuts just above a bud.
⏰ Step 5: Protect and Maintain for Long-Term Beauty
In Ontario’s winters, young trees may need wrapping with tree guard to prevent rodent damage and frost cracks. I also apply a thin layer of anti-desiccant spray in late fall to protect the bark from winter winds. Once established, flowering pears handle cold well, but a little extra care in their first few years ensures they thrive.
Watch for signs of fire blight (blackened branches) or scale insects—common pests in Ontario. If you spot issues, prune infected branches 6 inches below the damage and sterilize your tools with rubbing alcohol. With proper care, your tree will reward you with showy spring blooms and a sturdy structure for decades.
Tips & tricks for perfect flowering pear trees in Ontario
Here's what I've learned from years of growing these stunning trees in Ontario's challenging climate.
Variety Selection: Bradford is my top recommendation for Ontario—it's the most cold-hardy and handles our harsh winters beautifully. If you're looking for something different, Chanticleer offers a more compact shape while still thriving in zones 4-7. Always check the label for cold tolerance ratings, especially if you're in northern Ontario where winters are more severe.
Soil Preparation: In Step 2, when preparing your 12-inch hole, I recommend adding a handful of bone meal to the bottom for extra phosphorus—this gives young trees a nutrient boost right when they need it most. For heavy clay soils common in southern Ontario, mixing in 2 inches of compost is essential, but don't overdo it. Too much organic matter can make the soil too loose and unstable for young roots.
Planting Stability: The key to successful planting in Step 3 is getting that root ball level with the ground. I use a level tool to double-check, and if needed, add a bit more soil to the bottom of the hole. For windy Ontario yards, consider using two stakes placed diagonally rather than one—this provides better support without restricting growth. Remember to loosen the ties every few months as the tree grows.
Winter Protection: When applying tree guard in Step 5, I've found that wrapping only the trunk and lower branches is most effective. Leave the top open to prevent moisture buildup that can lead to rot. For extra protection, I also add a layer of straw mulch around the base after the first hard frost—this creates an insulating barrier against cold winds.
Pro Tips for Flowering Pear Tree Ontario
- Here's what I've learned from years of growing these stunning trees in Ontario's challenging climate.
- Variety Selection: Bradford is my top recommendation for Ontario—it's the most cold-hardy and handles our harsh winters beautifully.
- Soil Preparation: In Step 2, when preparing your 12-inch hole, I recommend adding a handful of bone meal to the bottom for extra phosphorus—this gives young trees a nutrient boost right when they need it most.
Frequently asked questions
Got questions about growing flowering pear trees in Ontario? You’re not alone! Here are answers to the most common queries—from planting tips to troubleshooting—so you can enjoy vibrant blooms year-round.
What’s the best time to plant a flowering pear tree in Ontario?
Plant in early spring (April–May) or early fall (September–October) when soil is workable but not frozen. Avoid extreme heat or cold—roots need time to establish before winter. For container-grown trees, plant as soon as possible after purchase to minimize transplant shock.
Are flowering pear trees truly cold-hardy in Ontario’s winters?
Yes! Most varieties (like ‘Bradford’ or ‘Aristocrat’) tolerate Zone 5–6, common in southern Ontario. However, young trees may need winter mulch (3–4 inches of shredded bark) and wrapping for the first 2–3 years. Prune damaged branches in late winter to encourage new growth.
How do I keep my flowering pear tree healthy and blooming?
Focus on 3 key practices:
- Prune annually in late winter (before buds swell) to remove dead wood and thin dense branches for airflow.
- Water deeply during droughts (1–2 inches per week) but avoid soggy soil.
- Fertilize lightly in early spring with balanced 10-10-10 or a slow-release tree fertilizer.
Watch for fire blight (blackened branches)—prune infected areas 6 inches below the damage and sterilize tools with rubbing alcohol.
What’s a good alternative if my flowering pear tree isn’t thriving?
Try these Ontario-friendly alternatives for year-round interest:
- Serviceberry (Amelanchier) – White spring blooms + edible berries + fall color.
- Crabapple (Malus) – Disease-resistant, compact varieties like ‘Royalty’.
- Korean Spice Viburnum (Viburnum carlesii) – Fragrant winter blooms + red berries.
All handle Ontario’s climate well and offer similar seasonal appeal!
Why isn’t my flowering pear tree blooming?
Common culprits:
- Over-pruning—never remove more than 25% of the canopy in one year.
- Poor sunlight—needs full sun (6+ hours/day) for blooms.
- Young age—trees often take 3–5 years to bloom after planting.
- Nutrient deficiency—yellow leaves? Test soil and amend with iron or potassium if needed.
Give it patience and proper care—most rebound quickly!
Can I grow a flowering pear tree in a pot or small yard?
Yes, but choose dwarf varieties like ‘Capital’ (15–20 ft tall) or ‘Cleveland Select’ (20–25 ft). Use a large container (20+ gallons) with drainage holes, and repot every 2–3 years. Place in full sun and water consistently—container trees dry out faster!
Wrapping up and next steps
Growing a flowering pear tree in Ontario is a rewarding way to add vibrant color and seasonal interest to your landscape—even in cold climates! 🌸 With the right variety, proper pruning, and a little care, you’ll enjoy stunning blooms year-round.
Whether you’re a beginner or a seasoned gardener, these cold-hardy options and tips will help you cultivate a thriving tree that brings joy for decades.
Ready to get started? Pick your favorite variety, gather your tools, and give your flowering pear tree the love it deserves. Happy planting—your future spring blooms will thank you! 🌿✨