
Tools
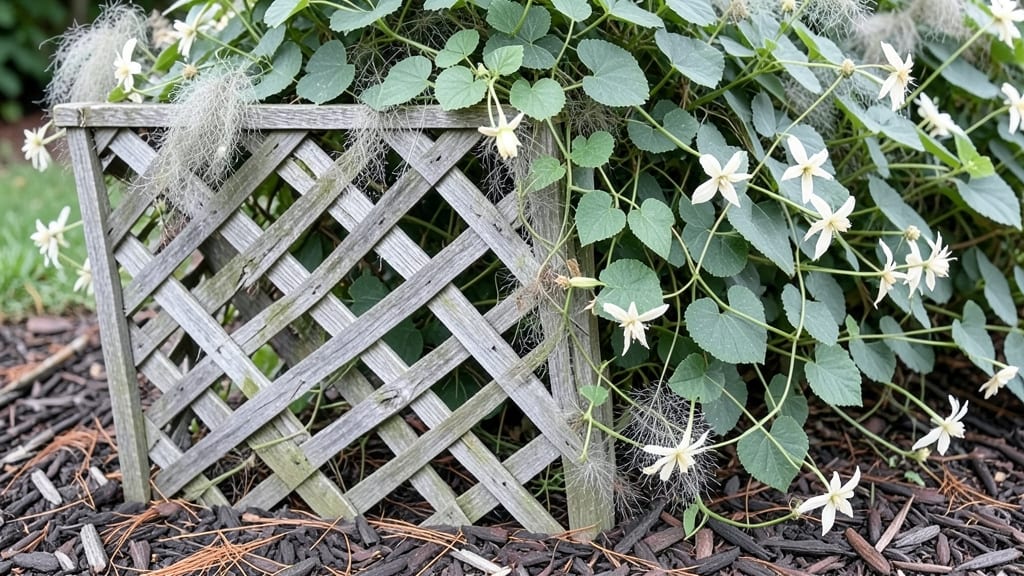
Creating a flower archway garden transforms any entrance into a fragrant, ever-changing tunnel of color. 🌿 I stumbled upon this idea after my neighbor’s arch bloomed nonstop from spring to fall, and I knew I had to replicate that magic.
The key isn’t just picking pretty flowers—it’s layering plants that climb, spill, and cascade in perfect harmony.
You’ll need a sturdy trellis or arched frame (metal, wood, or even salvaged materials) and a mix of fast-growing vines, mid-height shrubs, and trailing flowers. Think clematis for height, roses for romance, and sweet alyssum for delicate spills.
Most projects take a weekend to assemble, but the payoff is months of living color that greets you every time you walk through.
The result? A floral gateway that smells like a secret garden and changes with the seasons. In spring, you’ll have blooming wisteria; by summer, climbing roses will perfume the air; and in fall, ornamental kale adds texture.
It’s the kind of project that makes neighbors stop and stare—and that’s before you even add the fairy lights.
Works for any yard size, from cottage-style cottages to modern minimalist homes. The structure stays in place year-round, while the plants rotate for evergreen interest. Here’s how to bring the romance home without breaking the bank.
📚 In This Guide
- What you need
- Instructions
- Tips and common mistakes
- Wrapping up and next steps
What you need
- ● Floral Arch Frame: Wooden, metal, or PVC arch (4–6 ft wide, 6–8 ft tall). Choose untreated wood for a natural look or pre-painted metal for durability.
- ● Floral Wire or Twine: 100+ ft of 18–22-gauge floral wire or jute twine for securing flowers and vines.
- ● Floral Picks or Stems: 10–20 bunches of rambling roses (for classic romance).
- ● 15–25 stems of clematis or wisteria (for cascading drama).
- ● 30+ stems of dahlias, peonies, or hydrangeas (for bold color).
- ● 20+ stems of baby’s breath or larkspur (for delicate texture).
- ● Greenery Fillers: 10–15 stems of eucalyptus, ivy, or ferns to fill gaps and add volume.
- ● Pruning Shears (sharp, for trimming stems).
- ● Floral Tape or Wire (to secure stems without crushing).
- ● Watering Can or Spray Bottle (to keep flowers hydrated).
- ● Garden Gloves (for protection while handling thorns or vines).
- ○ Stakes or Trellis Wire (optional, for supporting heavier blooms).
- ● Post Hole Digger (if planting permanent vines like clematis).
Step-by-Step instructions for building a flower archway garden
Here's how to create a romantic, layered arch that blooms from spring through fall.
🪴 Step 1: Select and Prepare Your Arch Structure
Choose an arch frame made of metal, wood, or PVC pipes—anything sturdy enough to support climbing plants. I like the rustic look of wooden arches, but metal ones last longer in wet climates. Measure your arch's width and height to determine how much climbing material you'll need.
If your arch is new, assemble it according to the manufacturer's instructions. For existing structures, give them a good cleaning to remove dirt or old plant debris. Apply a fresh coat of paint or sealant if needed, especially for wooden arches. This ensures your structure lasts through multiple seasons of blooms and rain.
🌱 Step 2: Layer Soil and Plant Support Structures
Fill the base of the arch with a minimum of 6 inches of high-quality potting mix mixed with compost for nutrients. I like to add a layer of landscape fabric at the bottom to prevent weeds from creeping up through the soil. This keeps your arch looking tidy without constant weeding.
Install climbing trellis netting or twine supports along the arch's length, spacing them about 12 inches apart. For a more natural look, use bamboo stakes or wooden lattice panels instead. The key is to create a sturdy framework that plants can cling to as they grow. Water the soil thoroughly after planting to help roots establish.
☀️ Step 3: Plant Seasonal Climbing Flowers
Start with fast-growing annuals like morning glories or sweet peas for quick color. Plant them at the base of the arch, spacing them 6-12 inches apart depending on the variety. These will climb quickly and provide early-season blooms. For long-term romance, add perennial climbers like clematis or roses—plant them slightly deeper than their root balls to encourage strong growth.
Mix in trailing plants like nasturtiums or petunias at the arch's base to spill over the edges. These add texture and fill in gaps while the main climbers establish. Water deeply after planting, and mulch with 2-3 inches of shredded bark to retain moisture and suppress weeds. You’ll see new growth within 2-3 weeks if conditions are right.
💧 Step 4: Train and Maintain the Climbers
As vines emerge, gently weave them through the trellis or tie them to supports with soft twine. Avoid pulling or forcing growth—let the plants climb naturally to prevent damage. Prune leggy stems early to encourage bushier blooms. I like to trim back one-third of the oldest growth in late winter to promote fresh, vigorous new shoots.
Water the arch deeply 2-3 times per week during the first growing season, then taper to once a week once established. Watch for wilting leaves or yellowing foliage—these are signs of overwatering or underwatering. Feed with a balanced liquid fertilizer every 4-6 weeks during the growing season to keep blooms abundant. Deadhead spent flowers regularly to encourage continuous blooming.
✂️ Step 5: Seasonal Care for Year-Round Beauty
In early spring, prune back any dead or weak growth and add a fresh layer of mulch to protect roots. By mid-summer, you may need to stake taller climbers like roses to prevent them from sagging under the weight of blooms. In fall, cut back annuals but leave perennials until late winter—this helps them establish stronger root systems for next year.
Winterize your arch by wrapping tender perennials like clematis in burlap and adding a thick layer of mulch to insulate roots. If your arch is in a windy area, consider securing it with stakes to prevent shifting. With this care, your archway will burst into color year after year, creating a whimsical, romantic focal point in your garden.
Tips & tricks for perfect flower archway gardens
Between us, these little details make all the difference between a charming garden feature and a flop. Let me share what I've learned after years of trial and error with my own flower arches.
Soil Depth Matters: That 6-inch minimum of potting mix in Step 2 is non-negotiable for root health. I've seen arches fail because people used garden soil instead—it compacts too much. If your arch is wider than 3 feet, consider adding an extra 2 inches of soil at the center for better drainage. The compost layer should be about 25% of your total soil mix to prevent compaction while still providing nutrients.
Support System Secret: When installing trellis netting in Step 2, leave about 6 inches of slack between supports. This prevents the netting from becoming taut and breaking when vines grow heavy with blooms. For roses specifically, I like to add horizontal wires every 18 inches vertically to give them extra support. The 12-inch spacing works for most climbers, but taller varieties like wisteria need supports every 8-10 inches.
Plant Placement Pro Tip: In Step 3, place your fastest-growing annuals like morning glories on the outer edges of the arch. This creates that lush, cascading look immediately while slower climbers like clematis establish in the center. For roses, position them slightly off-center—this creates better air circulation and prevents fungal issues. The 6-12 inch spacing gives you flexibility, but don't exceed 12 inches for vines or they'll compete for sunlight.
Watering Wisdom: Those 2-3 waterings per week in Step 4 should be deep—about 1 inch of water each time. I use a soaker hose at the base of the arch to prevent wetting the foliage, which reduces disease risk. In hot climates, you might need daily watering during the first 2-3 weeks until roots establish. The wilting leaves warning is critical—it's often a sign of underwatering rather than overwatering with climbing plants.
Pro Tips for Flower Archway Garden
- Between us, these little details make all the difference between a charming garden feature and a flop.
- Soil Depth Matters: That 6-inch minimum of potting mix in Step 2 is non-negotiable for root health.
- Support System Secret: When installing trellis netting in Step 2, leave about 6 inches of slack between supports.
Frequently asked questions
Got questions about creating your dream flower archway garden? You’re not alone! Here are answers to the most common curiosities—from planning to upkeep—so you can dive in with confidence.
What’s the best time of year to plant a flower archway?
The ideal time depends on your climate, but spring (after the last frost) is the sweet spot for most regions. For perennials, plant in early spring or fall to give roots time to establish. Annuals? Wait until after the last frost date for your zone—check your local nursery for specifics!
How much does a flower archway cost to build?
Costs vary wildly! A DIY wooden arch with basic flowers might run $50–$150, while a custom metal frame with premium blooms could hit $300–$800+. Pro tip: Thrift materials (like reclaimed wood or secondhand trellises) and divide perennials to slash expenses. Plan for annual replanting too!
Can I use artificial flowers in an archway?
Artificial flowers are a low-maintenance, long-lasting alternative—perfect for high-traffic areas or if you love a year-round display. Opt for weather-resistant fabrics (like silk or polymer) and secure them tightly to avoid wind damage. Just swap them out every few years for a fresh look!
How do I keep pests away from my flower archway?
Pests love archways too! Prevent problems with these tricks:
- Neem oil spray (natural insect repellent).
- Interplant with pest-repelling herbs like lavender or basil.
- Remove wilted blooms daily to deter aphids.
- Install birdhouses nearby—birds eat bugs!
Will my archway survive heavy rain or wind?
With the right prep, yes! Secure everything tightly—use zip ties, heavy-duty staples, or screws for frames. For climbers, train vines along the arch early so they grow into the structure. If storms are common, choose flexible materials (like willow or bamboo) that bend instead of snap. Add weighted stakes for extra stability!
Wrapping up and next steps
A flower archway garden isn’t just a decorative touch—it’s a magical gateway that transforms your outdoor space into a year-round haven of romance and charm. 🌸 Whether you’re a seasoned gardener or a beginner with a green thumb, these whimsical layers bring joy, beauty, and a sense of wonder to any setting.
Ready to dive in?
Your next step? Sketch a design, gather your tools, and start building! Watch as your garden blooms into a dreamy escape—one petal at a time. Happy gardening! ✨