
Shrubs
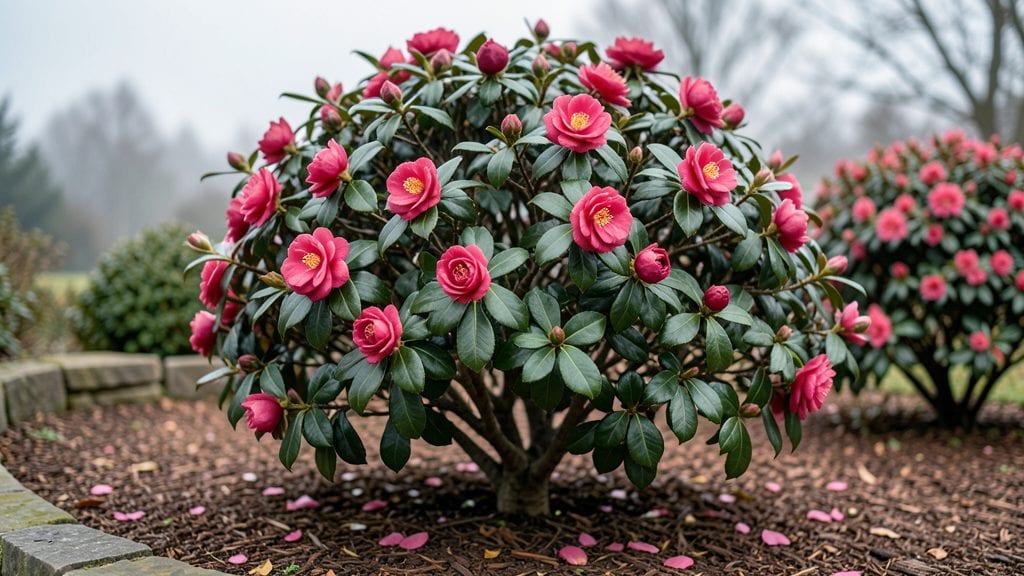
Fall flowering camellias defy the usual rules—these shrubs burst into rosy-pink or deep red blooms when most gardens are asleep. 🌿 I’ve pruned mine every autumn for years, and the difference between a sparse bush and a lush, flower-covered statement plant comes down to timing and technique.
The key? Pruning right after blooms fade, but before winter dormancy sets in.
You’ll need sharp pruners, a clear day (so you can see what you’re cutting), and about 30 minutes of focused work. The goal isn’t to shape the plant—it’s to encourage next year’s flowers by removing spent blooms and thinning crowded branches.
Skip this step, and you’ll end up with leggy growth and fewer flowers. But do it right, and you’ll have a camellia that looks like a winter holiday centerpiece.
What you’ll get is a shrub that stays compact yet full, with blooms arriving just as other plants fade. The flowers last longer in cooler weather, and the glossy evergreen leaves add texture year-round.
Plus, you’ll save time in spring because you’re not playing catch-up with overgrown branches. This is the secret to camellias that steal the show when everything else is dormant.
Works for zones 7-9, though some varieties handle cooler climates with extra winter protection. If you’ve ever struggled with camellias that either bloom poorly or grow too wild, this method changes everything. Let’s get those pruners out before the first frost!
📚 In This Guide
- What you need
- Instructions
- Tips and common mistakes
- Wrapping up and next steps
What you need
- ● Pruning shears: Bypass pruners (sharp, clean, and not dull—aim for 5-inch blades for precision). Pro tip: 💡 Sanitize with rubbing alcohol between cuts to prevent disease.
- ● Loppers: For thicker branches (8–10-inch blades)—great for stubborn growth.
- ● Gloves: Heavy-duty, gardening-grade (cut-resistant for safety).
- ● Disposable pruning bags: 1–2 gallon-sized (for collecting debris).
- ○ Pruning sealant: Optional but helpful for large cuts (>½ inch) to prevent sap loss.
- ● Ladder or step stool: If your camellia is over 6 feet tall (safety first!).
- ● Water & rag: For cleaning tools post-pruning.
- ● Ideal timing: Prune right after blooming (late fall/winter) or early spring—avoid pruning in summer heat.
- ● Weather check: Choose a dry, overcast day (humidity slows healing).
- ● Plant health: Only prune healthy branches—skip diseased or dead wood (cut those first!).
- ● Safety gear: Sunglasses (to shield from debris) and closed-toe shoes.
- ● Hand pruners: For tiny, detailed cuts (great for shaping).
- ● Pruning saw: If you encounter thick, woody branches (>1 inch).
- ● Plant food: Balanced fertilizer (10-10-10) to nourish post-pruning.
- ● Mulch: 2–3 inches of organic mulch (like pine bark) to protect roots.
Step-by-step pruning guide for fall-blooming camellias
Here's the method I've used for years to keep my camellias flowering beautifully through winter.
✂️ Step 1: Time Your Pruning for Post-Bloom
Prune your fall-blooming camellias immediately after the last flowers fade in late winter or early spring. This timing ensures you don't accidentally remove next year's flower buds, which form on old wood. I always wait until the blooms have completely dropped and new growth appears—usually around February or March depending on your climate zone.
Never prune in fall or winter when buds are still forming. The key is patience—rushing leads to missed blooms. If you prune too early, you risk cutting off next season's flowers before they've formed.
🌿 Step 2: Remove Dead, Diseased, or Crossing Branches
Start by examining each branch for dead wood, which appears brown and brittle. Cut these out completely at the branch collar where it meets the main stem. Next, look for branches that cross or rub against each other—these create wounds that invite disease. Remove the weaker of the two branches at its base.
Use clean, sharp pruners to make cuts at a 45-degree angle just outside the branch collar. Avoid leaving stubs, which can trap moisture and cause rot. I always sterilize my pruners with rubbing alcohol between cuts to prevent spreading any potential pathogens.
✂️ Step 3: Thin Out Overcrowded Growth
Camellias naturally grow dense, so aim to thin out about 20-30% of the total growth to improve air circulation. Focus on the interior of the plant first, removing branches that grow inward toward the center. This opens up the plant and reduces humidity, which helps prevent fungal issues.
Look for branches that are growing straight up—these often produce fewer flowers. Instead, encourage outward growth by selectively pruning upward-growing stems. You'll see the plant's natural shape emerge more clearly as you work.
⏰ Step 4: Shape the Plant for Next Season's Blooms
Now's the time to give your camellia its signature shape. Step back and visualize how you want it to look in a year. For a natural look, I lightly trim the outer edges to maintain a rounded form, but never cut more than 1/3 of any branch's length at once.
Pay special attention to the plant's strongest branches—these will carry the most flowers. Avoid heavy pruning on these stems. Instead, focus on lighter trims to encourage bushier growth. The goal is to create a balanced silhouette that supports next season's blooms.
💧 Step 5: Post-Pruning Care for Healthy Recovery
After pruning, give your camellia a thorough watering to help it recover. The roots need moisture to support new growth, especially if you've made significant cuts. I always water deeply at the base, avoiding the foliage to prevent fungal diseases.
Apply a balanced, slow-release fertilizer (like 10-10-10) around the root zone to encourage strong regrowth. Avoid heavy fertilizing right after pruning—it can stress the plant. Instead, wait until new growth appears, usually within 4-6 weeks.
Tips & tricks for perfect fall flowering camellia pruning
These game-changing tips will help you prune your camellias like a pro and keep those stunning winter blooms coming year after year.
Timing is Everything: That February-March window is critical because fall-blooming camellias set their flower buds on old wood during the previous fall and winter. If you prune too early, you risk cutting off next season's blooms before they've even formed. I've learned this the hard way—after pruning too soon, I ended up with a beautiful plant but no flowers the following winter. Trust me, patience pays off!
Tool Prep is Non-Negotiable: Before you even touch your camellia, sterilize your pruners with rubbing alcohol. This simple step prevents spreading any potential diseases between cuts. I keep a small bottle of alcohol in my gardening toolkit and wipe down my pruners after every 3-4 cuts. Sharp, clean tools make all the difference in how well your plant recovers.
Visualize the Plant's Future: When shaping your camellia in Step 4, step back frequently to visualize how it will look in 6-12 months. The goal is to create a balanced silhouette that supports next year's blooms. I like to imagine the plant as a tiered wedding cake—each layer should be slightly smaller than the one below. This natural shape not only looks beautiful but also improves air circulation, which is crucial for preventing fungal diseases.
Post-Pruning Care Makes All the Difference: That deep watering after pruning is essential, especially if you've made significant cuts. I've seen plants struggle when they don't get enough moisture during this recovery phase. Water deeply at the base (not the foliage) and wait until new growth appears—usually within 4-6 weeks—before applying fertilizer. This gradual approach helps prevent stress on the plant.
Pro Tips for Fall Flowering Camellia
- These game-changing tips will help you prune your camellias like a pro and keep those stunning winter blooms coming year after year.
- Timing is Everything: That February-March window is critical because fall-blooming camellias set their flower buds on old wood during the previous fall and winter.
- Tool Prep is Non-Negotiable: Before you even touch your camellia, sterilize your pruners with rubbing alcohol.
Frequently asked questions
Got questions about fall-blooming camellias?
You’re not alone! Here are some of the most common queries—plus quick, actionable answers to keep your shrubs thriving and stunning.
When is the best time to prune fall flowering camellias?
Prune after blooming (typically late winter to early spring) to avoid cutting off next year’s flower buds. Never prune in fall—this is when they’re setting buds for winter blooms! Light shaping can happen in late spring, but avoid heavy cuts.
Can I prune too much? What’s the rule of thumb?
Yes! Never remove more than 1/3 of the plant’s foliage in one season. Fall bloomers rely on old wood for flowers, so focus on selective pruning—remove only dead, crossing, or overcrowded branches. Think “less is more” for these beauties!
Do fall camellias need special care after pruning?
After pruning, water deeply and apply a balanced fertilizer (like 10-10-10) in early spring. Mulch around the base to retain moisture and protect roots from winter chill. Avoid heavy nitrogen—it encourages leafy growth over flowers.
What if my camellia isn’t blooming? Is it too late to fix it?
Not necessarily! Poor blooming often stems from over-pruning, nutrient deficiencies, or improper light (they love partial shade). Check for buds in late summer—if none appear, adjust care now. Light pruning in spring can encourage new growth for future blooms!
Are there alternatives to pruning for shaping my camellia?
Yes! If you’re hesitant about pruning, try pinching back new growth in spring (use clean, sharp shears) or topiary training for a structured look. For a more natural shape, focus on removing only the worst offenders—like leggy or misplaced branches—while preserving the plant’s organic form.
Wrapping up and next steps
Fall-flowering camellias are a showstopper in winter gardens, and with the right pruning techniques, you can ensure their boldest blooms yet! 🌸 By following this blueprint—timing cuts to early spring, shaping with precision, and prioritizing airflow—you’ll nurture healthier plants and stunning displays.
Remember, patience and consistency are key, so don’t rush the process.
Ready to transform your garden? Grab your tools, mark your calendar for early spring pruning, and watch your camellias thrive. Your winter masterpiece starts now! 🌿✨