
Flowers
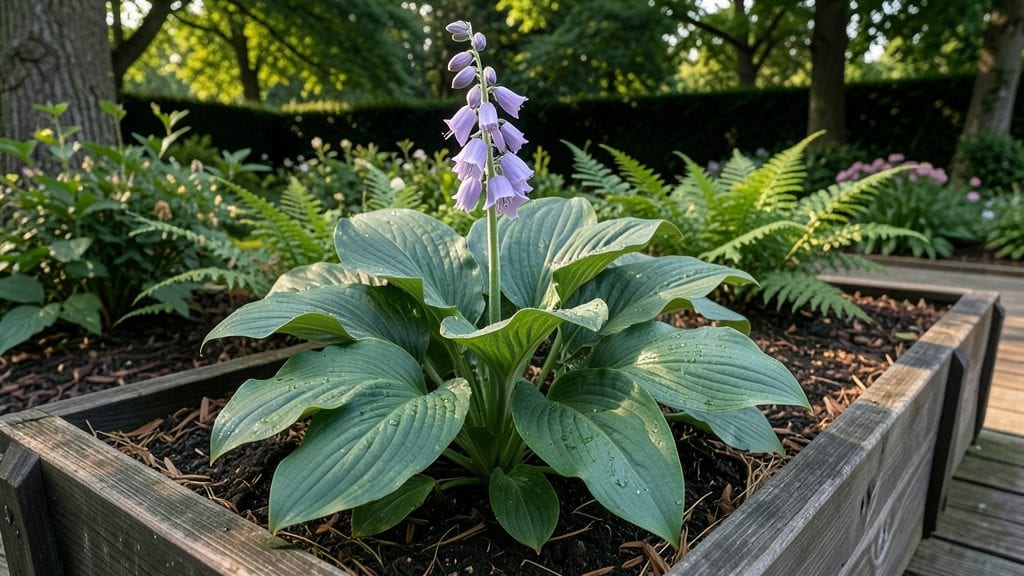
Cutting hosta flowers is the secret to thicker foliage and plants that look like they’re on steroids. 🌱 I used to let those spiky blooms stay all summer—until I noticed my hostas’ leaves growing thinner and more spaced out.
Turns out, hostas put all their energy into flowers, leaving nothing for the lush leaves we actually plant them for.
The best time to cut them is right after they finish blooming, usually in late June or early July, before the seed pods form. You’ll need sharp pruners (dull scissors tear the stems) and 5 minutes—that’s all it takes.
Just snip the flower stalks at the base, and watch your hostas reward you with bold, velvety leaves by midsummer.
Here’s the magic: removing the flowers redirects energy back into the roots and leaves, making your plants sturdier, darker, and more disease-resistant. My hostas now spread aggressively in the fall, and the leaves stay thick even through droughts. It’s the one pruning task that pays off in spades.
Fair warning: if you love the look of hosta flowers, skip this step—but if you’re growing them for foliage, this is the foolproof way to get the garden showstopper you planted for.
The rest of the guide covers exactly how to do it without damaging the plant, plus what to do if you miss the window.
📚 In This Guide
- What you need
- Instructions
- Tips and common mistakes
- Wrapping up and next steps
What you need
- ● Sharp pruning shears or bypass pruners – Choose clean, sterilized tools with sharp blades (4-6 inch length) to make precise cuts and avoid damaging foliage.
- ○ Gloves (optional but recommended) – Wear gardening gloves to protect your hands from rough edges or sap.
- ● Disinfectant (70% isopropyl alcohol or bleach solution) – 1 part bleach to 9 parts water to sterilize tools before and after use.
- ● Trash bag or compost bin – For safe disposal of spent flower stalks.
- ● Hand pruners (for smaller stalks) – Great for tight spaces where larger shears won’t fit.
- ● Pruning saw (for thick, woody stalks) – Only needed if your hosta has overly robust growth.
- ● Plant food or compost – To revitalize your hosta after pruning.
- ● Notebook or camera – To track progress or document your hosta’s growth cycle.
Step-by-step instructions for pruning hosta flowers
Here’s how to keep your hostas lush and vibrant by removing spent blooms the right way.
✂️ Step 1: Identify the Right Time to Prune
Wait until after the flowers have fully faded and turned brown—this usually happens in late summer to early fall. Cutting too early can stunt future blooms, while waiting too long risks seed formation, which weakens the plant. I always prune mine by mid-September in my zone 6 garden, just as the foliage starts to show signs of aging.
Look for flowers that have lost their color and feel dry to the touch. These are ready for removal. Avoid pruning when the blooms are still green or when rain is forecasted, as wet foliage can invite fungal issues.
✂️ Step 2: Gather Your Tools and Sanitize
Use sharp, clean pruning shears—I prefer bypass pruners for their precision. Before cutting, wipe the blades with rubbing alcohol to prevent spreading disease between plants. Dull or dirty tools can tear stems and introduce pathogens, so this step is non-negotiable.
Keep a small bucket nearby to collect the spent blooms. This makes cleanup easier and keeps your workspace tidy. If you’re working in a shady area, wear gloves to protect your hands from the rough foliage.
✂️ Step 3: Cut at the Right Angle and Spot
Locate the leaf node just below the flower stem—this is where new growth emerges. Make a clean cut at a 45-degree angle, about ¼ inch above the node. This angle helps water run off the cut and prevents rot. Avoid cutting into the main foliage; focus only on the flower stalk.
If the flower stem is thick, trim it in stages to avoid stressing the plant. For smaller blooms, a single snip is all you need. The goal is to remove the dead flower while leaving the foliage intact and healthy.
🌿 Step 4: Clean Up and Monitor for Regrowth
After pruning, collect all the cuttings and dispose of them in the trash—not the compost—since they may carry fungal spores. Rinse your pruners again with alcohol to keep them sterile for future use. Within 2-3 weeks, you should see fresh foliage emerging from the nodes where you cut.
If your hostas don’t rebound as expected, check for pests like slugs or signs of disease like yellowing leaves. Healthy hostas should look fuller and more vibrant after pruning, with new growth filling in any gaps left by the spent blooms.
⏰ Step 5: Schedule Maintenance for Next Season
Mark your calendar for early spring to divide any overcrowded hostas and fertilize lightly to encourage strong new blooms. Pruning flowers now ensures your plants focus energy on foliage and root growth rather than seed production, keeping them lush all season.
I like to add a thin layer of mulch around the base after pruning to retain moisture and suppress weeds. This simple step makes next year’s pruning even easier and keeps your hostas thriving.
Tips & tricks for perfect hosta pruning
Here's what nobody tells you about keeping your hostas thriving after the flowers fade.
Timing is Everything: The late summer to early fall window is critical—this is when hostas naturally shift energy from blooms to foliage. I've learned the hard way that pruning too early (when flowers are still green) can shock the plant, while waiting too late lets seeds form that drain nutrients. In my zone 6 garden, I always aim for mid-September when blooms turn completely brown and crispy. If you're in a warmer zone, adjust to late August to avoid seed formation.
Tool Prep Prevents Problems: I can't stress enough how important it is to sanitize your pruning shears before and after use. That rubbing alcohol wipe isn't just for show—it prevents spreading fungal diseases between plants. I keep a small bottle in my gardening tool caddy and wipe blades after every 3-4 cuts. For tougher stems, I find that soaking the shears in a 1:10 bleach-water solution for 5 minutes before the session gives me extra peace of mind.
The 45-Degree Angle Secret: That 45-degree angle cut in Step 3 isn't arbitrary—it's about water management. The angled cut creates a natural channel for water to run off the stem rather than pooling at the cut site, which prevents rot. I practice this angle on scrap wood first if I'm new to pruning, and I always make sure to leave that ¼ inch above the leaf node. This tiny detail makes all the difference in how quickly your hostas bounce back with fresh growth.
Post-Pruning Care Wins: After pruning, I always do a final inspection for any remaining dead foliage or brown edges on the leaves. These can harbor pests or diseases, so I trim them off too. The 2-3 week regrowth window mentioned in Step 4 is your reward for doing the job right—you'll notice new shoots emerging from those leaf nodes we carefully preserved. This is when I also check for slugs or snails that might be attracted to the fresh growth, and I make sure to apply organic slug bait if needed.
Pro Tips for Cutting Hosta Flowers
- Here's what nobody tells you about keeping your hostas thriving after the flowers fade.
- Timing is Everything: The late summer to early fall window is critical—this is when hostas naturally shift energy from blooms to foliage.
- Tool Prep Prevents Problems: I can't stress enough how important it is to sanitize your pruning shears before and after use.
Frequently asked questions
Got questions about cutting hosta flowers?
Here are some of the most common ones—plus quick, practical answers to keep your plants thriving!
Why should I cut hosta flowers at all?
Cutting hosta flowers—especially if they’re spent or leggy—redirects the plant’s energy toward foliage growth. This means bigger, healthier leaves (the real showstopper of hostas!) and fewer weak stems. Think of it as giving your plant a productivity boost for the season!
When is the best time to cut hosta flowers?
Timing matters! Trim flowers after they’ve bloomed (late summer/early fall) to avoid shocking the plant. If you’re dealing with pests or disease, cut them immediately. Never prune in spring—your hosta needs all its energy to wake up and grow!
How do I cut hosta flowers without hurting the plant?
Use clean, sharp pruners and cut just above a leaf node (where new growth can sprout). Avoid leaving stubs—this prevents rot. For large clumps, deadhead (remove faded blooms) first, then trim any leggy stems back to the base if needed.
Will cutting hosta flowers affect next year’s blooms?
Not necessarily! While hostas can rebloom, many gardeners prioritize foliage over flowers. If you love the blooms, leave a few stems or cut them back lightly (only after flowering). Over-pruning won’t kill your hosta—it’ll just focus on what you want: bold, lush leaves!
What if my hosta flowers turn brown or mushy after cutting?
Brown/mushy stems? That’s a sign of rot or disease. Act fast: sterilize your pruners with rubbing alcohol, cut the damaged parts below the affected area, and toss the clippings. Improve airflow around the plant to prevent future issues!
Wrapping up and next steps
Cutting hosta flowers is a simple yet powerful way to boost your plant’s health and encourage lush, vibrant foliage. Whether you’re a seasoned gardener or a beginner, taking the time to prune those spent blooms ensures your hostas thrive for years to come. 🌿
Ready to give your hostas the care they deserve? Grab your pruners, step outside, and start pruning today! Your plants—and your garden—will thank you. For even more gardening tips, explore our pruning guides or join a local plant-loving community to share your progress.