
Pruning
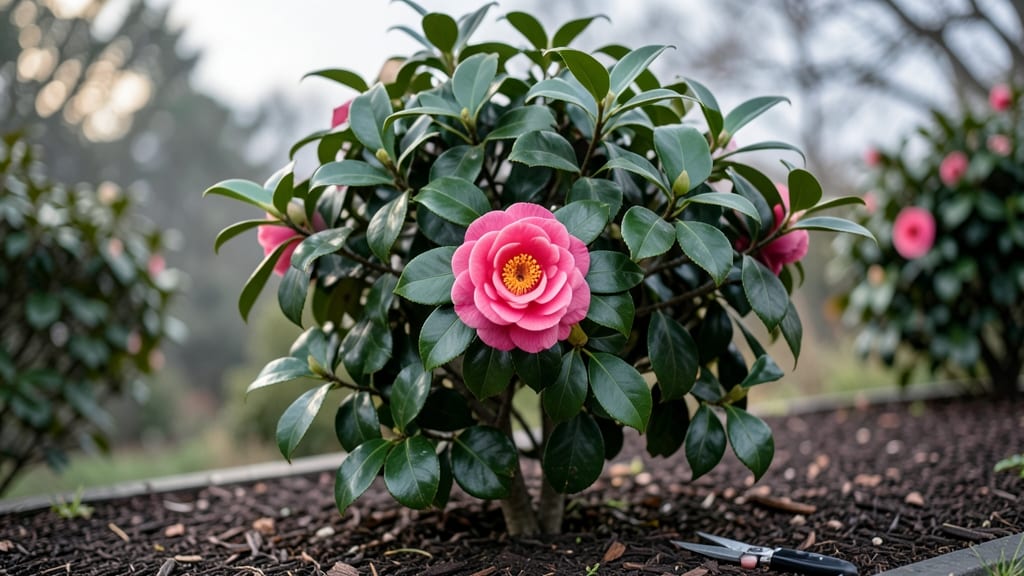
Pruning your camellia flower tree isn't just about shaping—it's about unlocking next year's blooms while keeping your plant healthy. ✨ I've learned the hard way that cutting at the wrong time can mean fewer flowers and stressed branches, but the right approach transforms your camellia into a lush, flowering powerhouse.
The secret lies in timing: prune right after blooming in late spring or early summer, and avoid heavy cuts in fall or winter. You'll need sharp pruners, a ladder for taller varieties, and a clear plan for removing dead wood while encouraging new growth.
Most people overlook the importance of sterilizing tools between cuts—this prevents disease spread.
With proper pruning, your camellia will reward you with thicker foliage, stronger branches, and even more abundant blooms next season. The key is patience—don't rush to shape it too aggressively, and always cut just above a bud or leaf node. You'll notice new growth within weeks.
This method works for both old and new camellias, from dwarf varieties to towering standards. The same principles apply whether you're trimming a single branch or giving your entire plant a makeover. Let's get those shears ready!
📚 In This Guide
- What you need
- Instructions
- Tips and common mistakes
- Wrapping up and next steps
What you need
- ● Pruning shears: Bypass pruners (sharp, 5–8 inch blades) for clean cuts on small branches.
- ● Loppers: 1 pair (8–12 inch) for thicker branches (up to 2 inches in diameter).
- ● Pruning saw: 1 lightweight handsaw for branches thicker than 2 inches.
- ● Disinfectant: 70% isopropyl alcohol or a commercial pruning sealant (to prevent disease spread).
- ● Garden gloves: 1 pair (cut-resistant, preferably).
- ● Ladder or step stool: Sturdy and tall enough to reach the tree’s canopy safely.
- ● Trash bags or bucket: For collecting pruned branches and debris.
- ● Rag or paper towels: For wiping tools between cuts.
- ● Hand pruners: For delicate trimming of small, new growth.
- ● Pruning paint/sealant: To cover large cuts (over ½ inch) and protect the tree.
- ● Extension pole: For high branches (if you prefer not to climb).
- ● Notebook & pen: To sketch a pruning plan or mark areas for future attention.
- ● Safety glasses: To shield eyes from debris.
Step-by-Step instructions for pruning a camellia flower tree
Keep your camellia blooming beautifully by following these simple, seasonal pruning steps.
✂️ Step 1: Prune Immediately After Flowering in Late Spring
Use clean, sharp pruning shears to remove any spent blooms and dead branches right after the flowers fade in late spring. This encourages new growth and keeps your tree looking tidy. Focus on branches that are brown, broken, or crossing—these won’t produce flowers and can crowd healthy growth.
Make cuts just above a leaf node or bud, angled slightly downward to prevent water from pooling. Avoid cutting into old wood, as camellias bloom on last year’s growth. If a branch is too thick to cut by hand, use a pruning saw—but only if necessary. You’ll know you’re on the right track when you see fresh, green growth emerging within a few weeks.
✂️ Step 2: Lightly Shape in Early Summer
In early summer, give your camellia a gentle shape-up to maintain its form. Remove any branches growing inward or rubbing against others, as these can cause damage over time. Thin out crowded areas to improve airflow, which reduces the risk of fungal diseases.
Never remove more than one-third of the tree’s foliage at once—camellias are sensitive to heavy pruning. If you’re unsure, err on the side of caution and trim less. You’ll notice healthier, fuller growth if you keep the cuts minimal and strategic.
✂️ Step 3: Prune for Airflow and Light in Late Summer
As summer progresses, focus on opening up the canopy to let sunlight reach the inner branches. Camellias need morning sun and afternoon shade, so avoid heavy pruning that exposes too much foliage to harsh afternoon rays. Remove any suckers or water sprouts that appear at the base or along the trunk.
Use your fingers to gently pull out small, weak shoots rather than cutting them—this prevents disease from entering the wound. If you must cut, sterilize your tools with rubbing alcohol first. You’ll see a difference in next year’s blooms if the tree gets better airflow and light penetration.
⏰ Step 4: Minimal Winter Pruning for Health
In late winter or early spring, before new growth begins, do a final light pruning to remove any dead, diseased, or damaged wood. Avoid heavy cuts now—camellias set their flower buds in late summer, and pruning too late can reduce next year’s blooms.
If you notice any branches with signs of pests or disease, prune them out immediately and dispose of them in the trash—not the compost. A quick inspection now ensures your tree stays healthy for another season of stunning flowers.
🌿 Step 5: Year-Round Maintenance Checks
Between pruning seasons, keep an eye on your camellia for any signs of stress. Remove any crossing branches or those growing at odd angles, as these can weaken the tree over time. A little attention now prevents bigger problems later.
Water deeply after pruning to help the tree recover, and mulch around the base to retain moisture. You’ll know your efforts are paying off when your camellia bursts into bloom year after year with vibrant, healthy flowers.
Tips & tricks for perfect camellia flower tree pruning
Camellias reward careful pruning with stunning blooms year after year—here's how to avoid common mistakes and maximize your tree's health.
Timing is Everything: Late spring is your prime window for Step 1 pruning because that's when camellias finish blooming and begin setting next year's buds. I've learned the hard way that pruning too early (before flowers fade) removes potential blooms, while waiting too long can stress the tree. Look for fully faded blooms that have turned brown—this is your cue to start. The goal is to remove only what's necessary without disturbing the flower buds forming for next season.
Tool Prep Prevents Problems: Sterilizing your pruning shears with rubbing alcohol between cuts (especially in Step 3) is non-negotiable. I once lost a camellia to fungal infection because I skipped this step when dealing with a branch showing signs of disease. For thicker branches, use a pruning saw—but only when absolutely necessary. The cleaner and sharper your cuts, the faster the tree recovers and the less stress it experiences. Always make cuts just above a leaf node or bud, angled slightly downward to prevent water from pooling.
The One-Third Rule: Never remove more than one-third of your camellia's foliage in any single session, particularly during the shaping in Step 2. This sensitive plant sets its flower buds on last year's growth, so aggressive pruning can actually reduce next year's blooms. Think of it like giving your tree a haircut—you want to shape it, not shave it. If you're unsure, it's always better to trim less and do a follow-up session later in the season.
Seasonal Strategy: Each pruning step serves a purpose tied to the season. In late summer (Step 3), focus on improving airflow by removing suckers and water sprouts—these compete with your main branches for nutrients. In winter (Step 4), limit yourself to just removing dead or diseased wood. This seasonal approach ensures your camellia stays healthy without disrupting its natural bloom cycle. The key is patience—camellias respond best to gradual, thoughtful pruning rather than dramatic changes.
Pro Tips for Camellia Flower Tree
- Camellias reward careful pruning with stunning blooms year after year—here's how to avoid common mistakes and maximize your tree's health.
- Timing is Everything: Late spring is your prime window for Step 1 pruning because that's when camellias finish blooming and begin setting next year's buds.
- Tool Prep Prevents Problems: Sterilizing your pruning shears with rubbing alcohol between cuts (especially in Step 3) is non-negotiable.
Frequently asked questions
about pruning your camellia flower tree—because even experts need a little clarity!When is the best time to prune a camellia tree?
The ideal window is right after blooming (late spring to early summer) and again lightly in late winter (before buds swell). Avoid heavy pruning in fall—this can damage tender new growth. Pro tip: If you missed spring, a light trim in summer is better than nothing!
Can I prune camellias in winter?
Yes, but only lightly! Winter pruning (Dec–Feb) should focus on removing dead or crossing branches. Heavy cuts now can stress the tree and reduce next year’s blooms. Save major shaping for post-bloom season. Warning: Avoid pruning during hard freezes (below 20°F).
Will pruning my camellia kill its flowers?
Not if done correctly! Pruning after blooming encourages stronger growth for next season’s flowers. However, over-pruning (cutting >1/3 of the tree) may reduce blooms temporarily. Balance is key—aim for selective trimming to maintain shape and health.
What should I do if my camellia leaves turn brown after pruning?
Brown leaves often signal stress from over-pruning or fungal issues. Check for:
Too many cuts? Reduce future trims to 10–20% of branches.
Fungal spots? Prune infected leaves immediately and apply copper fungicide.
Drought stress? Water deeply 2–3x/week post-pruning.
Good news: Healthy roots will regrow foliage in 4–6 weeks!Are there alternatives to pruning for shaping my camellia?
If you’re hesitant about pruning, try these low-maintenance options:
- Support structures: Use tree ties or lightweight stakes to guide growth.
- Selective planting: Place camellias where they naturally thrive (partial shade) to minimize shaping needs.
- Fertilizer tweaks: A balanced 10-10-10 fertilizer in spring can encourage denser growth.
Wrapping up and next steps
Pruning your camellia flower tree isn’t just about keeping it tidy—it’s the key to unlocking its full potential! 🌿 By following seasonal strategies, using the right tools, and mastering techniques like thinning and shaping, you’ll encourage vibrant blooms and a stronger structure year after year.
Whether you’re a newbie or a seasoned gardener, every trim brings you closer to a thriving, show-stopping tree.
Ready to level up your green thumb? Grab your pruners and start with one branch at a time—your camellia will thank you with bold blooms and lush foliage! For extra confidence, bookmark this guide or jot down your notes before your next pruning session. Happy trimming! ✂️