
Flowers
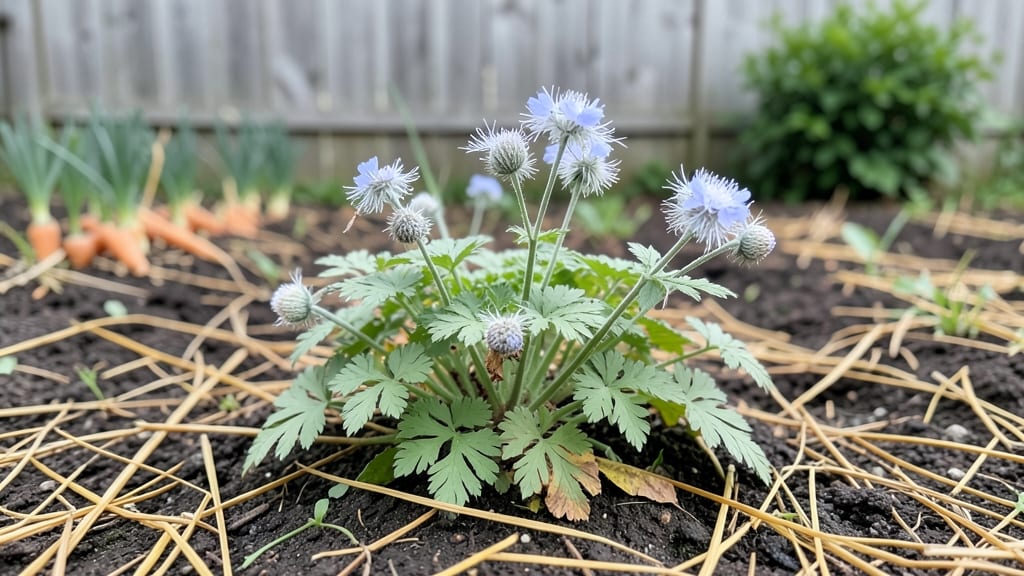
Blue nigella flowers transform any garden into a pollinator paradise with their delicate lace-like blooms and edible petals. 🌿 I first grew them after seeing how bees and butterflies flocked to my neighbor's border—turns out, their love for nigella is well-earned.
These self-seeding annuals thrive with minimal fuss, making them perfect for beginners who want instant impact without the upkeep.
The secret to their success lies in well-draining soil and full sun—think sandy loam mixed with compost, planted just ¼ inch deep in spring after the last frost.
Space seeds 12-18 inches apart to give their fern-like foliage room to spread, and water lightly only when the top inch of soil feels dry. Overwatering is their only real enemy, so let the soil dry between waterings to prevent rot.
By midsummer, you'll be snipping stems for bouquets or watching pollinators work their magic. The petals add a mild cucumber flavor to salads, though the real show is their ornamental value—try 'Miss Jekyll' for deep blues or 'Arabian Nights' for velvety black centers.
They reseed prolifically, often returning year after year with less effort than perennials.
For extra magic, pair them with lavender and catmint to create a pollinator superhighway. If aphids appear, blast them off with water—these flowers rarely need intervention. The payoff? A garden that looks effortlessly charming while feeding your local ecosystem. Ready to grow yours?
📚 In This Guide
- What you need
- Instructions
- Tips and common mistakes
- Wrapping up and next steps
What you need
- ● Blue nigella seeds: 1 packet (50–100 seeds) – Choose Nigella damascena for classic blue blooms.
- ● Well-draining potting mix: 5–10 gallons – Opt for a blend with perlite or sand (e.g., 60% garden soil + 40% compost).
- ● Containers or garden bed: For containers: 6–12-inch pots (1–2 plants per pot) with drainage holes.
- ● For in-ground: Full sun spot (6+ hours/day) with loose, rocky soil.
- ● Watering can or hose: With a gentle spray nozzle for seedlings.
- ○ Fertilizer (optional but helpful): Balanced 10-10-10 or low-nitrogen organic fertilizer (e.g., fish emulsion).
- ● Gloves: To protect hands from prickly seed pods.
- ● Pruning shears: For deadheading spent blooms (encourages reblooming!).
- ● Mulch (straw or shredded leaves): 1–2 inches to retain moisture.
- ○ Pollinator-friendly companion plants (optional): Marigolds, lavender, or cosmos to attract bees and butterflies.
- ● Seed-starting tray (if sowing indoors): With clear domes or plastic wrap for humidity.
Step-by-step instructions for growing blue nigella flowers
Here's how to coax those delicate blue blooms from seed to full pollinator-friendly glory.
🌱 Step 1: Start Seeds Indoors for Early Blooms
Sow nigella seeds 6-8 weeks before your last frost date in 2-3 inch deep pots filled with seed-starting mix. These seeds germinate best in cool conditions—65-75°F is ideal. I like to press them just below the soil surface (¼ inch deep) since they need light to germinate properly.
Keep the soil consistently moist but never soggy—damping-off will kill tender seedlings. Place the pots in a bright spot with indirect light or under a grow light. You'll see those first tiny sprouts in 10-14 days, but don't rush to move them—they're sensitive to temperature swings.
☀️ Step 2: Harden Off and Transplant After Frost
Once seedlings have 2-3 sets of true leaves and your last frost date has passed, it's time to move them outside. Start by placing them in a sheltered spot for 2-3 hours daily, gradually increasing exposure over 7-10 days. Nigella thrives in full sun, so don't skimp on light—pale, leggy plants mean they're stretching for more.
Transplant to the garden when nighttime temperatures stay above 50°F. Space plants 12-18 inches apart—they'll self-seed generously, so you won't need to replant next year. The key is patience: nigella grows slowly at first but rewards you with 3-4 inch tall blooms by mid-summer.
💧 Step 3: Water and Maintain for Long-Lasting Blooms
Nigella is remarkably drought-tolerant once established, but keep soil evenly moist during the first 4-6 weeks after transplanting. Water at the base of plants in the morning to prevent fungal issues—wet foliage invites problems. You'll know you're doing it right when the soil feels dry 1-2 inches down between waterings.
Deadhead spent blooms to encourage more flowers, but leave some seed heads for pollinators and self-seeding. The papery blue petals will fade to white as they age, but they remain attractive to bees and butterflies. Fertilize lightly once a month with a balanced organic fertilizer—too much nitrogen produces leafy growth at the expense of flowers.
✂️ Step 4: Harvest Petals and Prepare for Next Year
Pick individual petals when fully open for culinary use—they add a subtle cucumber flavor to salads and garnishes. Harvest in the morning after dew has dried to preserve flavor and texture. You'll get the most petals from plants in full sun locations, so choose your spots wisely.
After blooms fade, let some seed pods mature on the plant—they'll self-seed prolifically. Collect dry pods in fall, crush them, and store in a cool, dry place for next year's crop. Nigella's self-seeding habit means you'll have volunteers popping up everywhere, but they're easy to thin or transplant to new spots.
Tips & tricks for perfect blue nigella flowers
A few simple strategies will help you coax those stunning blue blooms from seed to flourishing pollinator magnets.
Timing Secret: The 6-8 weeks before your last frost date is critical for starting seeds indoors. I always check my local frost dates and mark the calendar—this ensures seedlings have enough time to mature before summer heat arrives. If you're in a warmer climate, you might be able to sow directly outdoors in early spring when soil temperatures reach 50°F consistently.
Seed Placement Technique: Pressing nigella seeds just ¼ inch deep is key—they need light to germinate but shouldn't be exposed. I use a pencil to make small indentations in the soil, then place seeds gently into them. This prevents them from being buried too deep while still protecting them from drying out. The seeds are delicate, so handle them carefully to avoid crushing.
Harden Off Gradually: The 2-3 hour daily increments during hardening off (Step 2) are essential for preventing shock. I start with just 1 hour on the first day, then add 30 minutes each subsequent day. Watch for any wilting—if you see this, bring plants back indoors immediately. Nigella's slow growth means it's particularly sensitive to temperature swings during this transition period.
Watering Wisdom: During the first 4-6 weeks after transplanting, check soil moisture by sticking your finger 1-2 inches down—this is the perfect depth to gauge. I water deeply but infrequently, aiming for the base of the plant rather than overhead. This method prevents fungal issues while encouraging strong root development. The blue petals will thank you with their vibrant color when you get this right!
Pro Tips for Blue Nigella Flower
- A few simple strategies will help you coax those stunning blue blooms from seed to flourishing pollinator magnets.
- Timing Secret: The 6-8 weeks before your last frost date is critical for starting seeds indoors.
- Seed Placement Technique: Pressing nigella seeds just ¼ inch deep is key—they need light to germinate but shouldn't be exposed.
Frequently asked questions
Got questions about growing and using blue nigella flowers? You’re not alone! Here are some of the most common queries—plus straightforward answers to help you cultivate these stunning, edible blooms with confidence.
Can blue nigella flowers grow in containers or just in garden beds?
Blue nigella thrives in both! While they love garden beds with room to sprawl, they also adapt well to large containers (at least 12 inches deep). Just ensure the pot has drainage holes and use well-draining soil. For containers, place them in full sun for optimal growth.
How long does it take for blue nigella seeds to germinate?
Patience is key—blue nigella seeds can take 2 to 4 weeks to germinate, especially in cooler temperatures. For faster results, soak seeds overnight before planting and keep the soil consistently moist (but not soggy) until sprouts appear. Warmth (70°F+) speeds up germination!
Are blue nigella flowers really good for pollinators like bees and butterflies?
These flowers are pollinator superstars . Their delicate blooms attract bees, butterflies, and hoverflies, making them a fantastic addition to wildlife-friendly gardens. Plus, their long bloom season (summer to fall) ensures pollinators have a steady food source.
Can I eat blue nigella petals raw, or do I need to cook them first?
You can enjoy them raw or cooked! The petals add a mild, slightly citrusy flavor to salads, garnishes, or desserts. For a stronger taste, lightly sauté them in butter or infuse them in oils. Just ensure they’re pesticide-free if harvesting from your garden.
Why aren’t my blue nigella flowers opening, even though the plant looks healthy?
Several factors could be at play:
- Lack of sunlight: Nigella needs 6+ hours of full sun daily to bloom.
- Overcrowding: Thin seedlings to 12–18 inches apart for better airflow.
- Cool temperatures: Blooms may lag in early spring or late fall.
- Over-fertilizing: Too much nitrogen promotes foliage over flowers.
Wrapping up and next steps
The blue nigella flower isn’t just a stunning addition to your garden—it’s a functional one too! From its edible petals to its role as a pollinator magnet, this easy-to-grow beauty offers both beauty and utility.
Whether you’re a seasoned gardener or a beginner, its resilience and versatility make it a must-try.
Ready to transform your space? Start small—grow a few seeds in a pot or directly in your garden bed—and watch your pollinator friends flock in! 🐝✨ Next step: Share your progress with fellow plant lovers or experiment with its culinary uses!