
Flowers
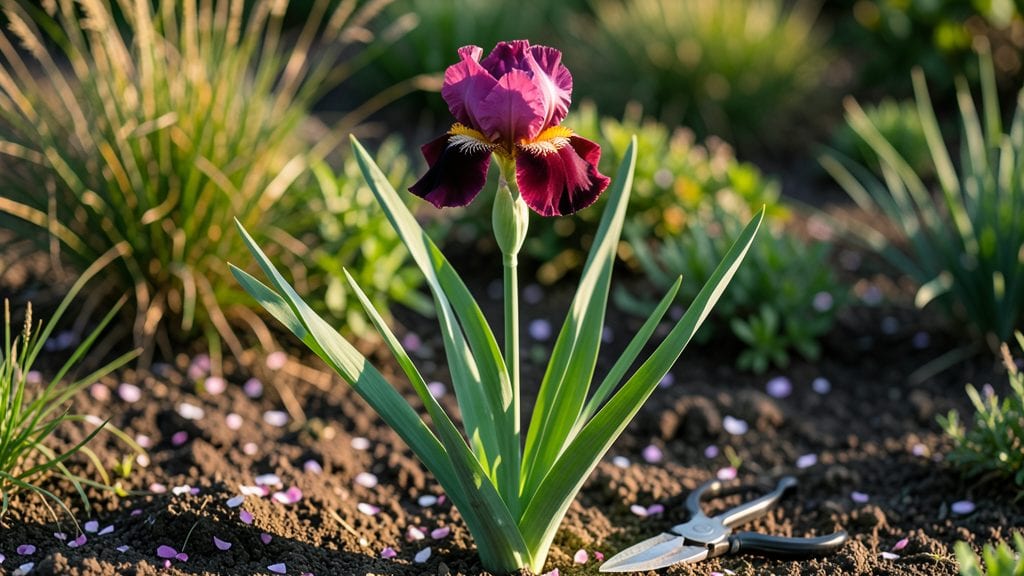
That beautiful iris flower with its velvety purple petals makes every spring garden feel like a masterpiece—just like my neighbor’s striking border did to me. 🌸 The way they stand tall against any backdrop makes them the perfect statement plant for borders or focal points.
Irises thrive in full sun and well-drained soil, which means they’re surprisingly low-maintenance once established. Their sword-like foliage adds texture year-round, while the blooms create a showstopping display from late spring to early summer.
You’ll find varieties in every shade, from deep plum to sunny yellow, so they blend seamlessly with any color scheme.
For maximum impact, plant them in clusters of three or five along pathways or at the front of borders. Pair them with lavender for a fragrant contrast or let them shine solo as a bold centerpiece.
The blooms also attract bees and butterflies, turning your garden into a lively pollinator paradise.
Once you see how effortlessly they elevate a space, you’ll want them everywhere. Here’s how to make the most of their natural beauty in your own garden.
📚 In This Guide
- What you need
- Instructions
- Tips and common mistakes
- Wrapping up and next steps
What you need
- ● Iris rhizomes or seeds: For rhizomes: 3–5 healthy, firm rhizomes (choose varieties like German or Bearded irises for vibrant purple blooms). For seeds: Organic iris seeds (soak overnight to soften the hard outer shell).
- ● Well-draining soil: Mix 2 parts garden soil with 1 part perlite or coarse sand (irises hate soggy roots!).
- ○ Sunlight: A full-sun location (6+ hours daily)—irises thrive in bright, open spaces. Watering can or hose: With a gentle spray nozzle for hydration without damaging petals. 🛠️ Tools & Prerequisites Garden trowel or shovel: For digging 6–8" deep holes (rhizomes should sit half-buried). Pruning shears: To trim dead foliage after blooming (leave 1/3 of the leaves for energy storage). Organic fertilizer: Balanced 10-10-10 or bone meal (sprinkle lightly around rhizomes in early spring). Mulch (optional): 2–3 inches of straw or pine needles to retain moisture (skip if soil drains poorly). Pollinator-friendly companions (optional): Lavender, catmint, or salvia to attract bees and butterflies. A small birdbath nearby for extra wildlife appeal.
How to grow stunning iris flowers for a pollinator-friendly garden
Here's the straightforward method I've used to cultivate irises that attract bees and butterflies while adding bold color to any landscape.
🌱 Step 1: Choose the Right Location and Prepare the Soil
Irises thrive in full sun—pick a spot that gets at least 6 hours of direct sunlight daily. They hate soggy soil, so avoid low-lying areas where water pools. I always test drainage by digging a hole, filling it with water, and watching how quickly it drains. If water lingers more than 2 hours, amend the soil with 2-3 inches of coarse sand or perlite to improve drainage.
Loosen the top 12 inches of soil with a garden fork to help roots establish easily. Irises prefer slightly alkaline soil with a pH between 6.0 and 7.0. If your soil is heavy clay or acidic, mix in 1-2 inches of compost and a handful of wood ash to adjust the pH naturally. The goal is well-draining, fertile soil that won’t suffocate the rhizomes.
🪴 Step 2: Plant Iris Rhizomes at the Correct Depth and Spacing
Plant iris rhizomes in early fall or late winter when the soil is cool but workable. Position each rhizome so that half of it sits above the soil line—this prevents rot and encourages strong growth. Use the 3 gallons of potting mix (if using containers) or the 1 packet of rhizomes (if planting directly in the ground) to create small mounds about 2 inches high in the prepared soil.
Space rhizomes 12-24 inches apart in rows, leaving 2 feet between rows for easy maintenance. I always plant with the fan-shaped top facing upward—this ensures the rhizome grows in the right direction and produces flowers the following season. Press the soil gently around the rhizomes but don’t compact it too tightly.
☀️ Step 3: Water and Mulch for Establishment
Water the newly planted rhizomes deeply once a week for the first 4-6 weeks to encourage root growth. After that, irises are remarkably drought-tolerant once established—overwatering is the biggest mistake gardeners make. Let the soil dry out between waterings, and you’ll see stronger, healthier plants.
Apply a 2-inch layer of mulch around the base, keeping it 6 inches away from the rhizomes to prevent rot. I use shredded bark or straw because it breaks down slowly and improves soil structure over time. Mulching also suppresses weeds, which compete with irises for nutrients and water.
✂️ Step 4: Maintain and Encourage Blooms Year After Year
Deadhead spent blooms by cutting the flower stalk 2 inches above the rhizome after the petals fade. This redirects the plant’s energy into next year’s blooms instead of seed production. I always do this in early summer when the flowers finish blooming—it keeps the garden tidy and promotes stronger growth.
Divide iris clumps every 3-5 years in early fall when the foliage turns yellow. Lift the rhizomes carefully with a fork, separate the fans, and replant the healthiest ones. Discard any rhizomes that are soft, mushy, or shriveled—these are signs of disease or rot. Replant the divisions in fresh soil, and you’ll have vibrant new blooms within a season.
🌿 Step 5: Protect and Nurture for a Pollinator Paradise
Irises are drought-tolerant once established, but they still need regular care to thrive. Fertilize lightly in early spring with a balanced, slow-release fertilizer (like a 10-10-10 blend) to encourage strong foliage and blooms. Avoid high-nitrogen fertilizers—they produce lush leaves but fewer flowers.
Watch for iris borers, which are the biggest pest threat. These insects lay eggs in the rhizomes, and the larvae feed on the plant’s insides. If you notice chewed leaves or sawdust-like frass, treat the rhizomes with neem oil or insecticidal soap as a preventive measure. Healthy irises with good airflow rarely have serious pest issues, so proper spacing and care go a long way.
Tips & tricks for growing stunning iris flowers
These simple yet powerful tips will help you avoid common pitfalls and grow irises that thrive for years—while keeping your pollinator friends happy.
Drainage is Everything: That 2-hour drainage test in Step 1 is non-negotiable. I've seen irises rot in just days when planted in soil that drains slowly. If your soil fails the test, mix in 3 inches of perlite instead of the suggested 2-3 inches—just a little extra insurance against soggy roots. The rhizomes need to breathe, and proper drainage prevents the #1 killer of irises: root rot.
Rhizome Placement Matters: When planting in Step 2, resist the urge to bury those rhizomes completely! The fan-shaped top should always face upward, and half should remain exposed. I've made the mistake of burying them too deep, and it takes years for the plant to recover. Think of it like a tiny sunbather—irises need that exposure to stay healthy.
Watering Wisdom: The 4-6 week watering window in Step 3 is critical, but timing matters just as much as frequency. Water in the morning so leaves have time to dry before evening. Wet foliage overnight invites fungal diseases. After those first 6 weeks, let the soil dry completely between waterings—irises are tougher than you think! I've had mine survive weeks without water once established.
Dividing Done Right: That 3-5 year division schedule in Step 4 is a guideline, not a rule. If your clumps are getting crowded before then, go ahead and divide—just do it in early fall when foliage turns yellow. The key is to replant the healthiest rhizomes in fresh soil. I always discard any that feel soft or mushy, as these are usually already infected with borers or rot.
Pro Tips for Beautiful Iris Flower
- These simple yet powerful tips will help you avoid common pitfalls and grow irises that thrive for years—while keeping your pollinator friends happy.
- Drainage is Everything: That 2-hour drainage test in Step 1 is non-negotiable.
- Rhizome Placement Matters: When planting in Step 2, resist the urge to bury those rhizomes completely!
Frequently asked questions
Got questions about nurturing or admiring these stunning beautiful iris flowers? You’re not alone! Here are some of the most common queries—and their simple, practical answers.
When is the best time to plant iris flowers for maximum blooms?
The ideal time to plant iris rhizomes is in early fall (4-6 weeks before the first frost) or late winter (just before new growth begins). This gives roots time to establish before summer heat. For container-growing, spring planting works too—just ensure well-draining soil!
Are iris flowers really good for pollinators like bees and butterflies?
Irises are a pollinator magnet, especially their purple and yellow varieties. Their upright blooms provide easy access for bees, while their long nectar tubes attract butterflies. Plant them in clusters to create a buzzing haven!
Why aren’t my iris flowers blooming this year?
Common culprits include overcrowded rhizomes (dig and divide clumps every 3-4 years), poor sunlight (they need 6+ hours of sun), or excessive fertilizer (too much nitrogen = fewer blooms). Try trimming spent blooms but leave the seed pods—they add texture and feed pollinators!
Can I grow iris flowers in containers, or do they need garden beds?
Containers are perfect for irises! Use a pot with drainage holes and a mix of potting soil + perlite. Dwarf varieties like ‘Little Star’ thrive in 8-inch pots, while standard irises need 12+ inches. Just ensure they get bright light—even balconies work!
How do I keep iris flowers looking vibrant and healthy year-round?
- Water wisely: Soak the soil after planting, then let it dry slightly between waterings (irises hate soggy roots!).
- Feed lightly: Use a low-nitrogen, high-phosphorus fertilizer (like 5-10-10) in early spring.
- Divide & conquer: Every 3-4 years, lift rhizomes, trim dead foliage, and replant—this boosts blooms!
Bonus: Deadhead spent blooms to encourage more flowers, but save a few for seed pods if you love whimsical garden art!
Wrapping up and next steps
The beautiful iris flower isn’t just a stunning addition to any garden—it’s a pollinator’s paradise that brings life, color, and joy with its velvety purple petals.
Whether you’re a seasoned gardener or just starting, these resilient blooms offer easy care, year-round beauty, and ecological benefits that make them a must-have. 🌸
Now that you’re armed with tips on planting, maintaining, and troubleshooting, why not take the next step? Try planting an iris in your garden this season—watch as it thrives and attracts butterflies, bees, and hummingbirds to your outdoor oasis! Your garden (and the pollinators) will thank you. 🌿